1974 128 SL Coupe build project

Second firing

Dismantled the heater box searching for cooling system leak at the base of the box. That was quick, as the whole unit was just apart. Discovered the repaired stud mount for the heater valve failed, and verified it was the water source by bench testing with running water into the core. Perhaps brazing in a whole new stud will be the permanent fix. Temporarily bypassed the core to enable running the engine to get it tuned. Installed a new cap on the Ducellier distributor. Battery hold down bracket installed, having chased the captive threads on the tray.
Primed the carb then fired the ignition, once the fresh primed fuel ran out, the car didn’t want to run. Inspected the interior of the DCNF and discovered the old/new/varnish mix from the tank was bright green and certainly unfresh. Pumped the remaining 2 gallons from the tank, refilled with 5 gallons fresh premium, cleared the line.

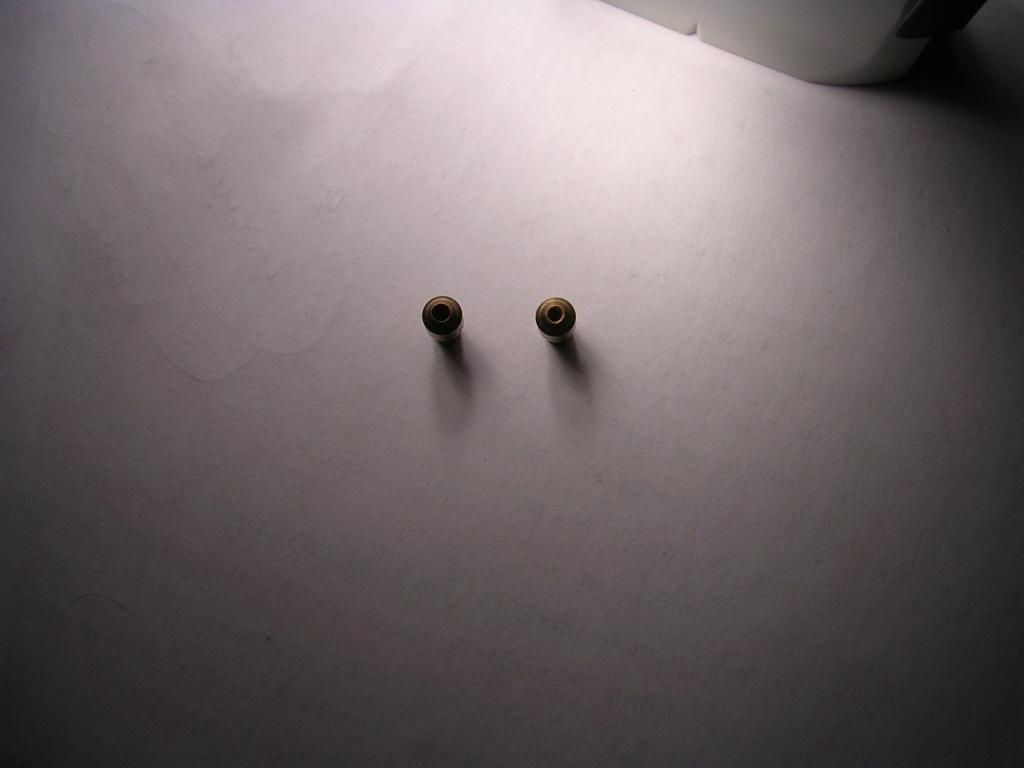
Fired again, this time it would run, strongly, but would starve out. On next to further jet tuning. The emulsifier did not look stock (few huge holes versus many small). That combined with observing the huge jets that came with the DCNF may indicate it came of a race car. Some further research is in order to achieve smooth transitions. Image here of the huge jets that came with the carb. Maiden voyage should be imminent, it idles well. Re-checking valve clearances also in order after first several start ups.


Agnelli

My first car ever was a white 1974 FIAT 128 SL. Just wanted to tell you about some areas that gave me significant trouble with my car, which was completely stock. Perhaps these will be no issue with your car, but just in case...

It is very important that you protect your ignition components from water, specially your distributor cap. Even in moderate rain, my car would stall from the water entering the engine compartment and invading the ignition distributor. I dont remember if the hood has vents, if it does, this is the entry route.
The exhaust system in my car kept giving me problems like mufflers falling, and exhaust leaks. At that time I confronted the problem that the exhaust system, from the exhaust header to the muffler, had no available support. This made the system oscillate so much that it just kept failing.
The front suspension attachment points detached from the unibody at one time, after I bumped the front end in a road depression. This moved the drive axle out of the differential and produced a terrible crunching sound, with no movement. The suspension attachment point was welded back, and I sold the car.
Since I had the car from dec 1980 until early 1982, and I was a kid with no money, It was impossible for me to hold on to the car. I am glad that you can return you SL to life and enjoy it. The Internet has been a blessing in this respect.
 
First drive

E-

Appreciate hearing about your 128 experience. Suspension points are solid on this car, splashguards came with it and will be reinstalled before winter. The 4 into 1 header / old school glasspack system on there now will be replaced, a 4-2-1 NOS Supersprint is on the way from Andy Smith aka Giant Killer Racing to mate with the NOS SS system that came with the car. Smith kindly supplied a collector compatible with the SS. Hangar advice, duly noted.


http://cgi.ebay.com/ws/eBayISAPI.dll?ViewItem&vxp=mtr&item=151068126664

Onward to the driving. Further tuning is in order to the Weber DCNF. Sequentially increased the main jets from 1.25mm to 1.35, and idle jets from .5mm to .6+mm. Definitely running better. Emulsion tubes supplied were curious, fewer large holes vs more small, shall order that style from Pierce manifold. Engine revs freely with very little throttle, then has a lean bog which will be addressed.


To get the car to roll, discovered reverse wouldn't engage, and recalled MikeM's advice that the 128 shifter linkage might not be compatible with the Yugo GVX 5 speed transaxle. Indeed, upon disassembly it became clear the gate / reverse lockout prevents the shifter from moving far enough to the right to grab reverse and 5th.

First attempt was to retrofit an X1/9 shifter. That would not work as the mounting points don't match the 128. Next idea was to use the internals from the X in the flange from the 128, also no go as the X ball is a different size, and the connecting hardware under the car is not compatible. So the solution was to omit the lockout / modify the gate on the flange. In the process discovered this extruded steel piece is hardened, the Sawzall didn't like it at all. However, it did yield to a gas cutting torch.


Transaxle works great (Thanks again JeffS). More to follow as the list of to do's shrinks.
 
NOS Supersprint 4-2-1 header arrived

Likewise, Toon, nice project.:grin:


Header should be good with the long runners, and collector to mate it to the SS NOS exhaust. Both are made of thick material, the latter a glasspack with resonator.
 
Further DCNF tuning, road test #2

Inspected plugs, revealing a lean condition. Since it idles well, left idle jets at 65. Emulsion tubes are F24, as the most common type, they remain. Air correction jets are 175. Sequentially increased main jets from 140 well beyond 150, best guess they are 180 now. Flat spot is gone, it's pulling well are running better and better, settling in and smoothing out. Installed air cleaner, which affected the tune as it reduces airflow and effectively richens the mixture. For now the DCNF is close.


Repaired heater core valve stud, reassembled heater box. Rewired cooling fan. Thermostat functioning well. Cooling system now complete and free of leaks. Installed overflow bottle. Oil pressure sensor wired and functional, the dash low pressure indicator functions. Need to QA the temp gauge, as its sensor tests good.

 
Last edited:
temperature gauge

Observed during carb jet tuning water temp gauge was barely lifting off the low end of the range, obviously inaccurate, and suspected resistance in the chain / low voltage to the gauge. Pulled the instrument cluster and measured resistance from the studs on the back of the gauge and the printed circuit board. Removed small brass nuts from studs, the tiny steel washers had oxidized both the nuts and copper circuit board. First pass with wire brush was not successful, to make it right, surfaces had to be scraped completely with the side of a razor blade to shiny new metal.

While at it, did the same for the fuel gauge. Now all six contacts read .5 ohm, about what the leads themselves from the ohmeter create.

 
Way to go.

With regard to those contacts, cleanliness makes a big difference.
On rare occasions, the corrosion can get into the riveted area of the contact. No way around that (that I know of)
except to solder the post to the copper trace.

Sometimes I use a mild steel wool pad (not soap pad but the same grain of steel wool) to clean the gauge
and lamp contacts but you've got to be careful & do it in a way that doesn't put the steel fibers inside the cluster.
(do it with the cluster facing upward)

More times than not, the PCB when it's released from the assembly so I'm not so worried about that.
The steel wool does a nice job though.
 
OEM, NOS

Bob,

Great how-to tip, will certainly utilize that instructive information.

Meanwhile, torsional hood spring installed, and new hood release cable, still need to find the standoff bit for cable tension, or make one.

Drained water from cooling system now that it is QA'd, and re-filled with glycol + water, system complete.

Adapted battery hold down bracket by folding excess material, new Interstate, installed.

Thank you to Dave Bishop for the cool bits arriving today:

 
I use 600 grit wet/dry...

For cleaning the PCB contacts, I use 600 grit wet/dry sandpaper. Lubed with oil, it does a nice job and the grit wipes up easily. Where it doesn't reach, my dremel also works.

For some applications, a mustard-colored "very fine" sanding sponge also works.
 
Wheels

More good electronics feedback, thank you for that Greg.

Period correct BWA 14x6 arrived by post from Poland, kudos to Miro, they are in excellent shape and were well packaged. And indeed, fit without spacers.


Also notable: stock steelies from new Fiat 500's fit. Below with a 185/55/15 Firestone.

 
Hmm!

Seeing that stock steel 500 wheel gives me ideas. Always liked the look of a wheel with that circle of holes in it. The last wheels I had on my Mk1 Scirocco looked like that, with a flat center cap and trim ring.
 
3P Grill, radio delete plate, vacuum brake hose, registration

Indeed, steelies are cool. Rolled on the 13 x 4.5s to see moto officer #8, who generously signed off on the VIN transfer, enabling the lift of the temporary registration. OEM tires are light.

Grill from 3P, installed, a cleaner one piece unit all the way across. The stock SL has headlight surrounds that are separate from the grill.


Fabricated dash blanking plate to house the new OEM NOS 124 dash lamp. Original had a tiny missing element from the switch. New lamp is just slightly larger than stock, but is compatible with the stock connectors.


Fabbed another blank to cover the original lamp socket. Also visible is the new Hazard switch, original supplied with car a bit recalcitrant in operation.


11mm inside diameter vacuum hose replaced with correct type of rigid material, though at 11/32" it required elbow grease to install. Built up the 3/8" port on intake manifold, now the brake booster is powered. Brake tuning in order next.

Hood latch / cable system fully dialed in, lubed and adjusted.
 
Seats

Dark green leather, from a 75 X1/9. Fully compatible with 128 SL Coupe frame rails. Further adjustment to the driver's side rails in order. Passenger side runs perfect. Also, when the seat back on the passenger side is tilted forward, the headrest does not hit the dashboard.


Verified the horn circuit all the way back to the steering hub. With the dashboard electronics complete, re-assembled the steering column covers.

Next steps: bleed the brakes, install driver's side steering rack boot, shorten tie rod ends, install and align. Mount Yokohama 185/55 14 S-drives on BWA's. Header & exhaust.
 
paint color test

Trying for a blue with a slight green tint. Prepped and primed the nose, then laid on three different hues to see actual results and effects of light angles.


Removed rear 5mph bumper. Completed breather hose install from sump to air filter housing.

 
NOS Supersprint 4-2-1 header installed

Old 4-1 header removed,including ancient Bluestreak glasspack from Benecia, CA.


Fit up on the new unit excellent, plus it's of thicker, better quality material. New header dropped right in, the only modification required was shaving the crossmember via cutting torch.


New system also hangs much closer to the underside. Now tacked into place, a future trip to the muffler shop will provide new hangars. Sounds better, too.


Bled the brakes, yielding air from the right front caliper. And adjusted handbrake. Added additional return spring to DCNF linkage.
 
Suspension: alignment, camber & toe-in settings

Started with alignment centering steering wheel and adjusting tie rod ends. Earlier research indicated with the X1/9 rear struts (Konis) mounted in the front suspension with 128 strut top donuts, there would be excessive negative camber. That turned out to be true, visibly, and measured well over 3 degrees negative, too much for the street and unfriendly to new Yokohamas.

Anticipating this, camber adjustment bolts had been sourced from C Obert / Fiatplus. Prior owner MikeM reflected not just any camber bolt will work on a 128 with this configuration.


Camber adjustment bolts, in the upper hole of the lower strut section, did provide a good range of adjustment, could even achieve close to +2 degrees possible at full throw. Set and torqued at minus 0.5 degrees and minus 0.75 degrees on each side in front. Achieved without modification to strut towers, which was a goal.

Camber effects toe-in, learned that the initial toe-in adjustment could have been done after camber, to save time. Tie rods set at zero toe-in. While the manual calls for marginal toe-out for the FWD 128, chose the zero setting to avoid hunting at speed. Note that shaving the tie rods was not necessary, apparently it is if running shorter springs.

Wired back-up switch on 5 speed transaxle, requiring an extension to the stock connector for the original 4 speed.

Brakes still soft, checked for vacuum to the booster. Discovered the port on the Alquati intake was actually into the water jacket. Next step: source a 90 degree fitting to then install by drilling an tapping the front side of the manifold, opposite the water jacket side.


European head does not have the same water jacket ports as US head, so the Alquati manifold won't have water running through it. Water jacket port is the one at the bottom of the photo, in the middle. New port will be on the opposite side.
 
I notice that you still need to shift the flat steel spacer for the cross member to go between the cross member and body, you have it under the heads of the bolts, that's incorrect.

Exhaust should also have a support towards the front, it attaches to the transmission and then to the front pipe. You will see the two threaded holes under the transmission, install two studs into these holes and fit the bracket up, otherwise you risk cracking your header.

EDIT: one more thing I noticed...do you have bolts attaching the lower engine mount to the transmission? They should be studs...for a good reason. If bolts are used, and are slightly too long (as these are a blind hole) you risk damaging the shifter rod (the internal one) by bulging the material at the end of the blind hole,which just happens to be right where the shifter rod passes by, makes shifting stiff, and eventually scours the rod...just so your aware this can happen.

SteveC
 
Last edited:
Need 1 more wheel?

Period correct BWA 14x6 arrived by post from Poland, kudos to Miro, they are in excellent shape and were well packaged. And indeed, fit without spacers.


If you're looking for a fifth 14x6 BWA for a spare, a friend of mine just posted a single wheel like this for sale over on the Mirafiori forum: http://forum.mirafiori.com/mirafior...ars_&msg=45668&show=unread&depth=all&frames=1

An excerpt from his For Sale ad:

[SIZE=+1]Wheel preBay[/SIZE]
From: Ron Horowitz
Email: ronhorowitz*yahoo.com
Date: Sat Jul 27 09:31 PDT 2013

...I've also got a single BWA 14x6. It might make a good spare if you've got 14" alloys with the steel 13" spare. $100?

If there's any interest, I can see about getting a few photos up.

Please email on ron_horowitzATyahoo.com
 
Back
Top