lookforjoe
True Classic
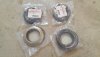
Picking up from this thread. Rear Bearings are 37x37x72mm. You can use Fiat 500 front wheel bearings for the rear.
I had to redo one rear wheel bearing from 2015, and replace the other side original (137K miles)
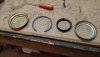
Fiat diagram. Plate (#5) is actually between 1 & 2, since it installs from the backside of the hub & sits against the back of the inner bearing seat. 3 & 7 are identical rubber lip seals that are stretched over the ridge on #1 stub shaft, and the inner ridge on #8 hub
I already had the control arms off the car for the K24 work. I did not remove the spindle from the control arm to do this work. Little fiddly doing the press work, but not that bad. I don't want to deal with the balljoints at this point, so I'm not touching them & risking damage.
So, remove either the entire arm, or follow the manual & remove just the spindle, as you prefer.
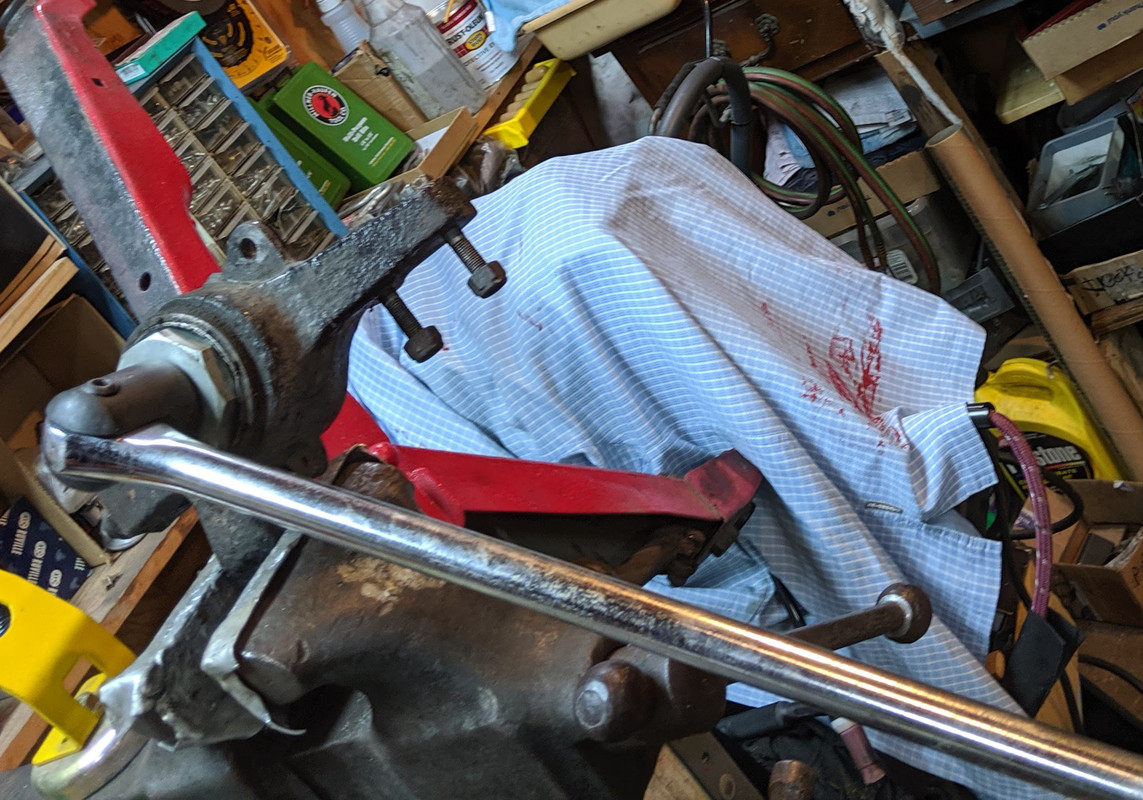
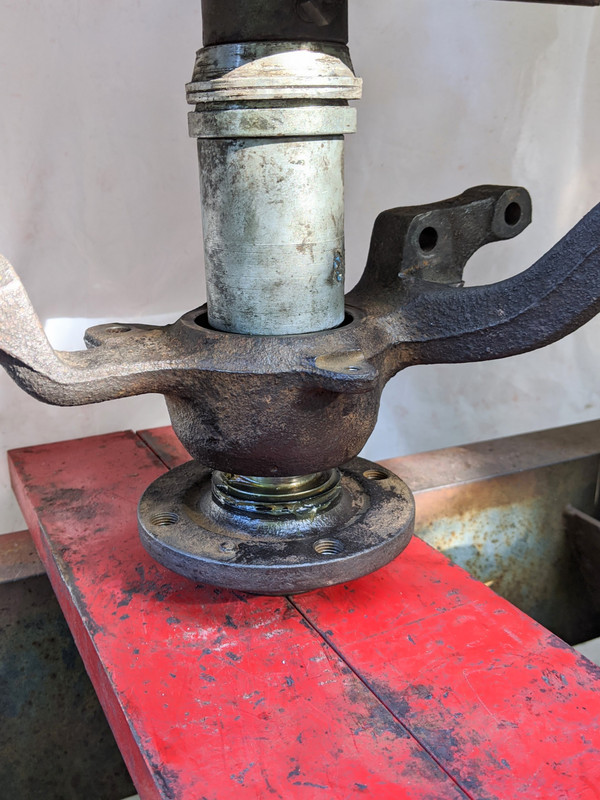
With the brakes removed, locate a suitable press tool / old socket that will fit inside (pass through) the inner bearing race - to use to press out the hub
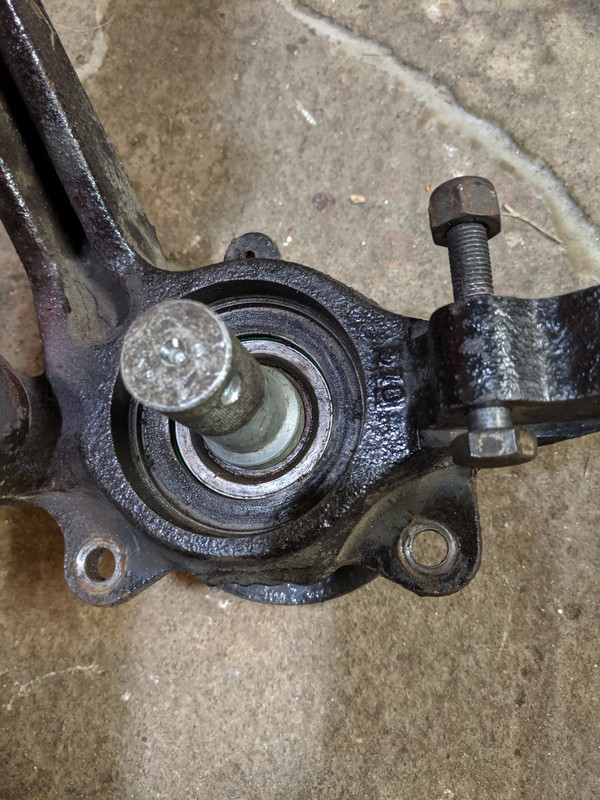
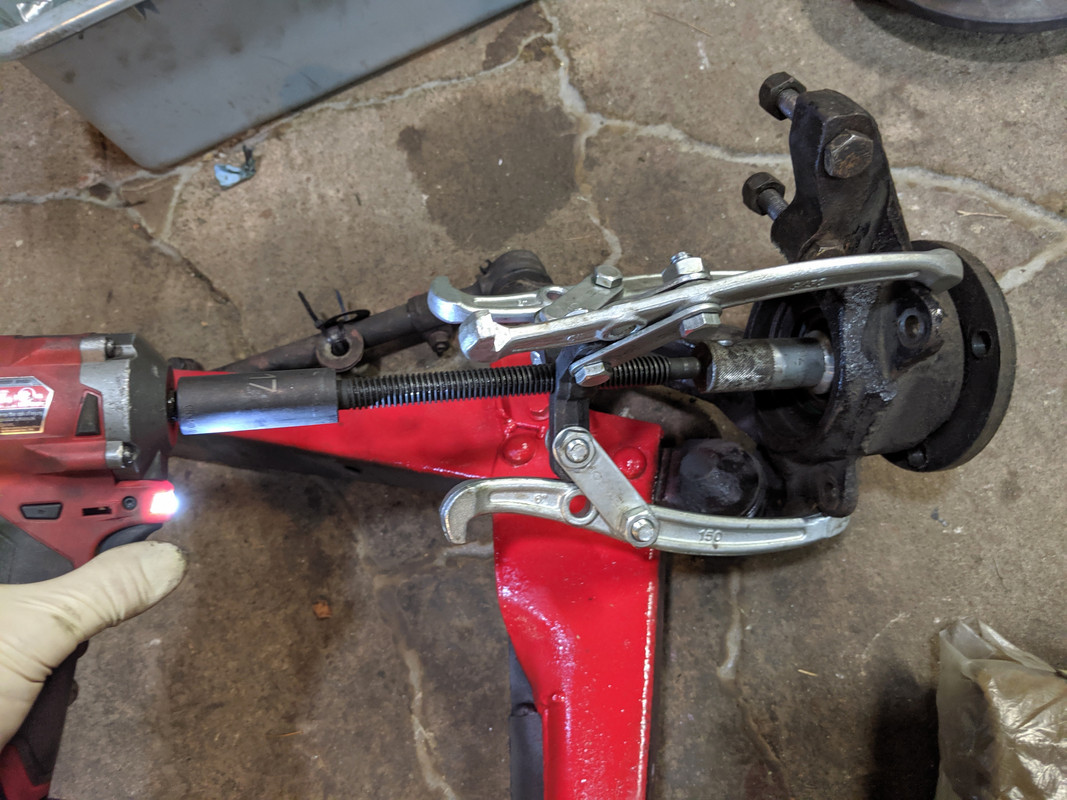
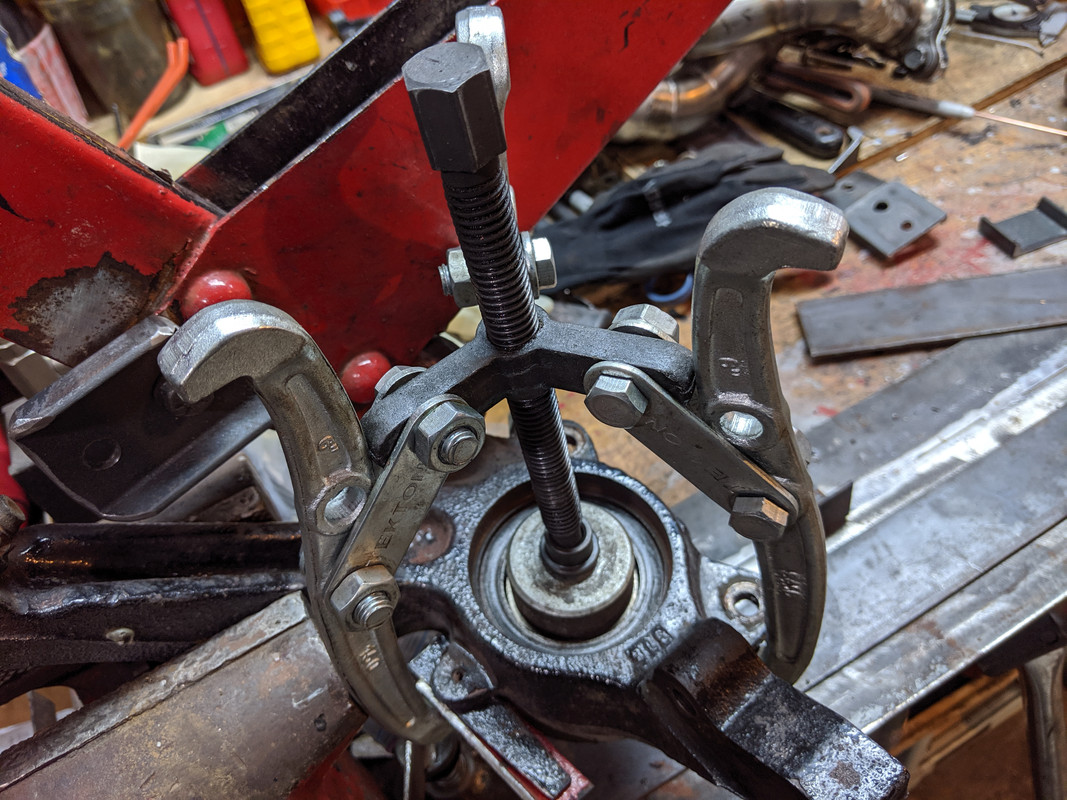
I used a three-arm puller to press out the hubs - make sure puller is centered as possible, so you don't hurt yourself. Applying force with an uneven setup can make the puller arms fly off the spindle(!)
The back plate ear is a different offset than the caliper ears, so I added a shim to get the puller arms even
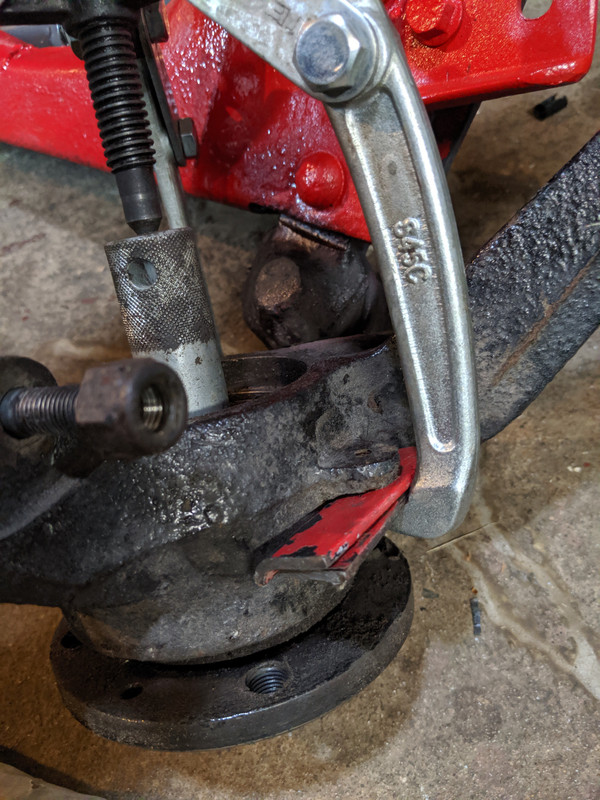
Use your favorite impact to zip the hub off
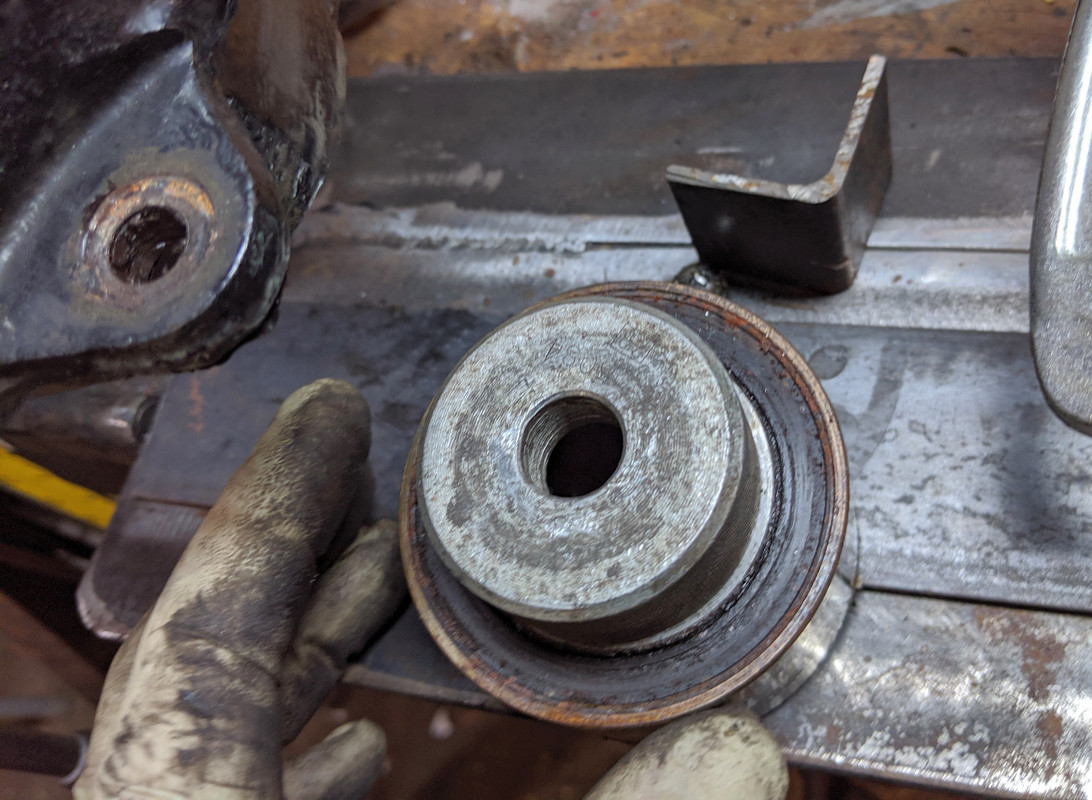
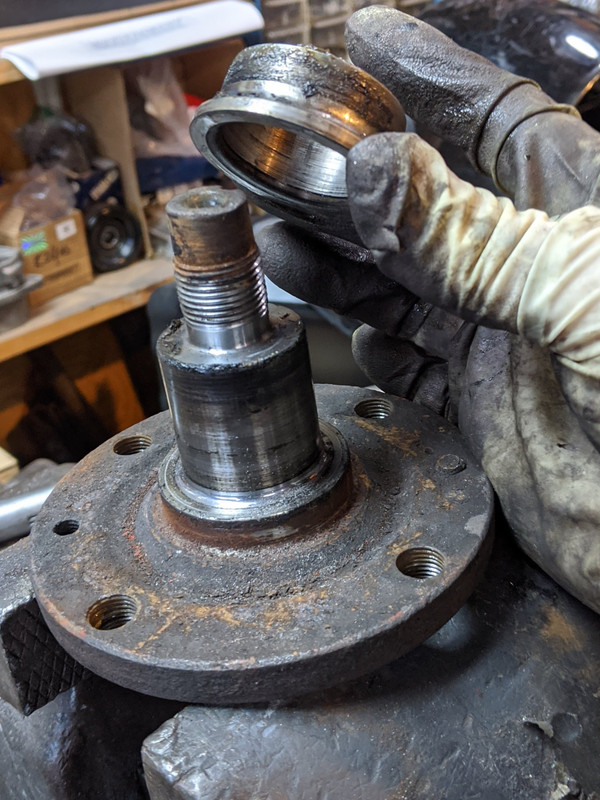
When you do this, the outer inner race may stay stuck on the hub shaft. If it does (one of mine did), I found the easiest way to remove it is to cut diagonally with a cutting disc going most of the way through to the center, then whack slot with a cold chisel to split it open. You don't want to cut all the way through the race or you will likely mar/damage the hub shaft.
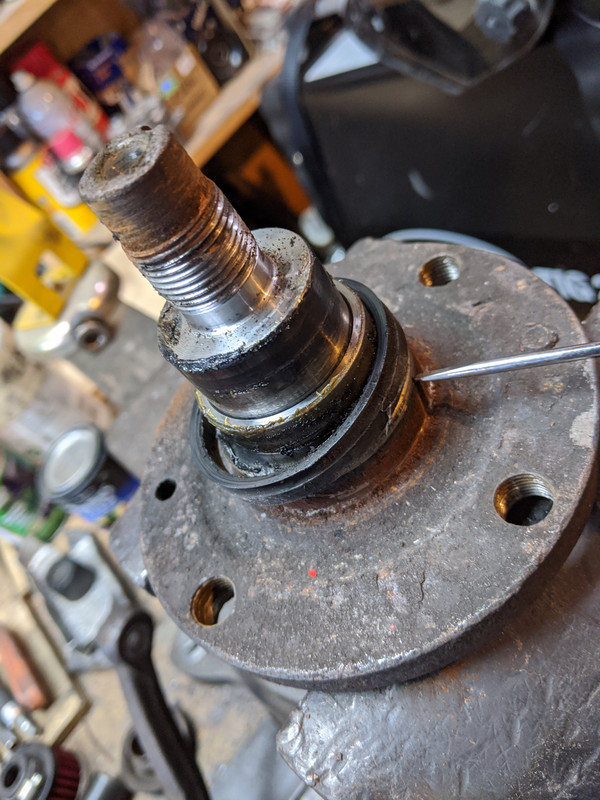
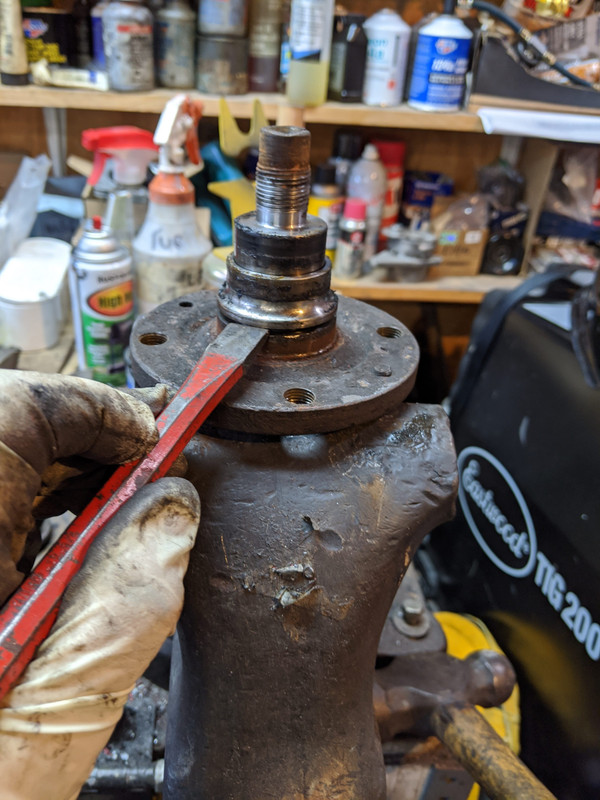
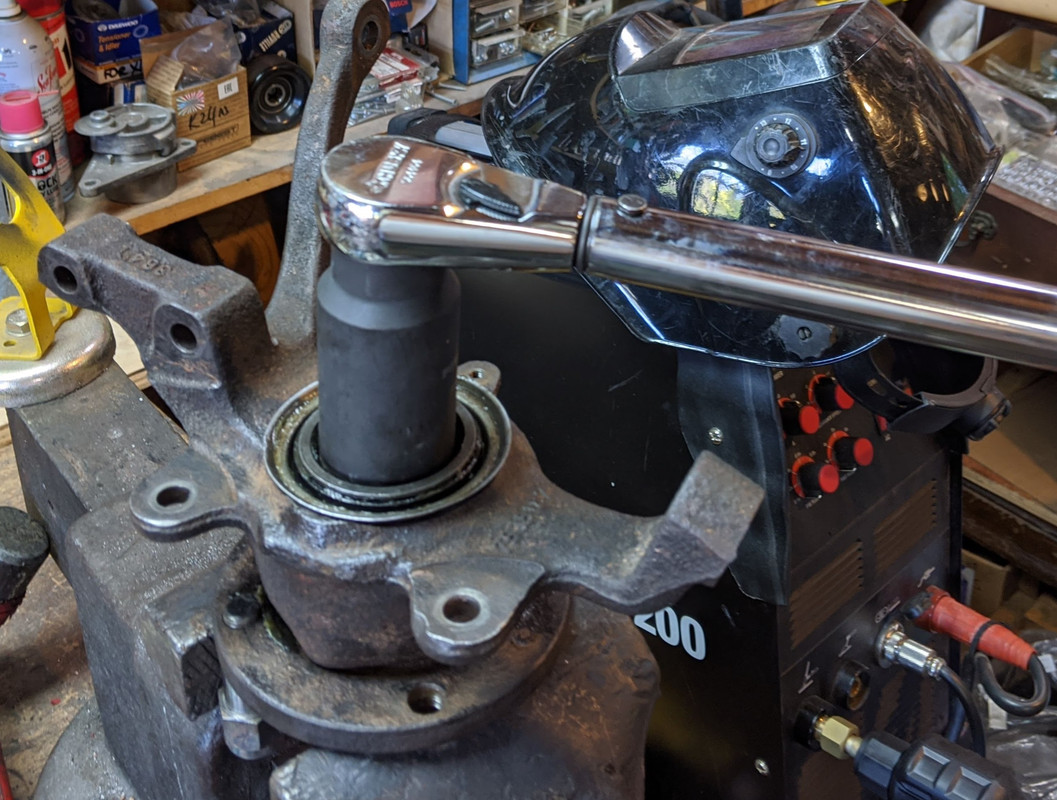
With that out the way, unstake the retaining ring
Then remove it with the tool (I bought mine from MWB)
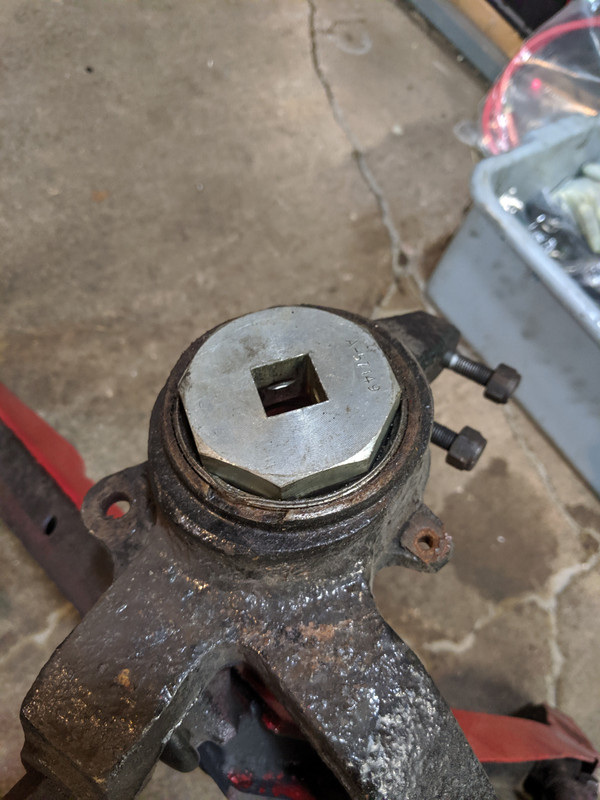
They can be really tight - I used a 3/4 long breaker bar
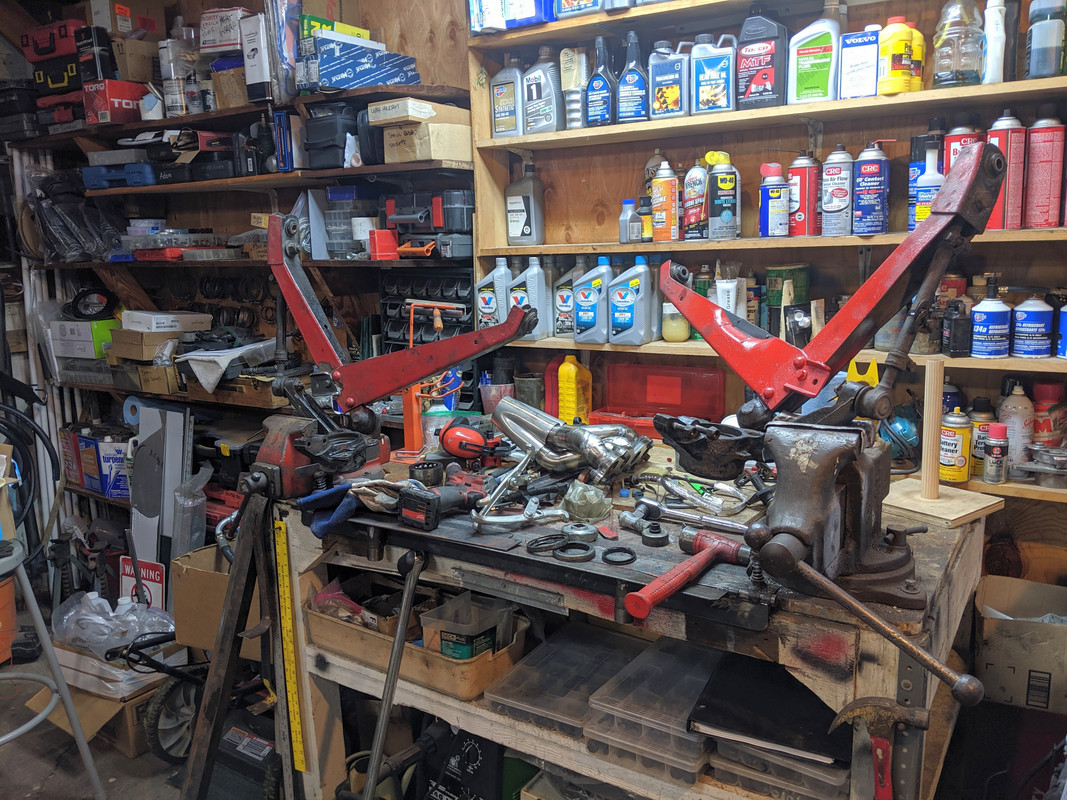
having multiple vices is not a bad thing")
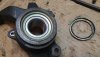
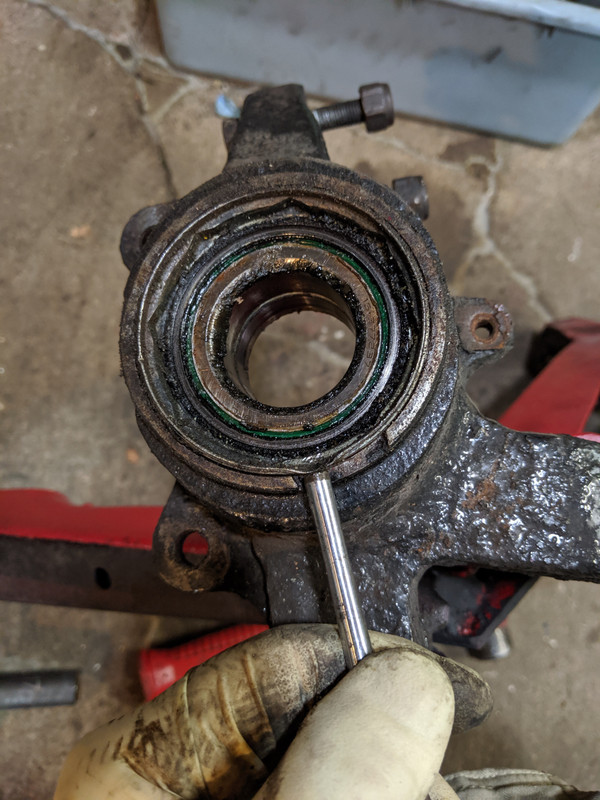
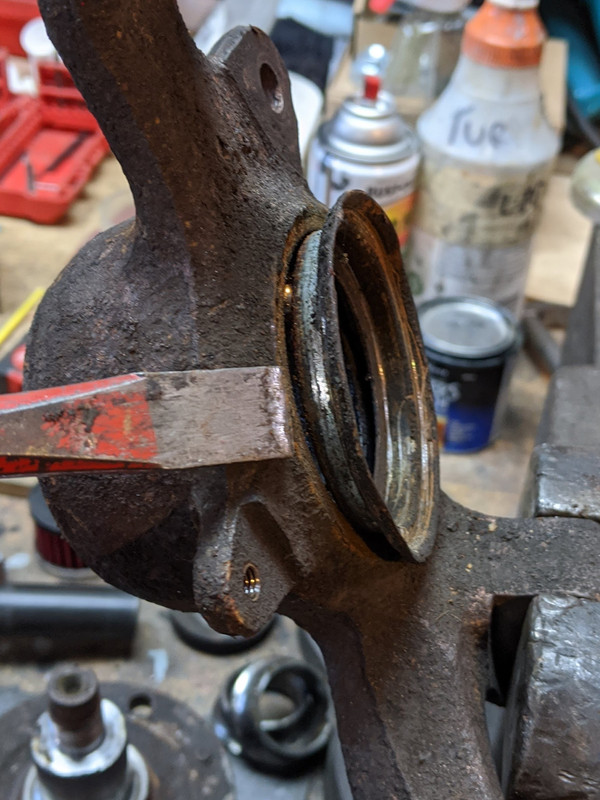
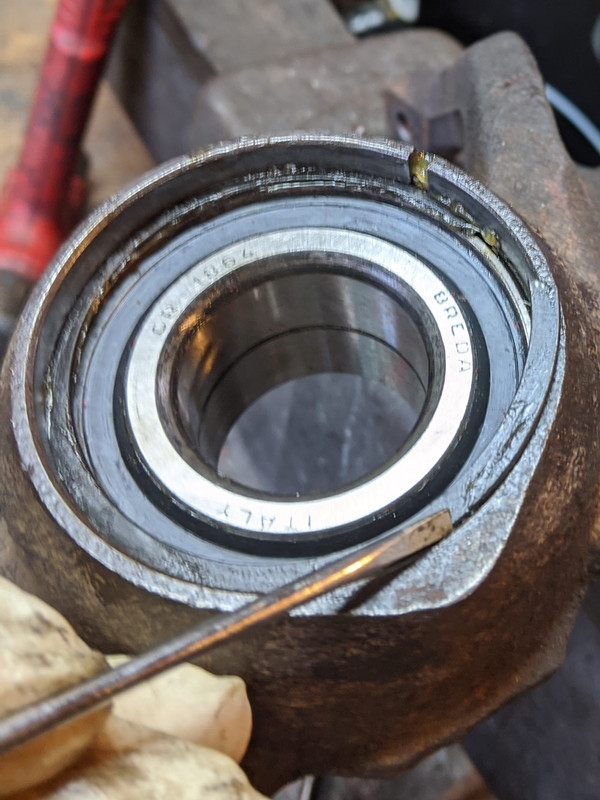
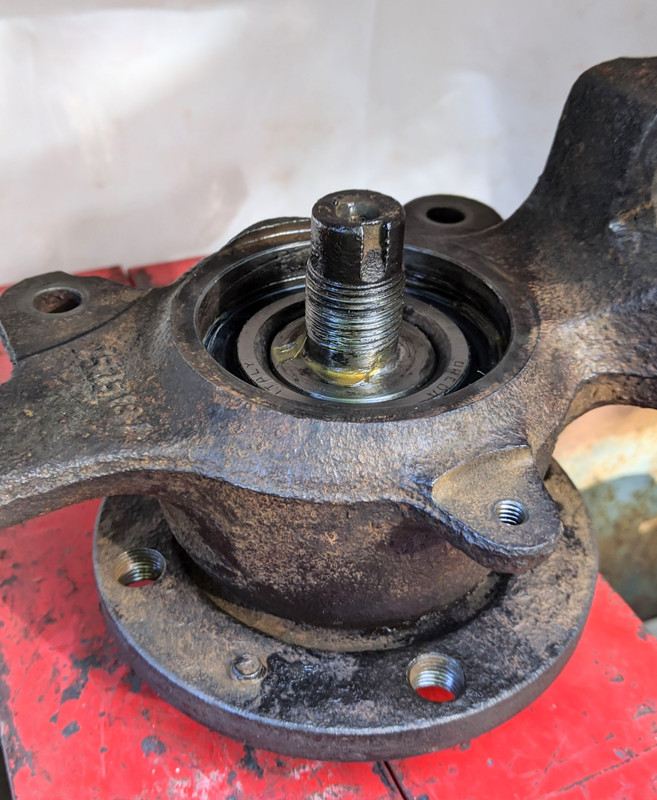
that will expose the bearing
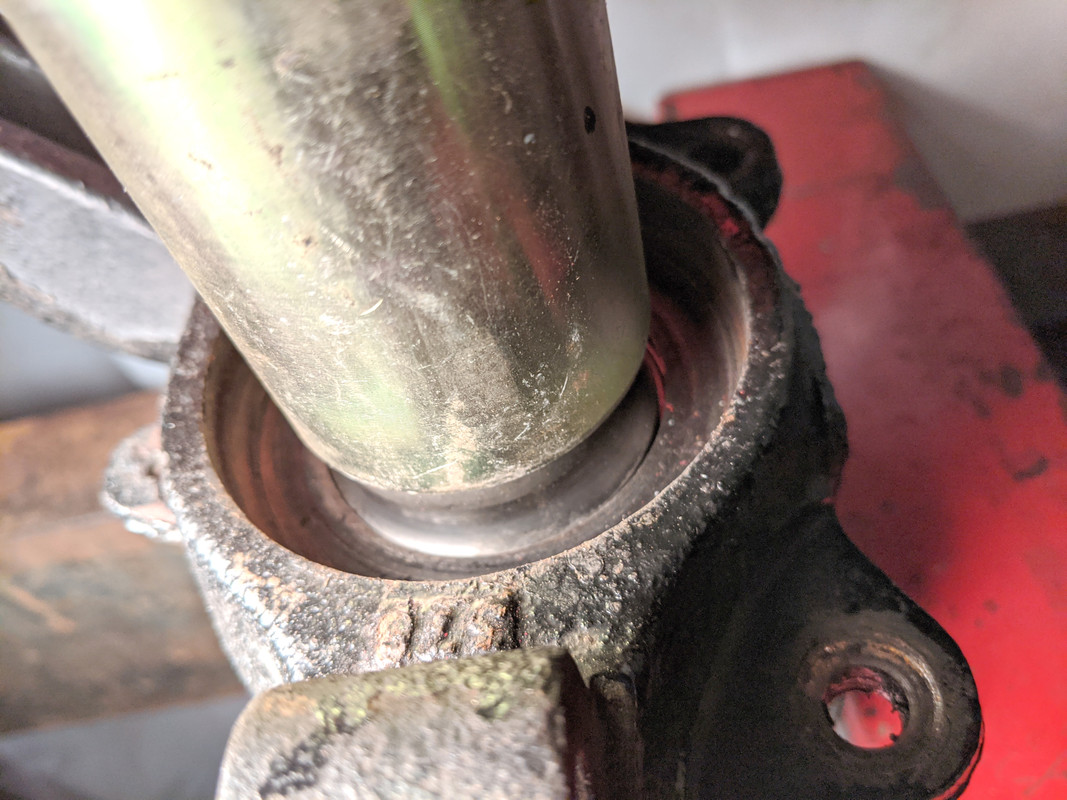
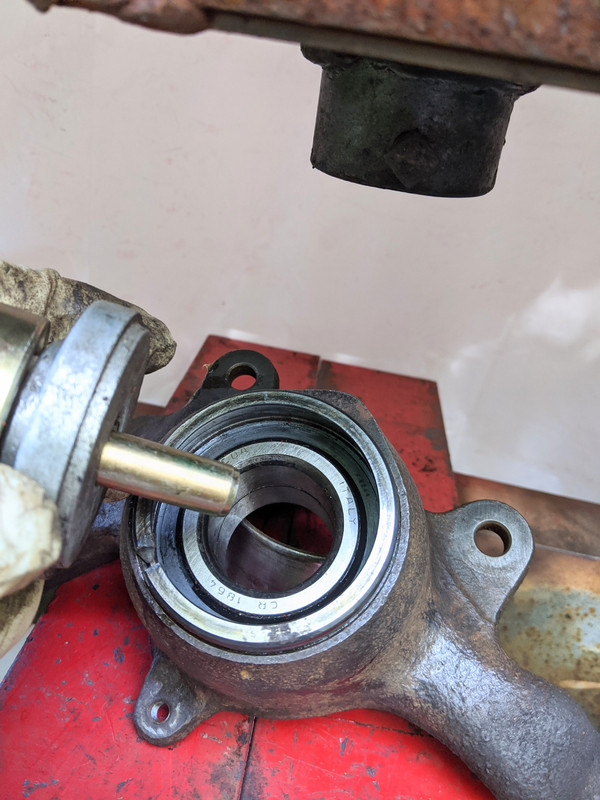
Find another socket or press tool that will fit over the bearing inner race, but sit inside the rear dust seal plate (#5)

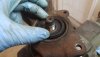
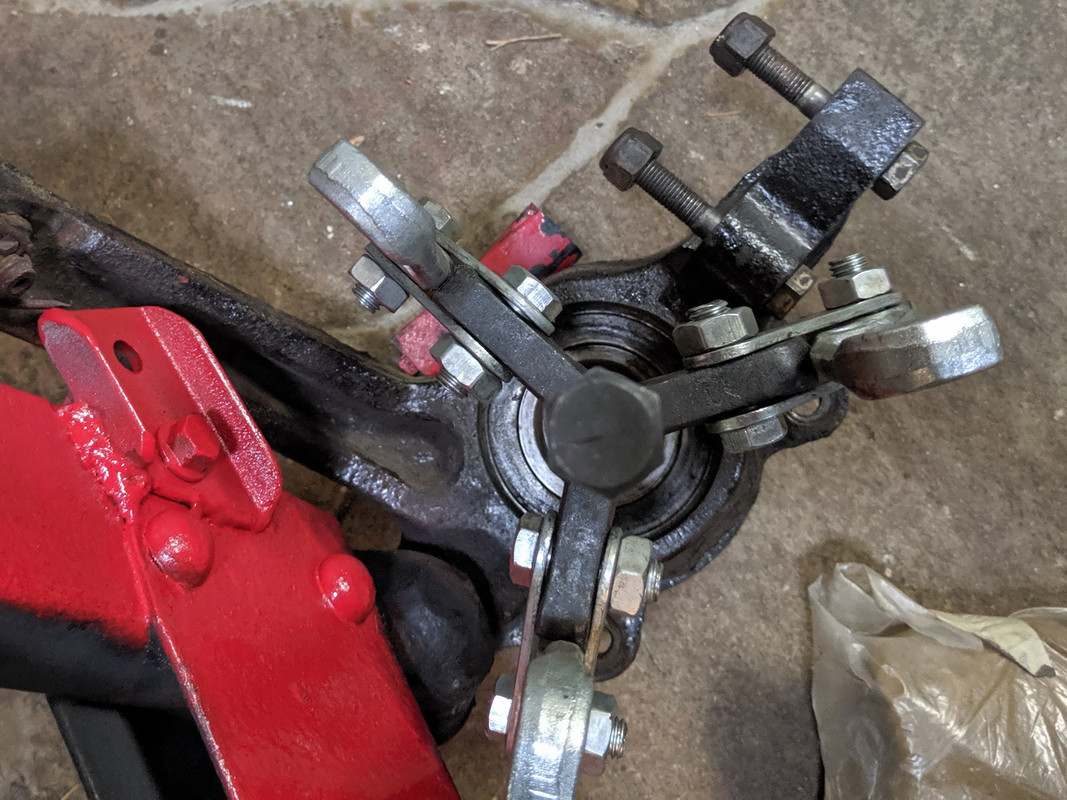
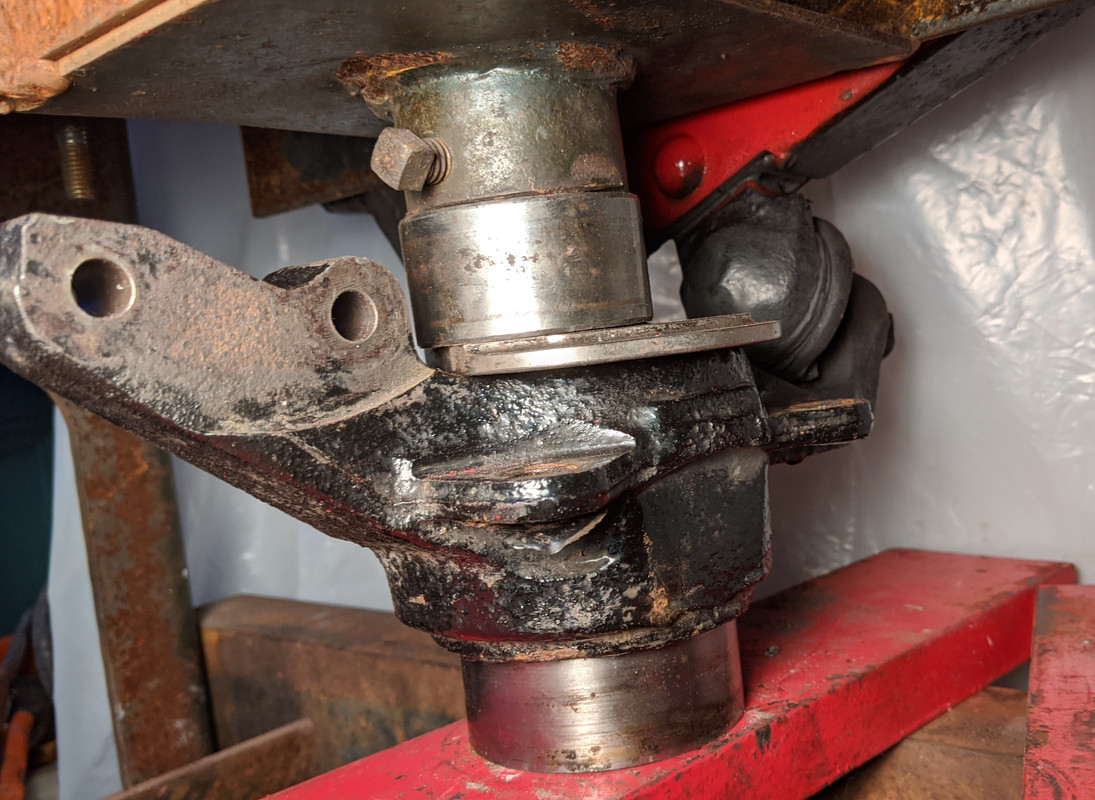
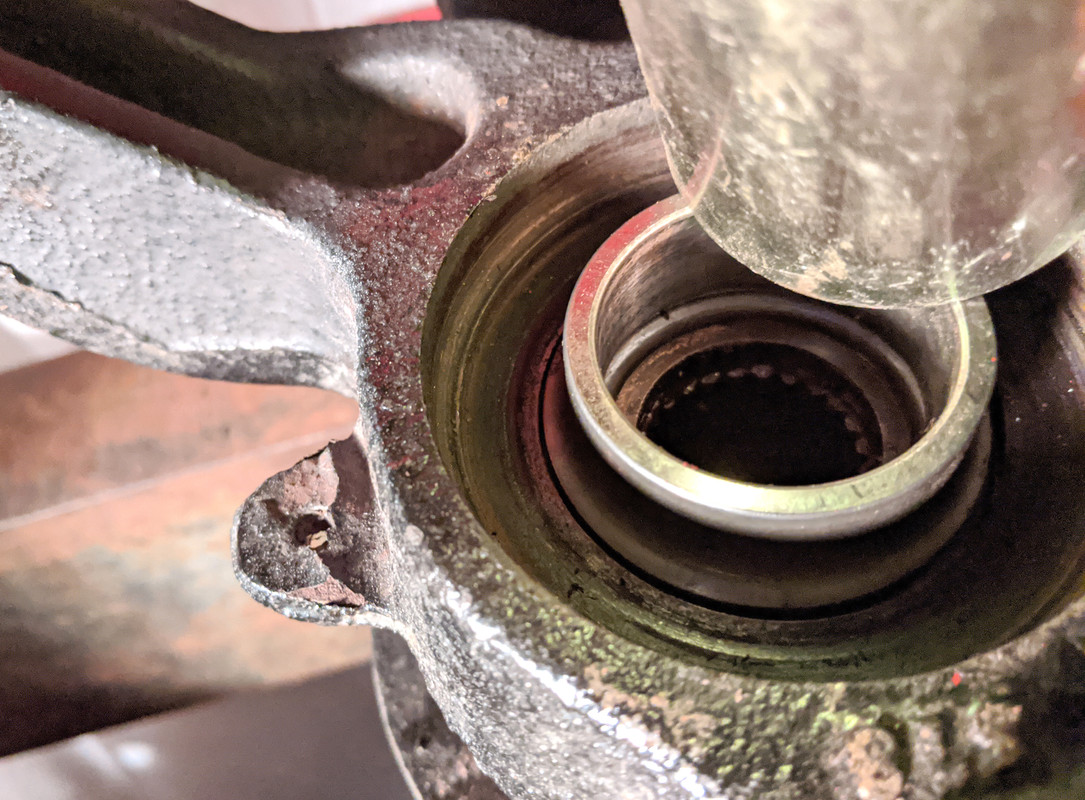
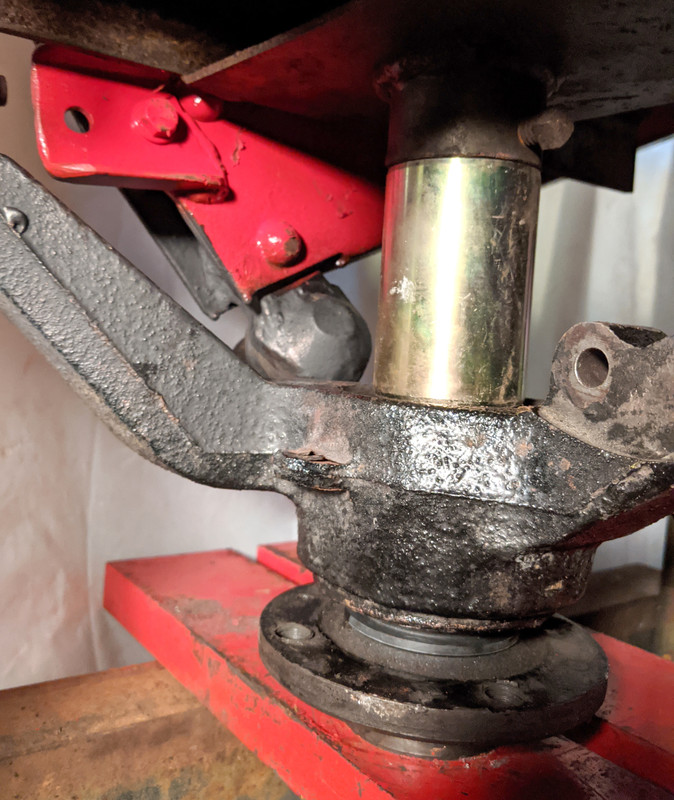
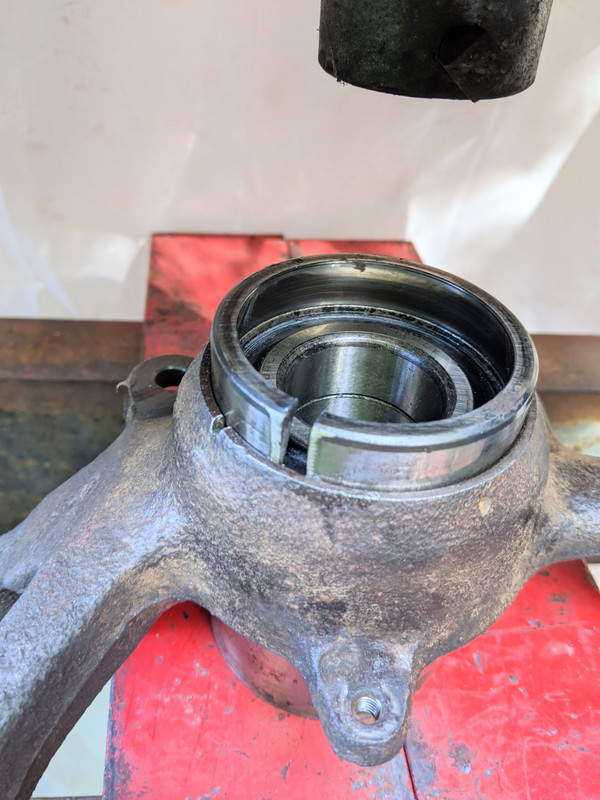
Use the three jaw puller to press the bearing out from the rear. Spindle clamped in vice.
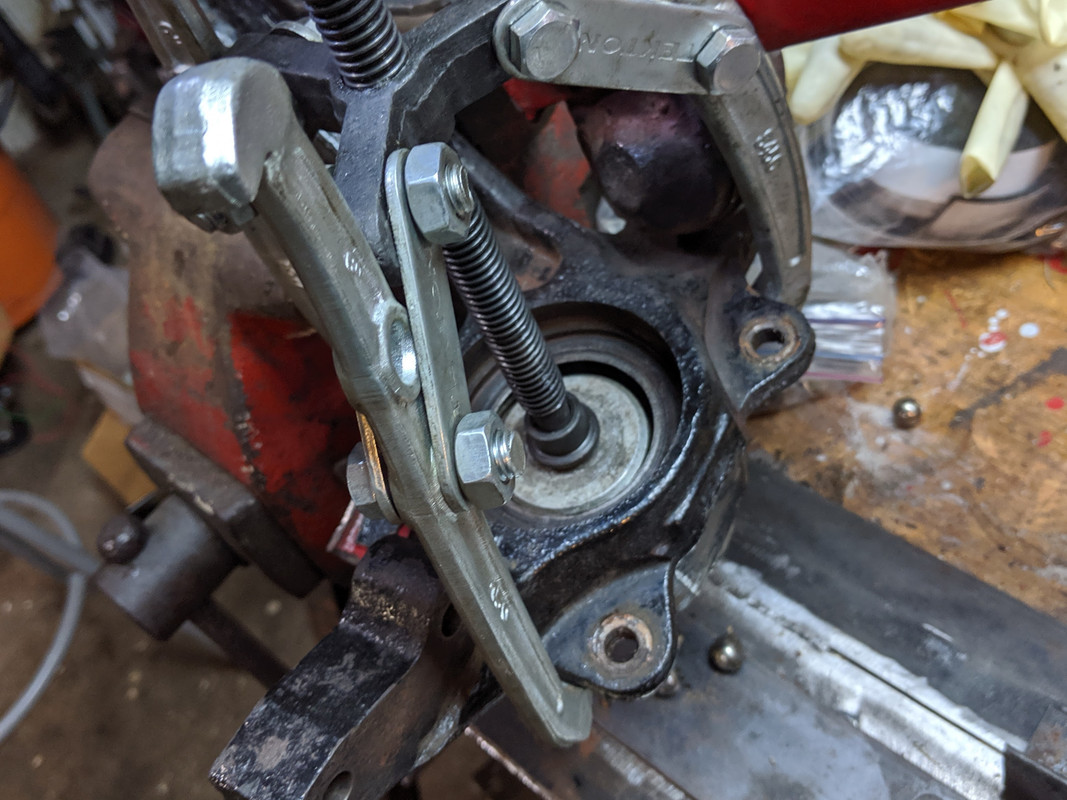
and out
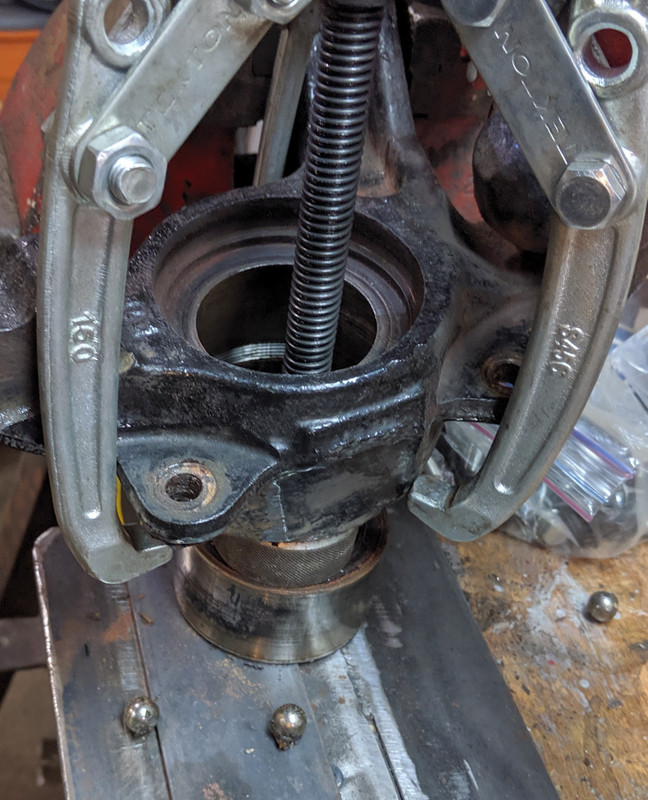
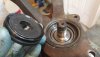
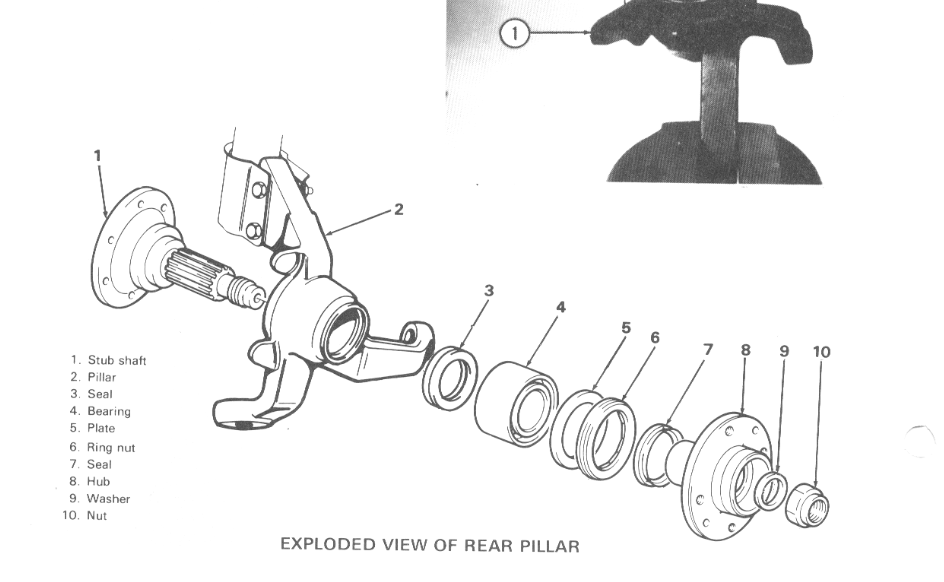
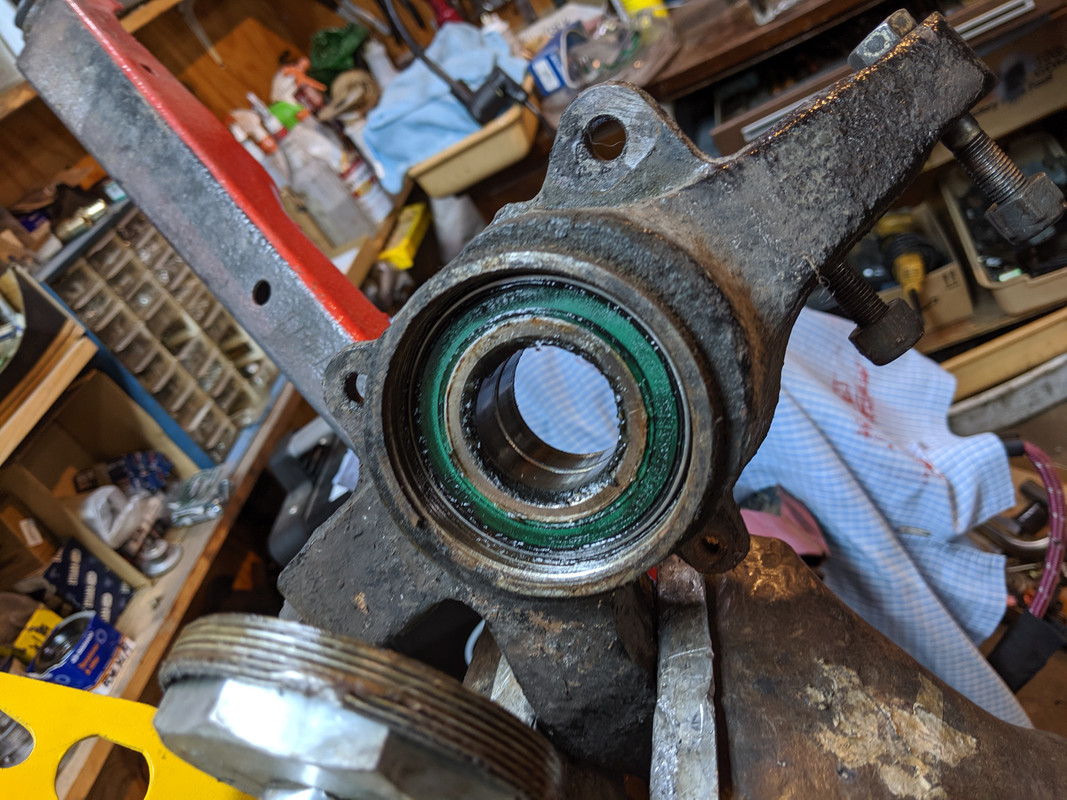
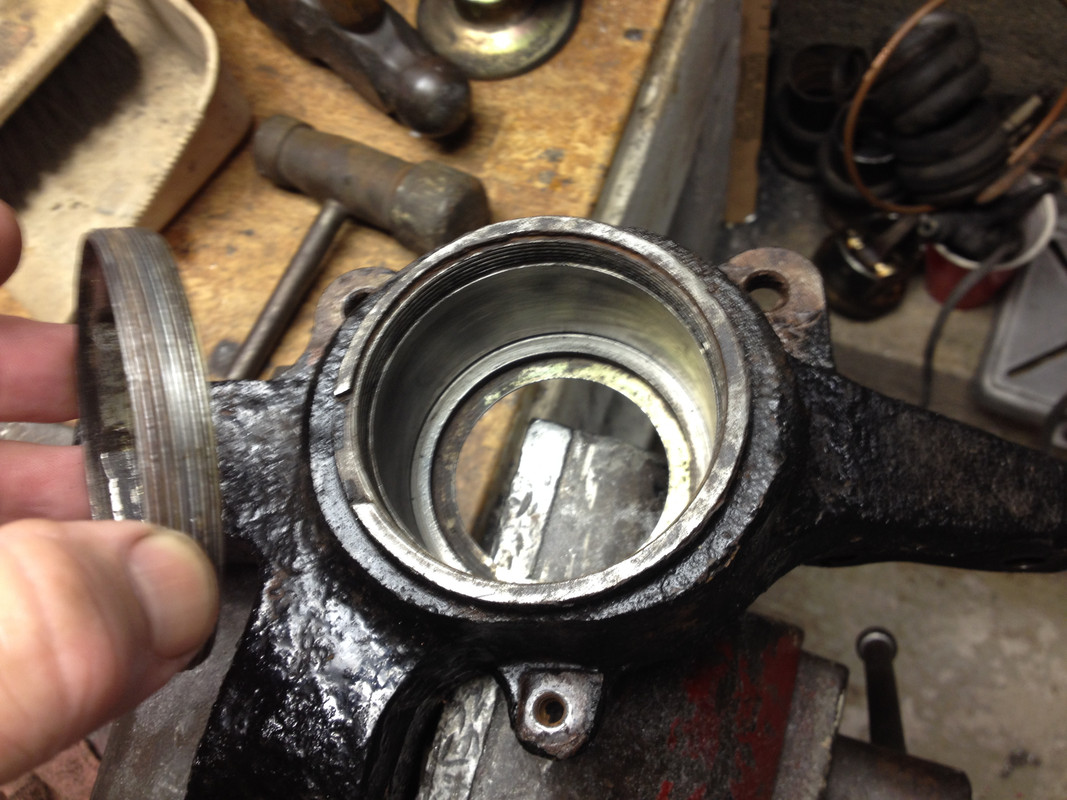
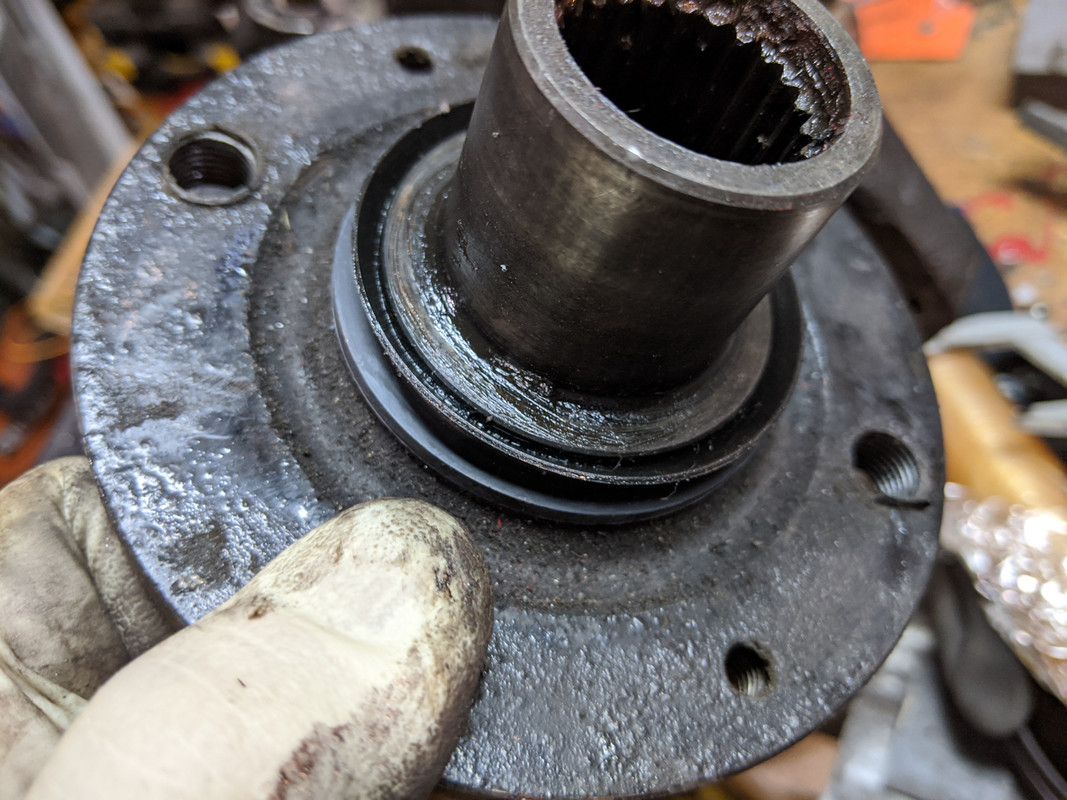
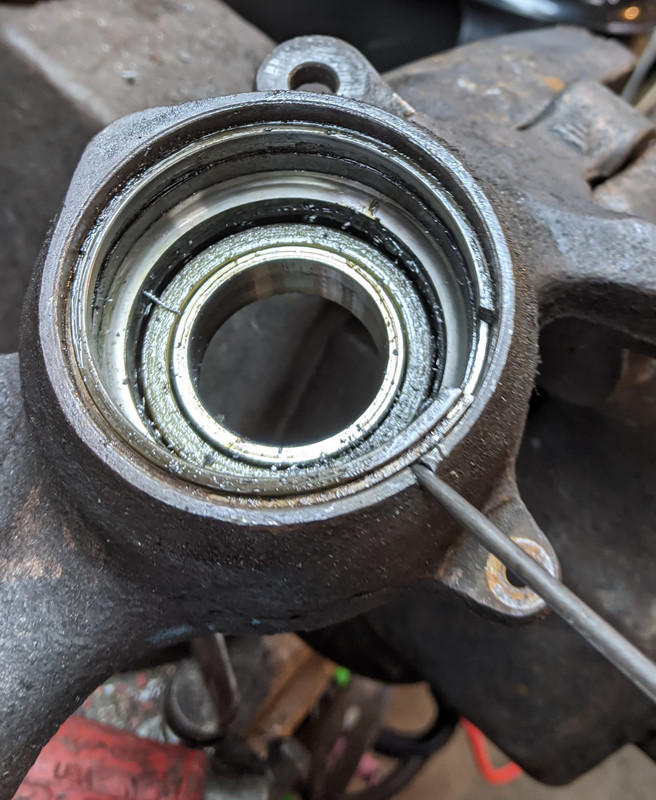
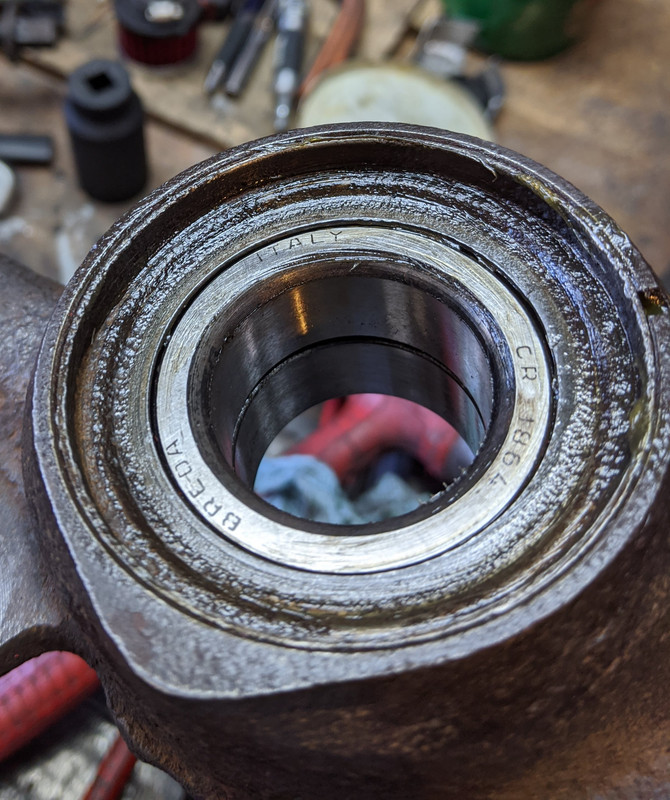
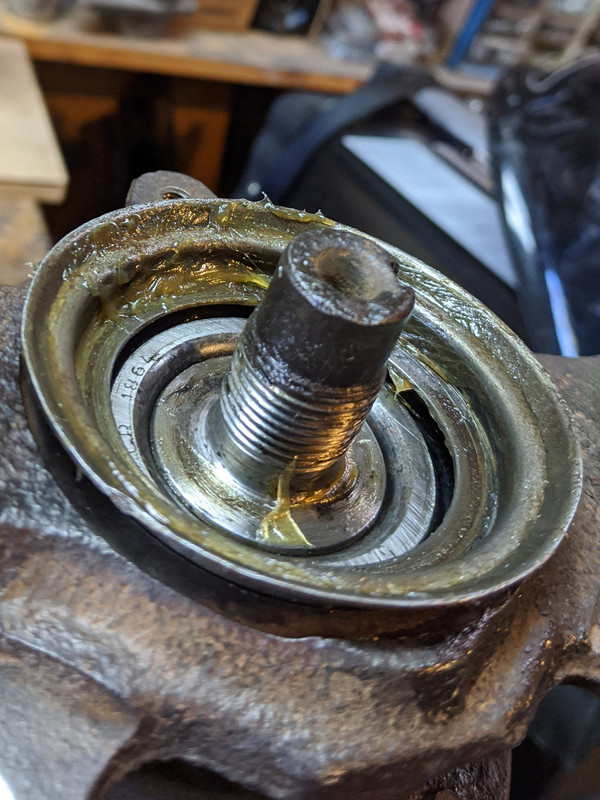
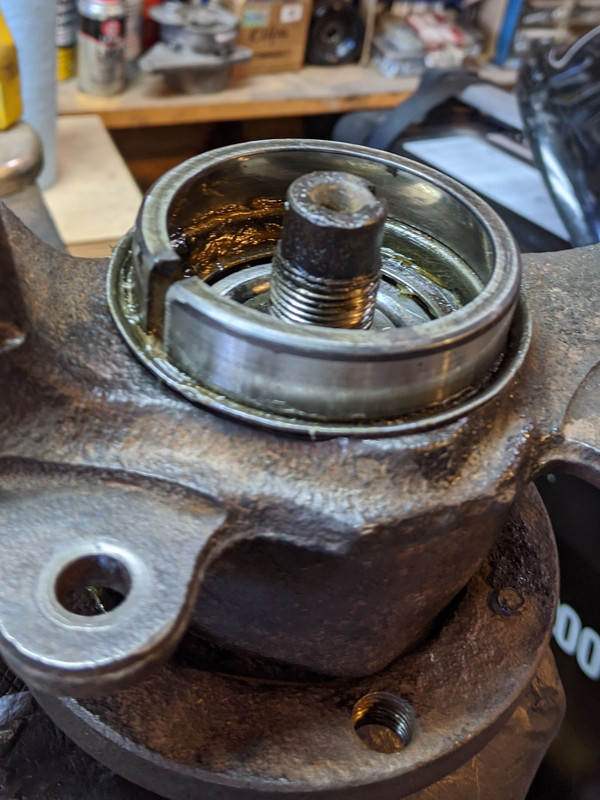
clean out any debris, clean lock ring threads, I put a little grease in the spindle cup where the bearing will be inserted. Inner seat and dust seal seat visible in this pic
Bearing must be installed in spindle first, then hub second. Outer ridge of outer bearing race needs to take the load when bearing is pressed, and inner bearing race ridge when hub is pressed.
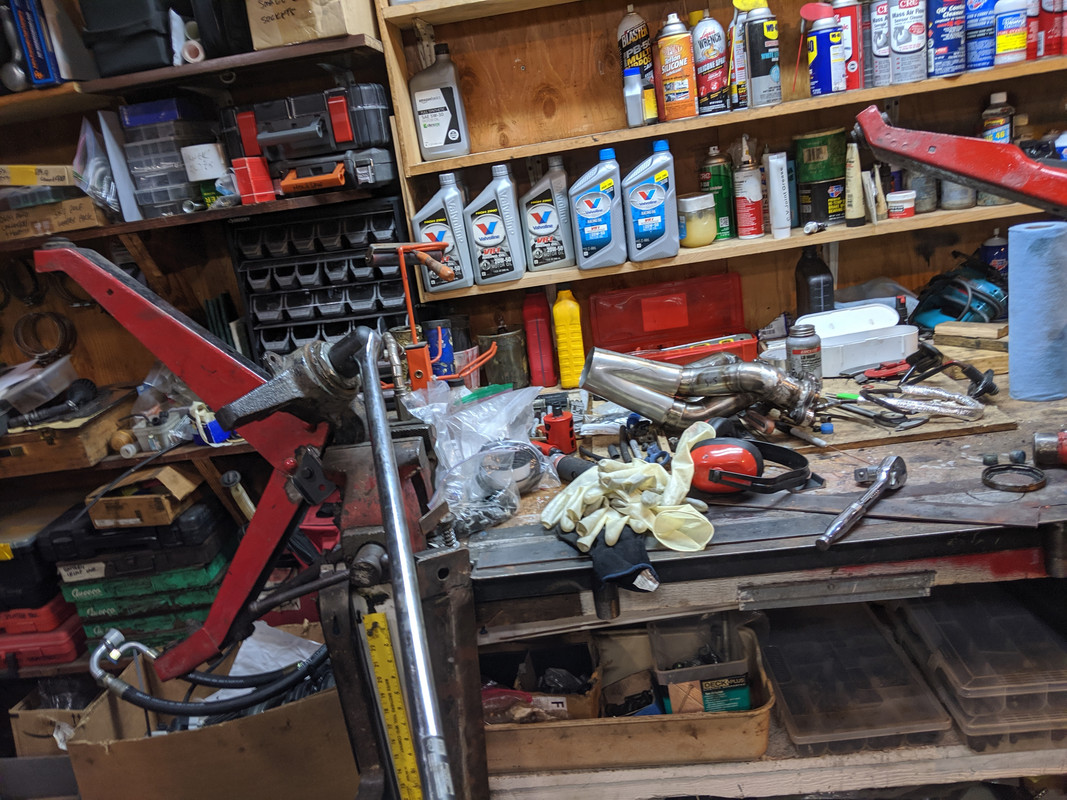
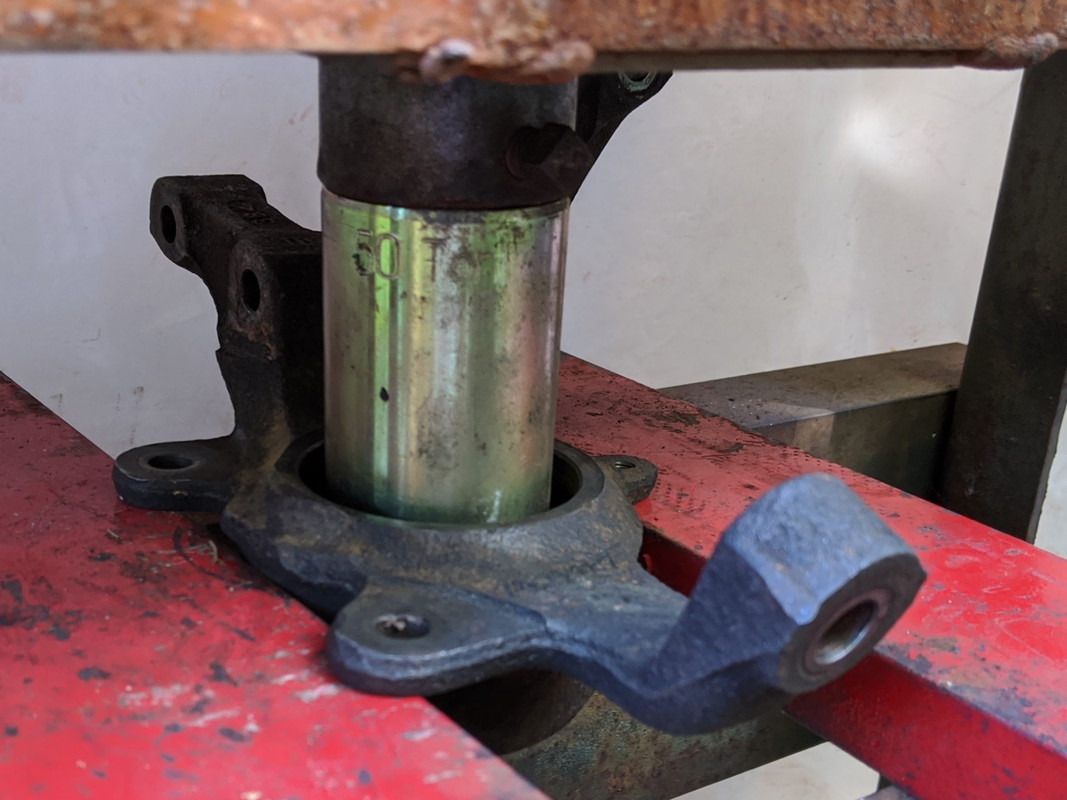
Pics here are not great, I was doing this outside in the dark at this point. Press lives on the backside of my garage. Control arm is set behind the press for this operation, the way I chose to do it. Plate & spacer on top, to make sure load is placed on the spindle. Bearing was tapped into opening of spindle prior to putting in the press, to make sure it is started square to opening. Old bearing is placed under to push new in place. If you do this with only the spindle, then the new bearing and spindle would likely be reversed in the press (bearing on top)
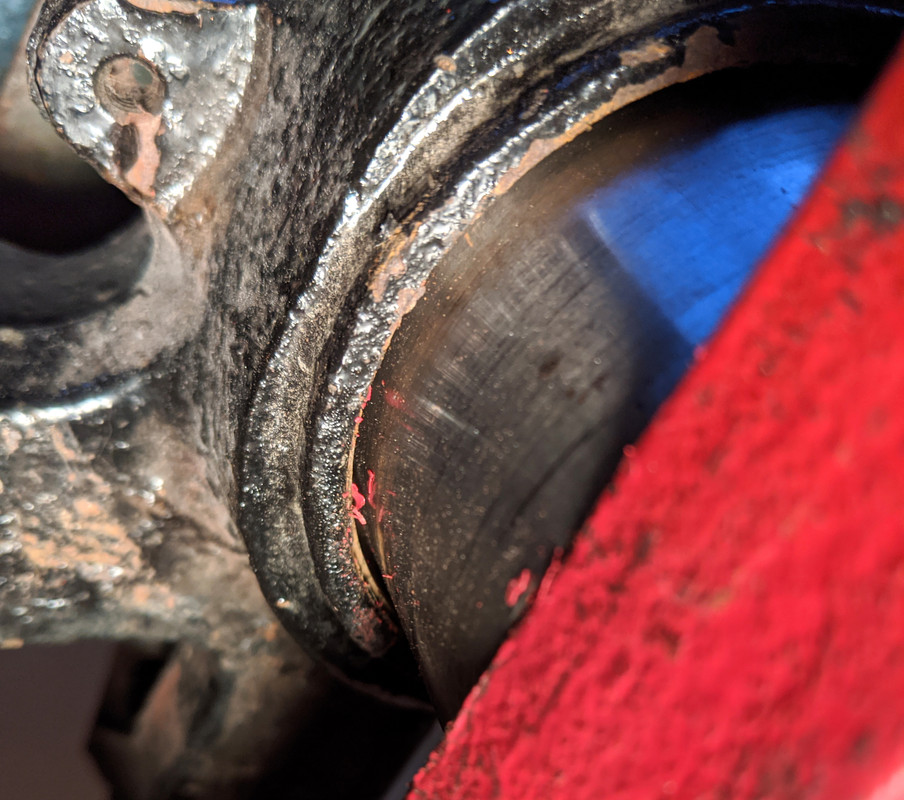
make sure press tool (old bearing) does not ride against the threads for the lock ring
You will feel when the bearing is seated.
After that, install the lock ring with some nevr-seize, and stake
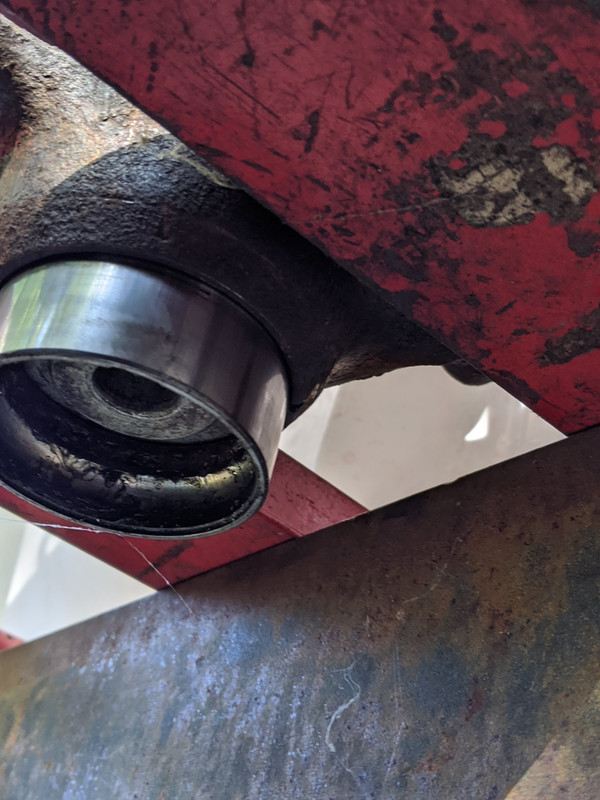
Install new dust/grease seal on hub ridge
Press hub into spindle, using an old inner race to press only on the new inner race
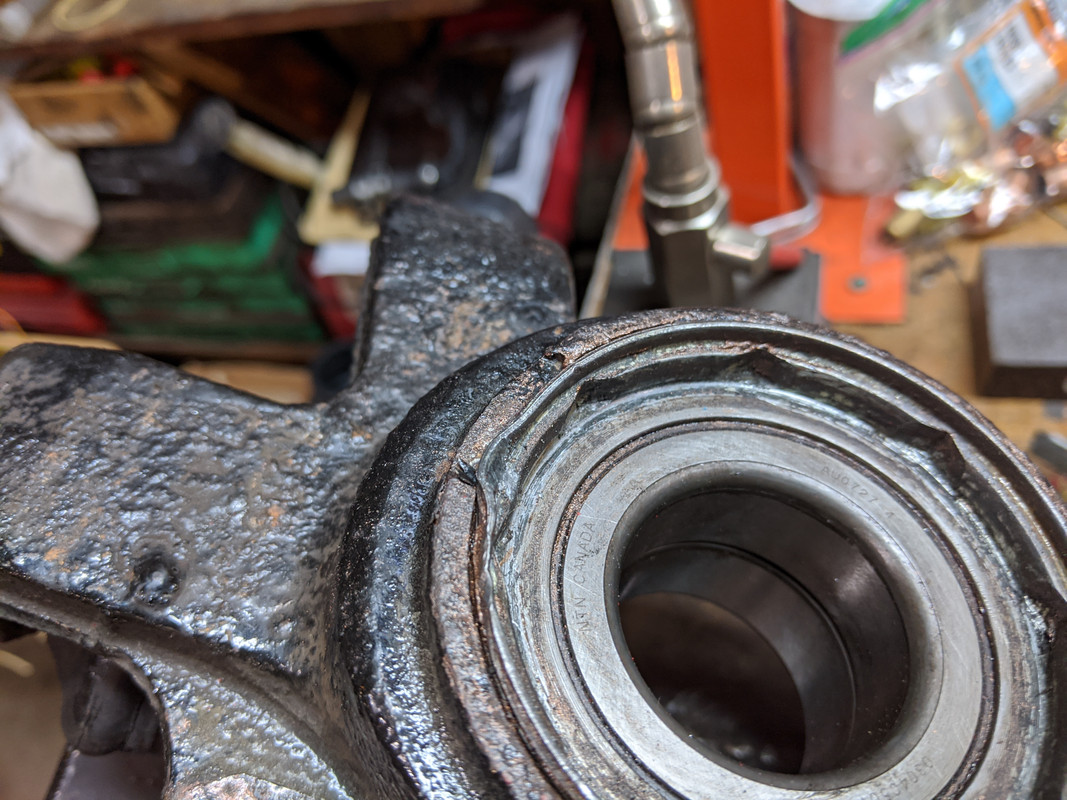
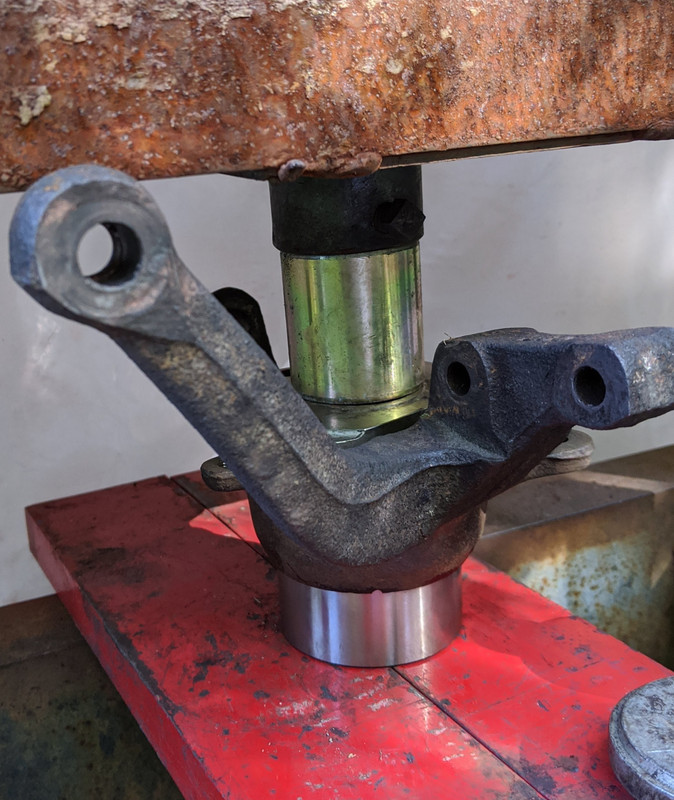
Pic taken after the fact, hub is already seated here
Control arm tucked behind press again here. Press until no movement is felt. Backside of hub will be clear of spindle outer ridge.
That's it. Sorry aboout poor press pics.
CV bolts - 31ft/lb
Axle nut - 159 ft/lb
Front Knuckle & Hub Assembly

Front Hub (10): press out of knuckle (1) in same manner as rear, after removing lock nut, heavy washer & inner seal (3,4,5)

remove outer seal (7) from hub
EDIT: Alternate inner seal / thrust washer (my car has different design on either side)

Outer half of inner race stuck on hub - easier way to get it off, IMO, is to use a chisel to push a gap between the race & shoulder
You can use the puller once the gap is present - or just lever it off

Knock out the inner thrust washer (2)
outer thrust washer (9)
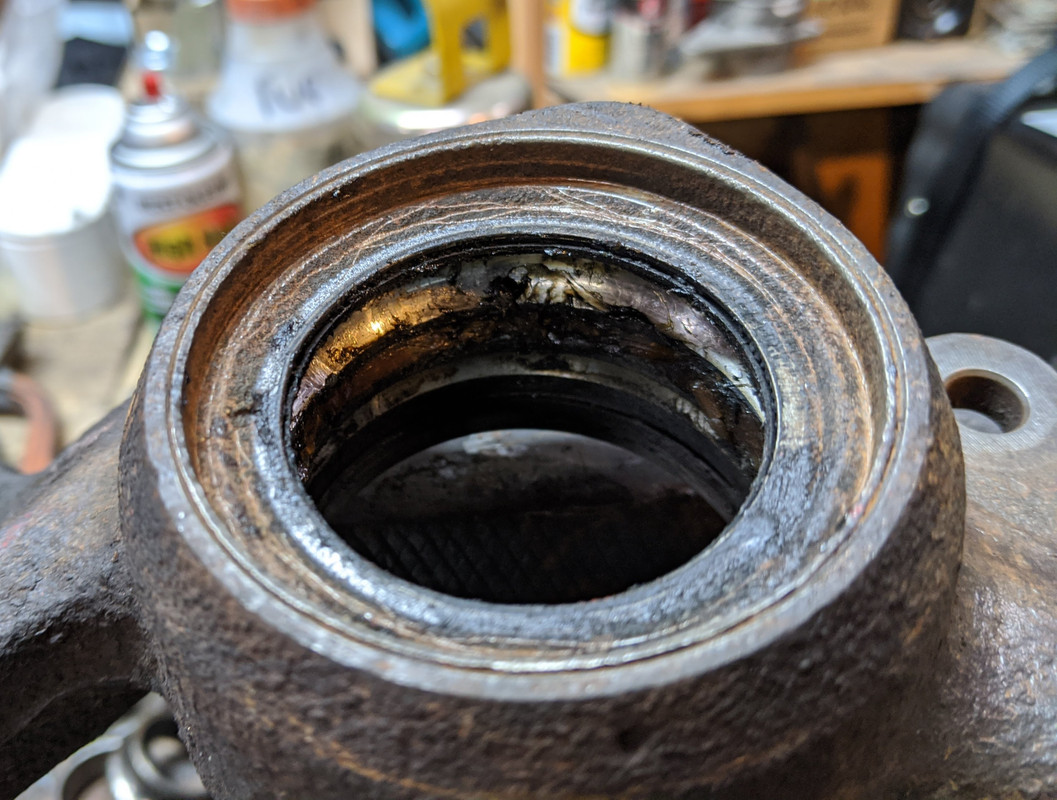
manual says "remove internal lock ring (8) ", then remove the thrust ring (9) - problem is the lock ring is BEHIND the thrust ring
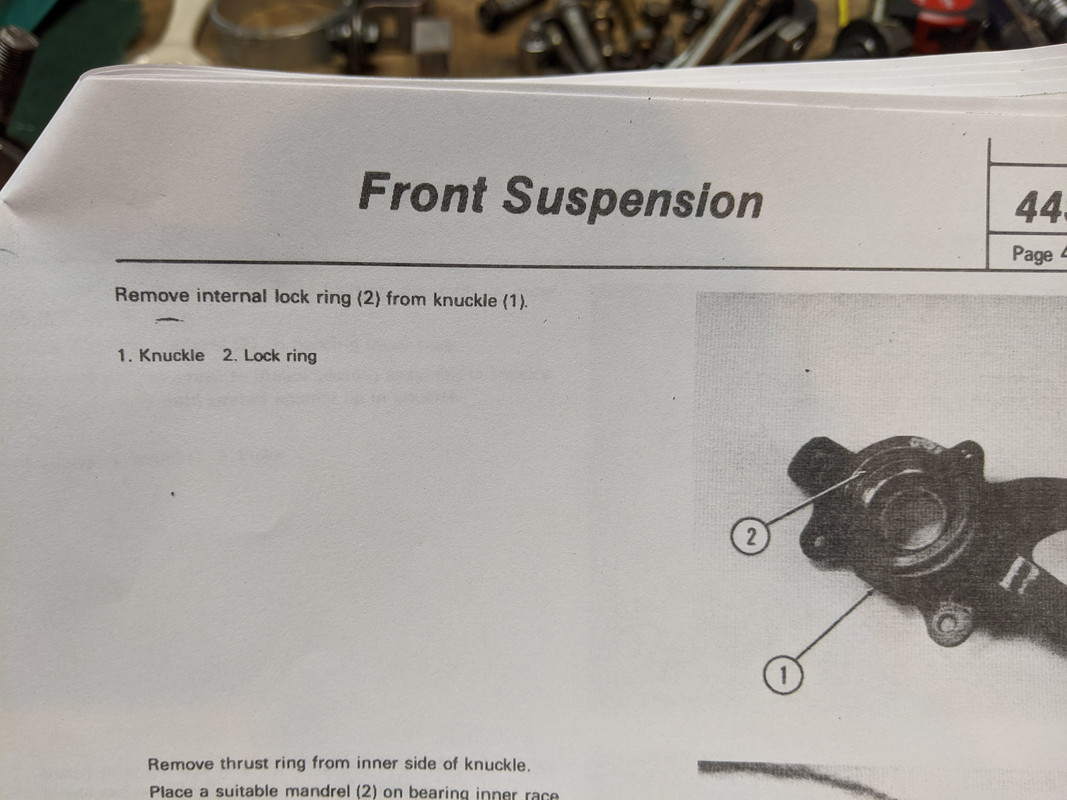
So, the thrust ring (9) - the only practical way I could find to remove it was to punch it carefully from the other side
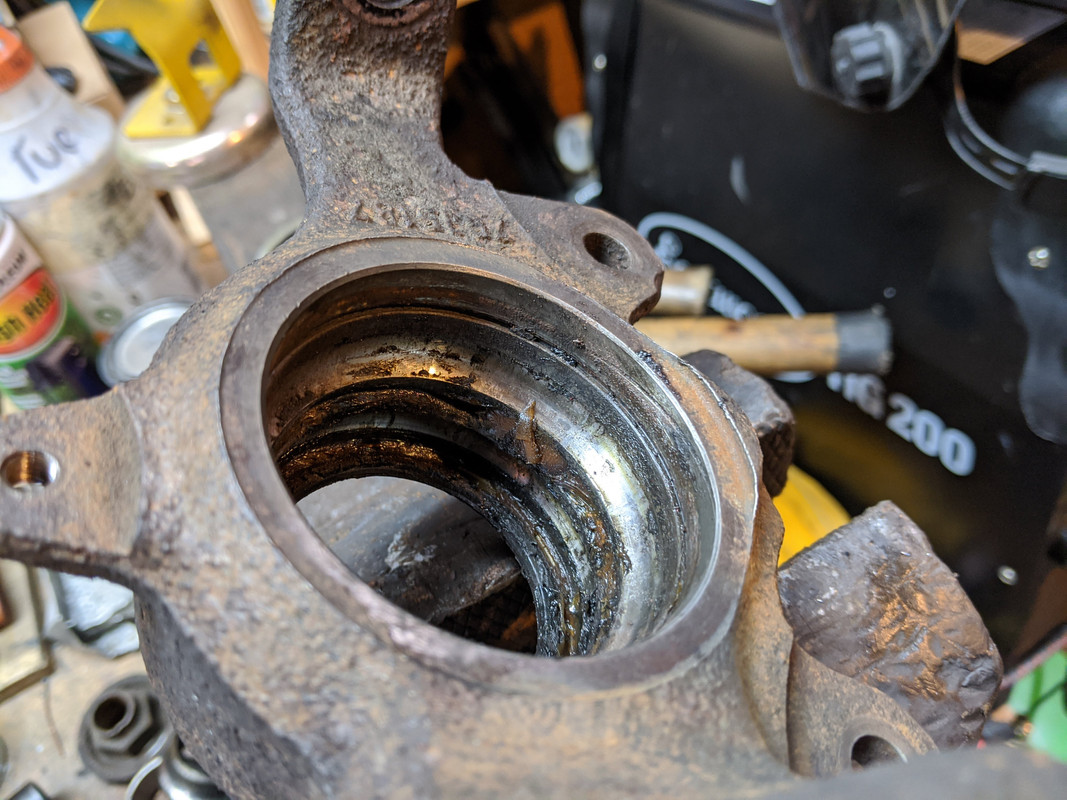

thrust washer (9) & old bearing seal remnant
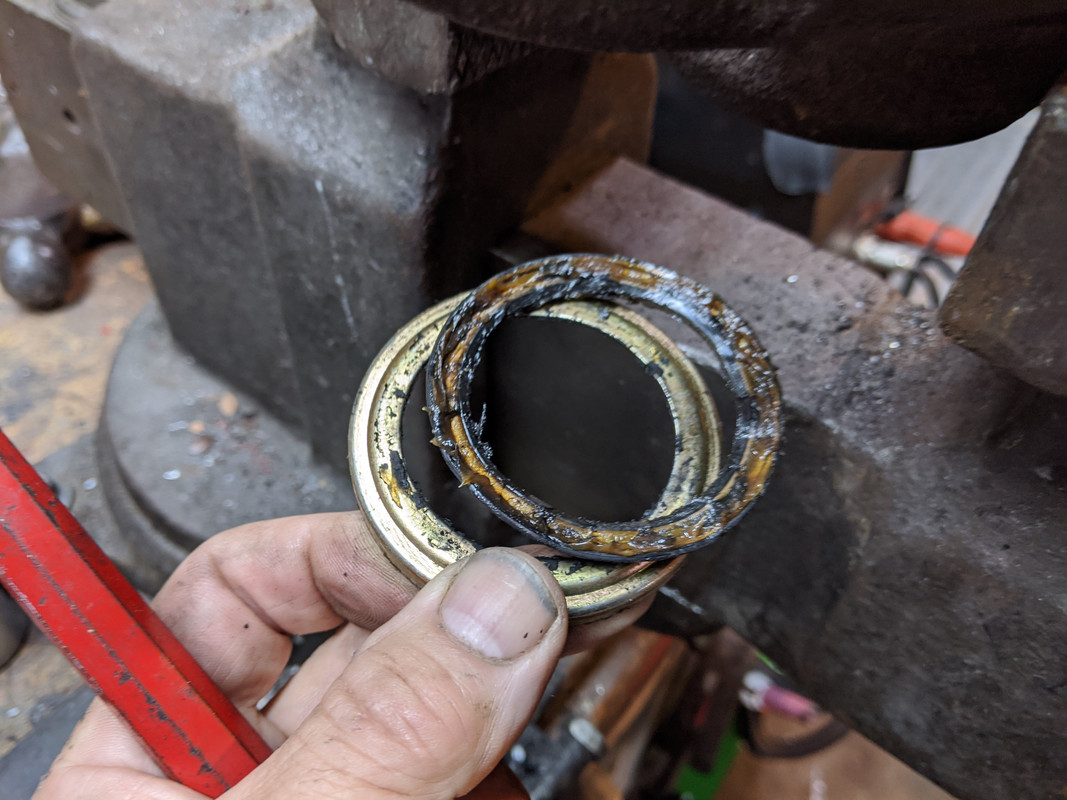
Lock ring (8) is now accessible

to be continued...
....Ok, so many thanks to Steve Holescher for the suggestion/tip for lock ring removal. Based on his description, I drilled a small hole (3/16") in the knuckle land so that I could get a pick behind the lock ring - perhaps more aggressive (in terms of depth) than his suggestion - I used a 1/4" bit - but it makes removal a breeze


EDIT: alternate lock ring - "L"/stepped design - my car has one of each style
also drilled the edge (3/16") to allow easy ring removal
With that removed, I pressed out the old bearing remnant
inset plate to press against bearing race ridge - you can't press on the OD of the race as there is a shoulder in the way, unlike the rears

set against caliper / dust shield flanges to keep it true
I cleaned the bore, applied a little grease to the wall & pressed in the new bearing. I did it in two stages - press flush, then flip & press to shoulder

for the 2nd stage I split a bearing race - I could have use the old Fiat one, but I had a shallower one from a Volvo carrier bearing (32008x) I felt my secure using a shallow open race vs. a deeper one
shoulder plate and guide for press
The split race pulls back out by hand with ease.
Then the lock ring (8) goes in. I positioned it so it blocks off the base of the drilled slot
next step is to tap the outer thrust ring (9) back in the knuckle
and clean the hub spindle & install the v-ring seal (7). I use liberal amounts of bearing grease

I used one of the old inner races to press against the new inner race, to make sure no load is placed anywhere else on the bearing. Sleeve ensures sufficient room for hub spindle to come through. No real effort required to press the hub into place.

After that, the rear thrust ring (2) goes in - I used the split race to tap it in place evenly
then the rear thick washer/seat with new seal (5), cleaned & liberally greased

then torque hub spindle nut, 159ft/lb & stake the nut (10)
I put 2 studs/nuts into the hub flange to make sure the hub could not rotate in the vice whilst torquing to spec

I had to redo one rear wheel bearing from 2015, and replace the other side original (137K miles)
Fiat diagram. Plate (#5) is actually between 1 & 2, since it installs from the backside of the hub & sits against the back of the inner bearing seat. 3 & 7 are identical rubber lip seals that are stretched over the ridge on #1 stub shaft, and the inner ridge on #8 hub
I already had the control arms off the car for the K24 work. I did not remove the spindle from the control arm to do this work. Little fiddly doing the press work, but not that bad. I don't want to deal with the balljoints at this point, so I'm not touching them & risking damage.
So, remove either the entire arm, or follow the manual & remove just the spindle, as you prefer.
With the brakes removed, locate a suitable press tool / old socket that will fit inside (pass through) the inner bearing race - to use to press out the hub
I used a three-arm puller to press out the hubs - make sure puller is centered as possible, so you don't hurt yourself. Applying force with an uneven setup can make the puller arms fly off the spindle(!)
The back plate ear is a different offset than the caliper ears, so I added a shim to get the puller arms even
Use your favorite impact to zip the hub off
When you do this, the outer inner race may stay stuck on the hub shaft. If it does (one of mine did), I found the easiest way to remove it is to cut diagonally with a cutting disc going most of the way through to the center, then whack slot with a cold chisel to split it open. You don't want to cut all the way through the race or you will likely mar/damage the hub shaft.
With that out the way, unstake the retaining ring
Then remove it with the tool (I bought mine from MWB)
They can be really tight - I used a 3/4 long breaker bar
having multiple vices is not a bad thing
that will expose the bearing
Find another socket or press tool that will fit over the bearing inner race, but sit inside the rear dust seal plate (#5)
Use the three jaw puller to press the bearing out from the rear. Spindle clamped in vice.
and out
clean out any debris, clean lock ring threads, I put a little grease in the spindle cup where the bearing will be inserted. Inner seat and dust seal seat visible in this pic
Bearing must be installed in spindle first, then hub second. Outer ridge of outer bearing race needs to take the load when bearing is pressed, and inner bearing race ridge when hub is pressed.
Pics here are not great, I was doing this outside in the dark at this point. Press lives on the backside of my garage. Control arm is set behind the press for this operation, the way I chose to do it. Plate & spacer on top, to make sure load is placed on the spindle. Bearing was tapped into opening of spindle prior to putting in the press, to make sure it is started square to opening. Old bearing is placed under to push new in place. If you do this with only the spindle, then the new bearing and spindle would likely be reversed in the press (bearing on top)
make sure press tool (old bearing) does not ride against the threads for the lock ring
You will feel when the bearing is seated.
After that, install the lock ring with some nevr-seize, and stake
Install new dust/grease seal on hub ridge
Press hub into spindle, using an old inner race to press only on the new inner race
Pic taken after the fact, hub is already seated here
Control arm tucked behind press again here. Press until no movement is felt. Backside of hub will be clear of spindle outer ridge.
That's it. Sorry aboout poor press pics.
CV bolts - 31ft/lb
Axle nut - 159 ft/lb
Front Knuckle & Hub Assembly
Front Hub (10): press out of knuckle (1) in same manner as rear, after removing lock nut, heavy washer & inner seal (3,4,5)
remove outer seal (7) from hub
EDIT: Alternate inner seal / thrust washer (my car has different design on either side)
Outer half of inner race stuck on hub - easier way to get it off, IMO, is to use a chisel to push a gap between the race & shoulder
You can use the puller once the gap is present - or just lever it off
Knock out the inner thrust washer (2)
outer thrust washer (9)
manual says "remove internal lock ring (8) ", then remove the thrust ring (9) - problem is the lock ring is BEHIND the thrust ring
So, the thrust ring (9) - the only practical way I could find to remove it was to punch it carefully from the other side
thrust washer (9) & old bearing seal remnant
Lock ring (8) is now accessible
to be continued...
....Ok, so many thanks to Steve Holescher for the suggestion/tip for lock ring removal. Based on his description, I drilled a small hole (3/16") in the knuckle land so that I could get a pick behind the lock ring - perhaps more aggressive (in terms of depth) than his suggestion - I used a 1/4" bit - but it makes removal a breeze
EDIT: alternate lock ring - "L"/stepped design - my car has one of each style
also drilled the edge (3/16") to allow easy ring removal
With that removed, I pressed out the old bearing remnant
inset plate to press against bearing race ridge - you can't press on the OD of the race as there is a shoulder in the way, unlike the rears
set against caliper / dust shield flanges to keep it true
I cleaned the bore, applied a little grease to the wall & pressed in the new bearing. I did it in two stages - press flush, then flip & press to shoulder
for the 2nd stage I split a bearing race - I could have use the old Fiat one, but I had a shallower one from a Volvo carrier bearing (32008x) I felt my secure using a shallow open race vs. a deeper one
shoulder plate and guide for press
The split race pulls back out by hand with ease.
Then the lock ring (8) goes in. I positioned it so it blocks off the base of the drilled slot
next step is to tap the outer thrust ring (9) back in the knuckle
and clean the hub spindle & install the v-ring seal (7). I use liberal amounts of bearing grease
I used one of the old inner races to press against the new inner race, to make sure no load is placed anywhere else on the bearing. Sleeve ensures sufficient room for hub spindle to come through. No real effort required to press the hub into place.
After that, the rear thrust ring (2) goes in - I used the split race to tap it in place evenly
then the rear thick washer/seat with new seal (5), cleaned & liberally greased
then torque hub spindle nut, 159ft/lb & stake the nut (10)
I put 2 studs/nuts into the hub flange to make sure the hub could not rotate in the vice whilst torquing to spec
Last edited: