Andrew's X1/9 restoration

Andrew Coles

Say no to rice
Hi all!

It seems there's so much time between the updates of my project that my build thread's keep getting closed - that's the second one now! Ah well, I guess that's some indication that I should probably work a bit faster :)

You can find the previous thread here: http://www.xwebforums.com/forum/index.php?threads/12623&highlight=andrew's

I'll make another update in the next few days with photos and more information, but I'd just like to mention here that I finally drove my X1/9 for the first time in 6 years the other week. Given that between me, my Dad and a couple of mates we've built it all ourselves (including the gearbox) it was incredibly satisfying to discover that it actually drives. Admittedly we only drove it down the driveway - first proper drive will come in January when a little more has been assembled :)

More updates to come shortly...
 
Hi all,

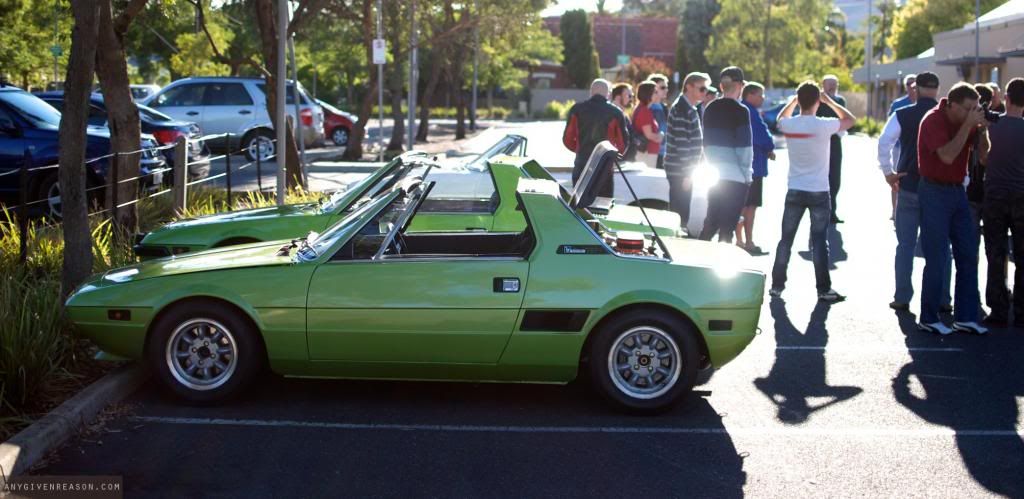
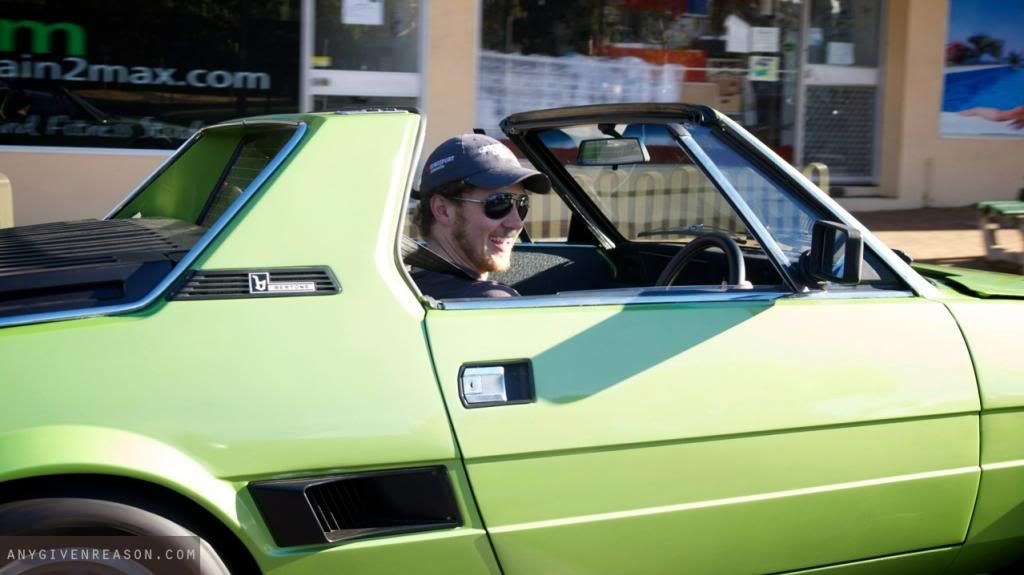
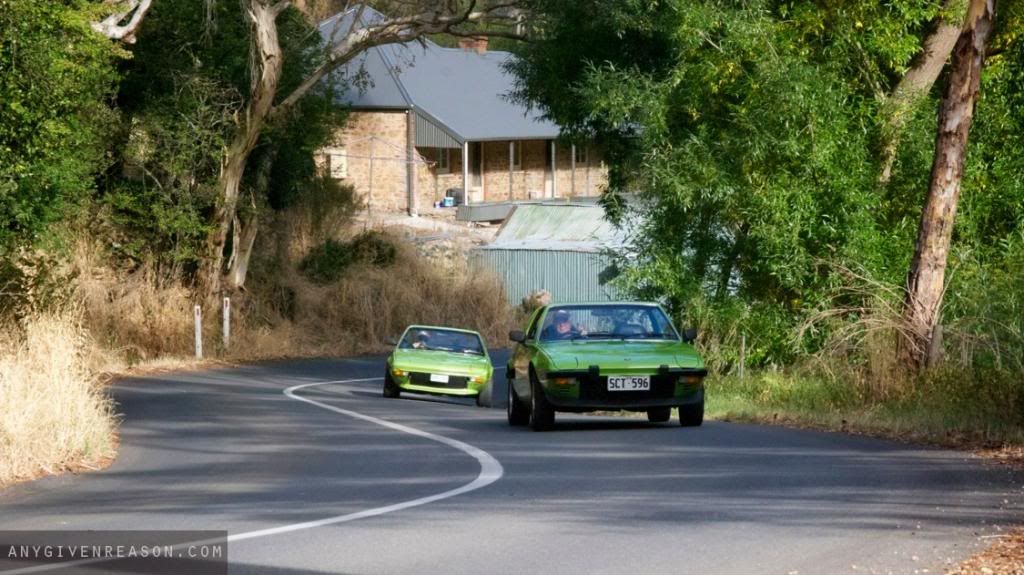
So here's a quick update about what's been happening in the last, well, year. In the meantime I've started an automotive blog (
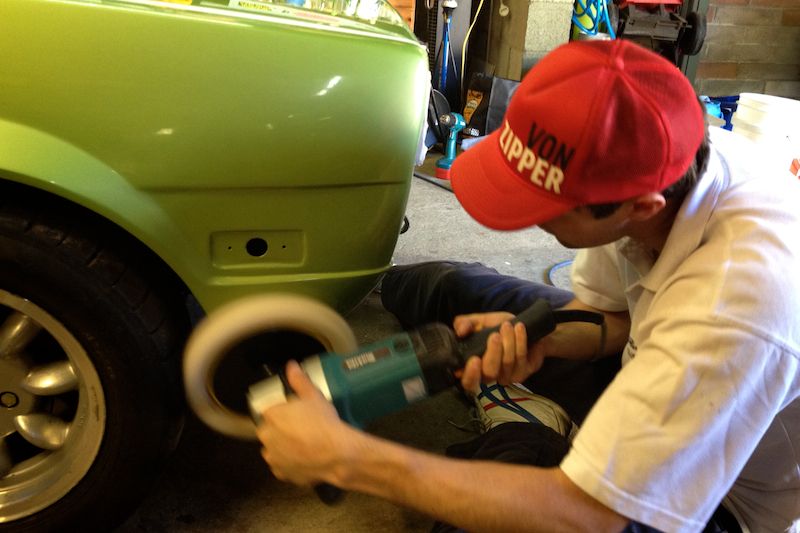
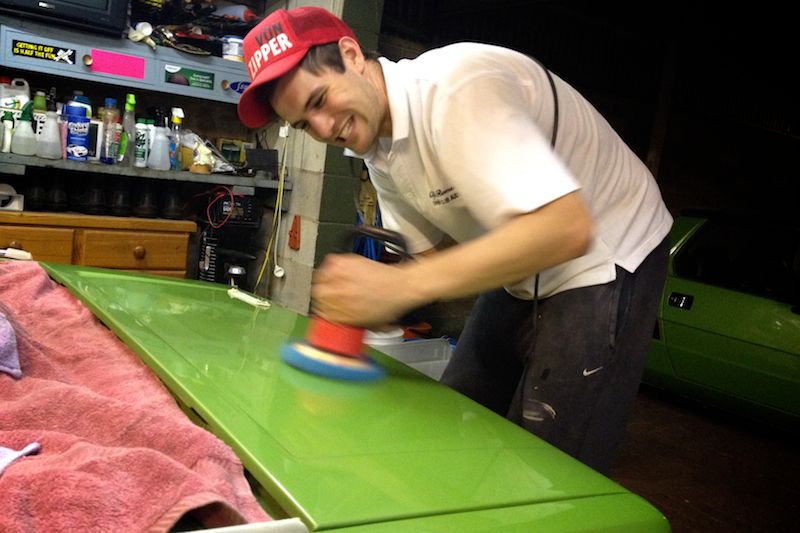
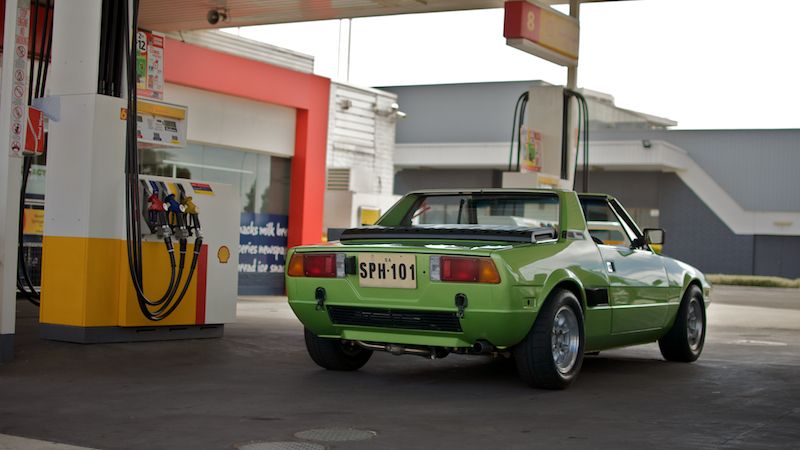
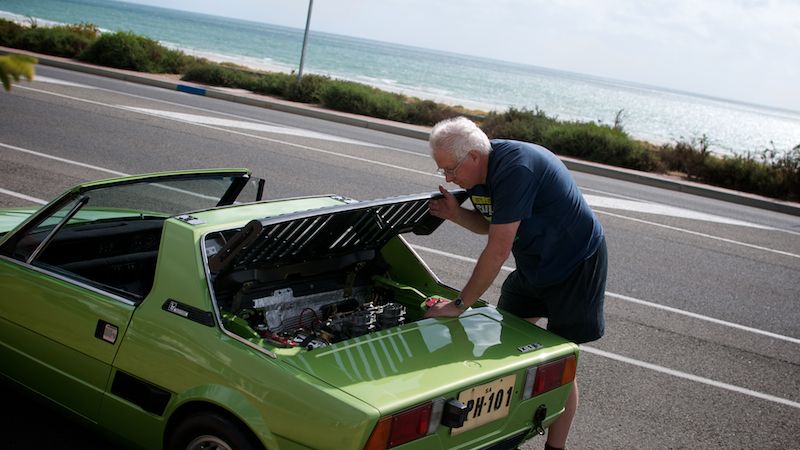
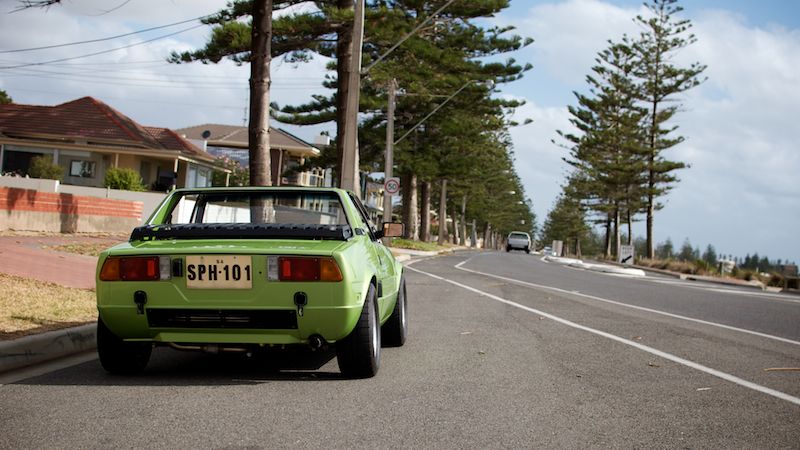
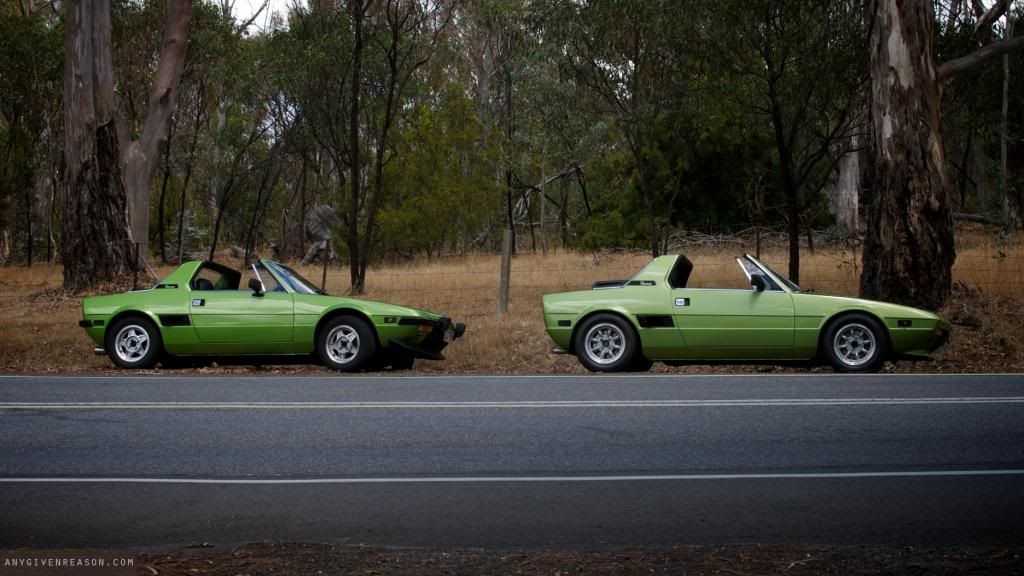
www.anygivenreason.com) which has taken up a surprising amount of my time, both hindering progress on the X19 and time spent on Xweb. But it's worth it. And apologies on the quality of the photography - I usually pride myself on trying to take good photos, but lately I just haven't had the time. So most of these are straight off the iPhone!

Okay, so right into it...

IMG_1541_zpsb18a72e4.jpg


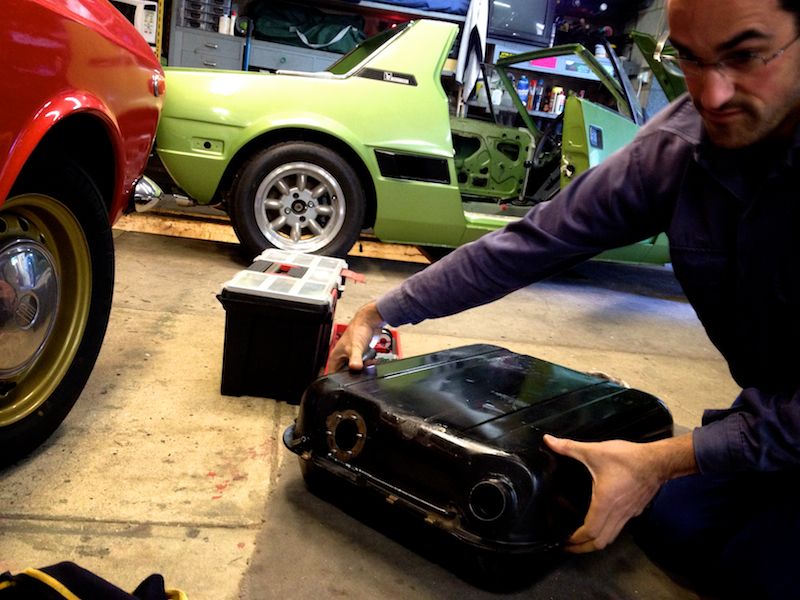
It really is the little things that take time, for example we discovered a whole bunch of crud in the fuel tank. Probably spent half a day cleaning it - there's a quarter of a weekend of unplanned time.

IMG_1545_zpsaf1bb4b3.jpg


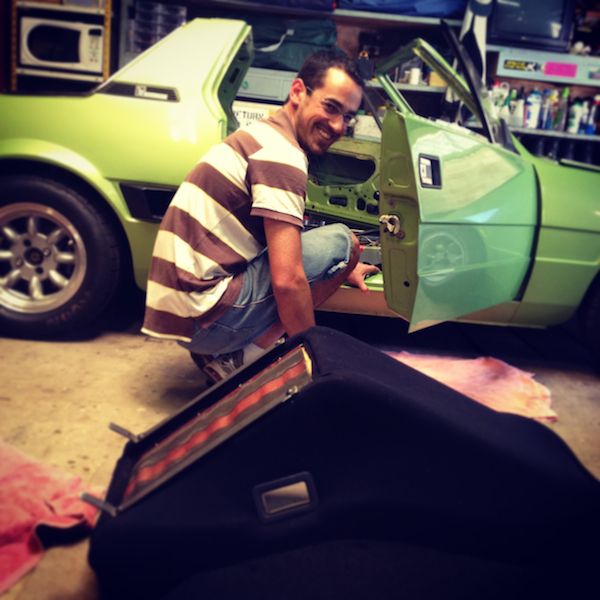
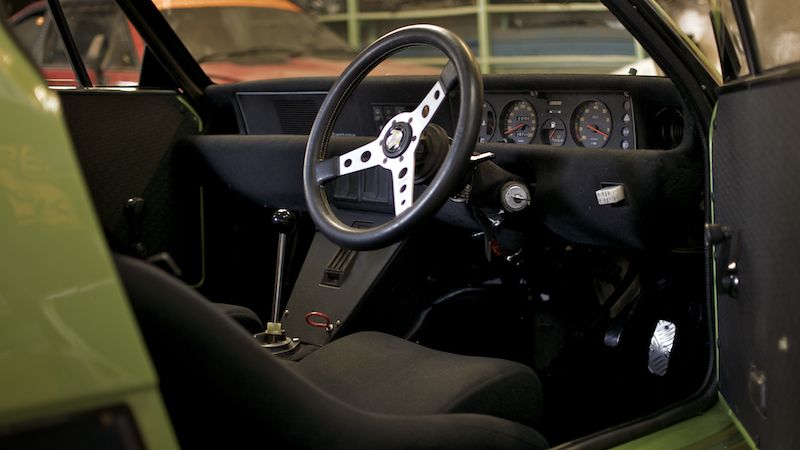
X1/9's are a lot easier to work on when there's no interior!

IMG_3183_zps5a0e3a26.jpg

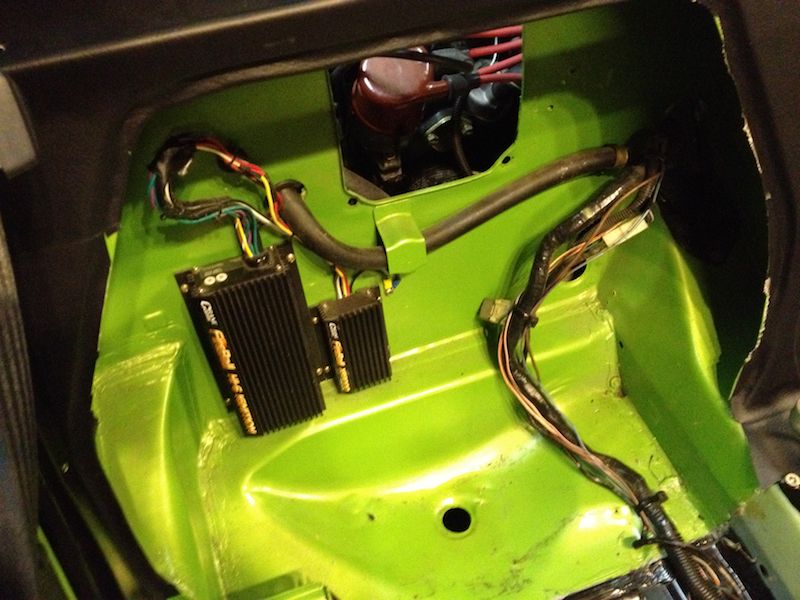
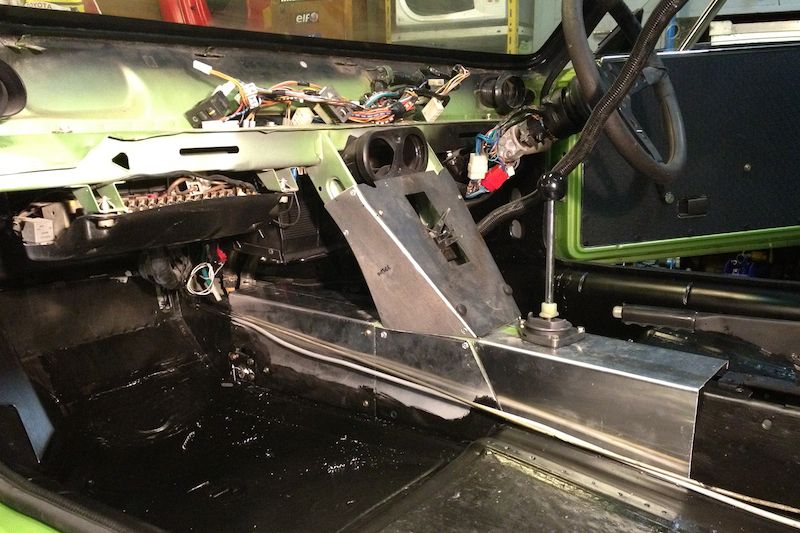
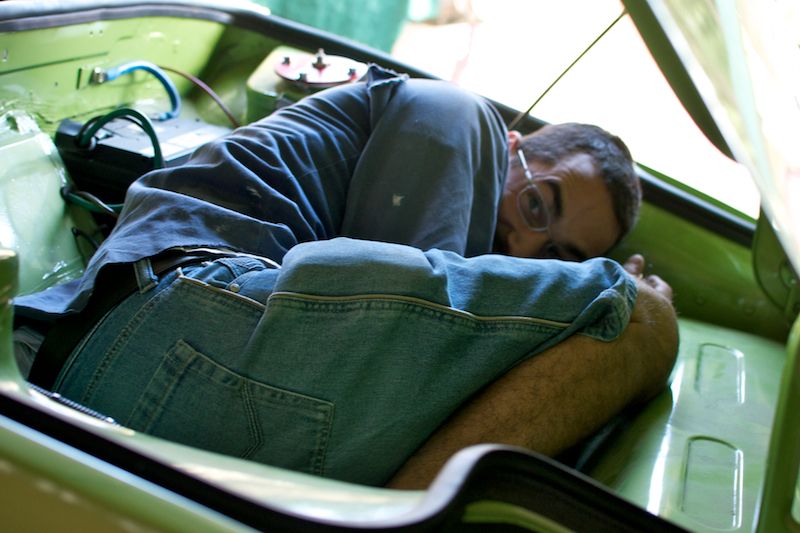
I decided to go for a Crane Hi-6 ignition system, which throws the most ridiculously huge sparks if you pull a plug lead off! The fact that I'll be running fixed seats means the spare wheel well is not usable anyway, so we mounted the ignition system in there.

IMG_1551_zps2bcb179c.jpg

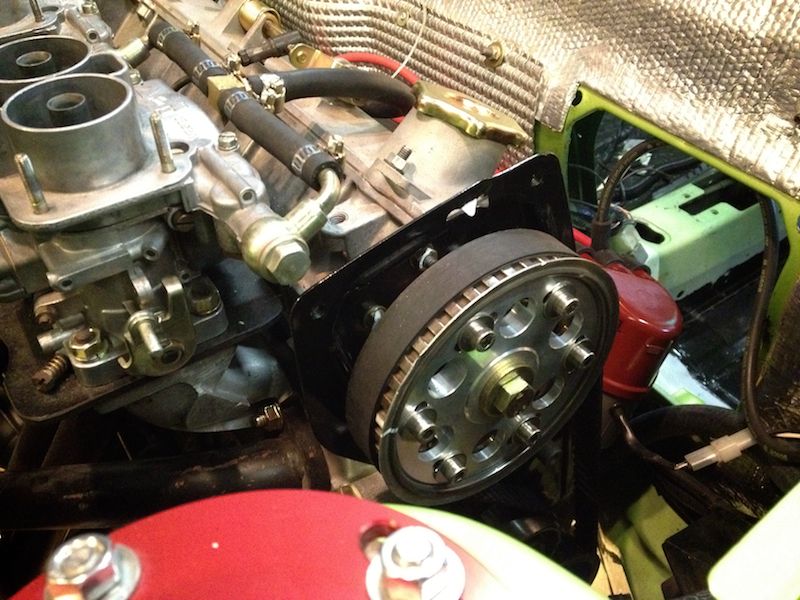
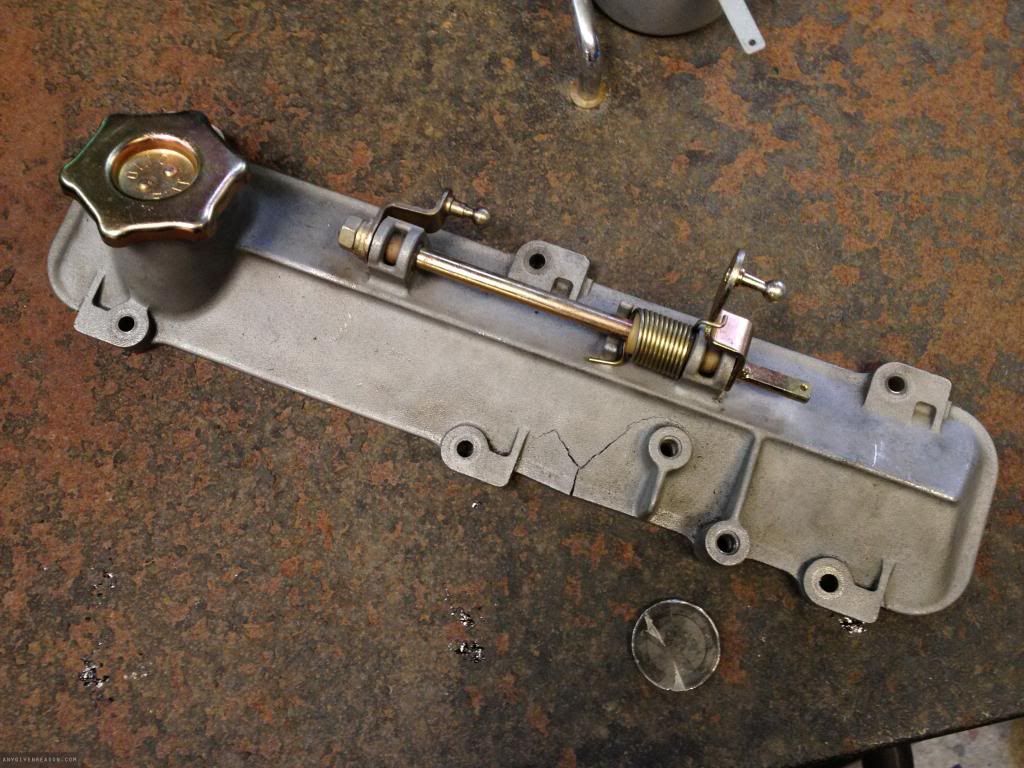
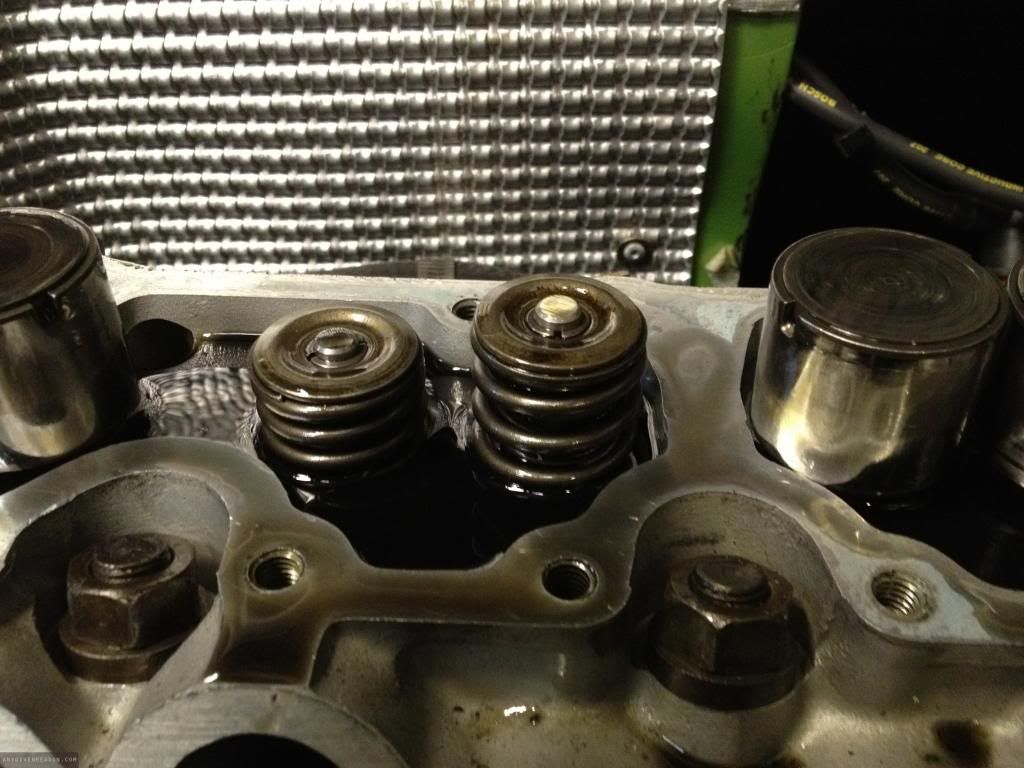
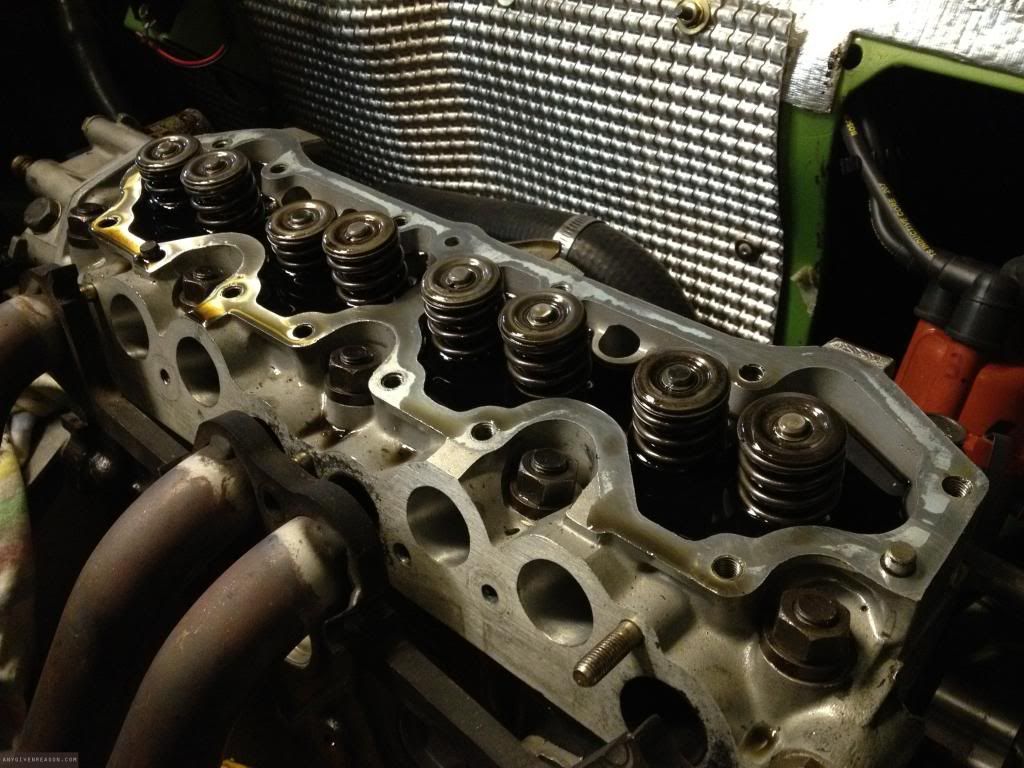
I've honestly lost count of all the little problems we encountered and overcame. This is one for example - when we turned the engine over by hand, the timing belt kept slipping off. I assembled the belt and tensioners and timed the engine according to the workshop manual, but given I'm a bit of a mechanical idiot I was really worried I'd stuffed something up. Turns out this adjustable cam wheel was the wrong one - we switched to a stock one with the correct number of teeth, and all was good.

IMG_1592_zps3fe1ad9a.jpg


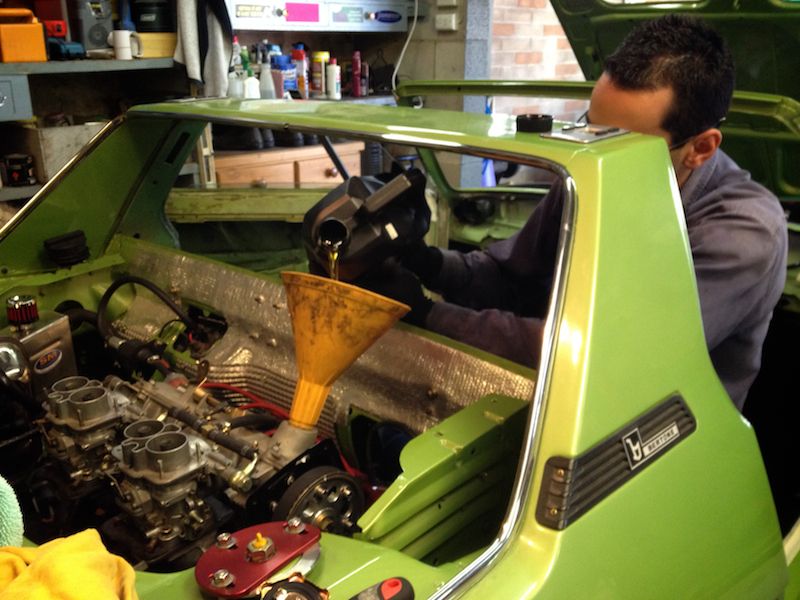
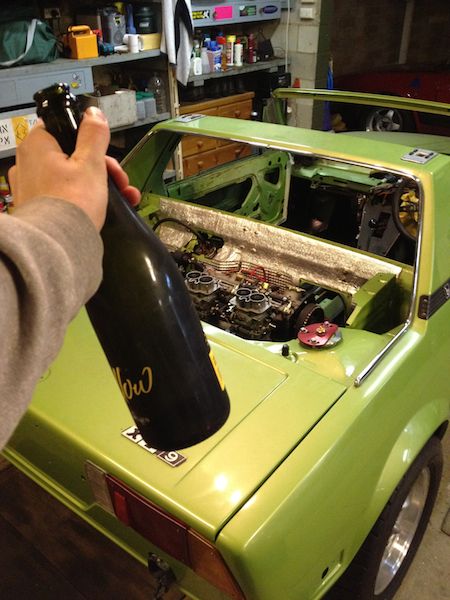
Getting it started for the first time was a huge step, and a major kick for the project. The engine had sat for probably 2 years since being built with only assembly lube in it and I hadn't even turned it over until just before we fired it (rookie error), so it was a great relief when it didn't just seize into a lump. We didn't smash the champagne bottle over the hull, rather we popped the cork in the shed and had a quiet glass!

http://www.vimeo.com/44094037

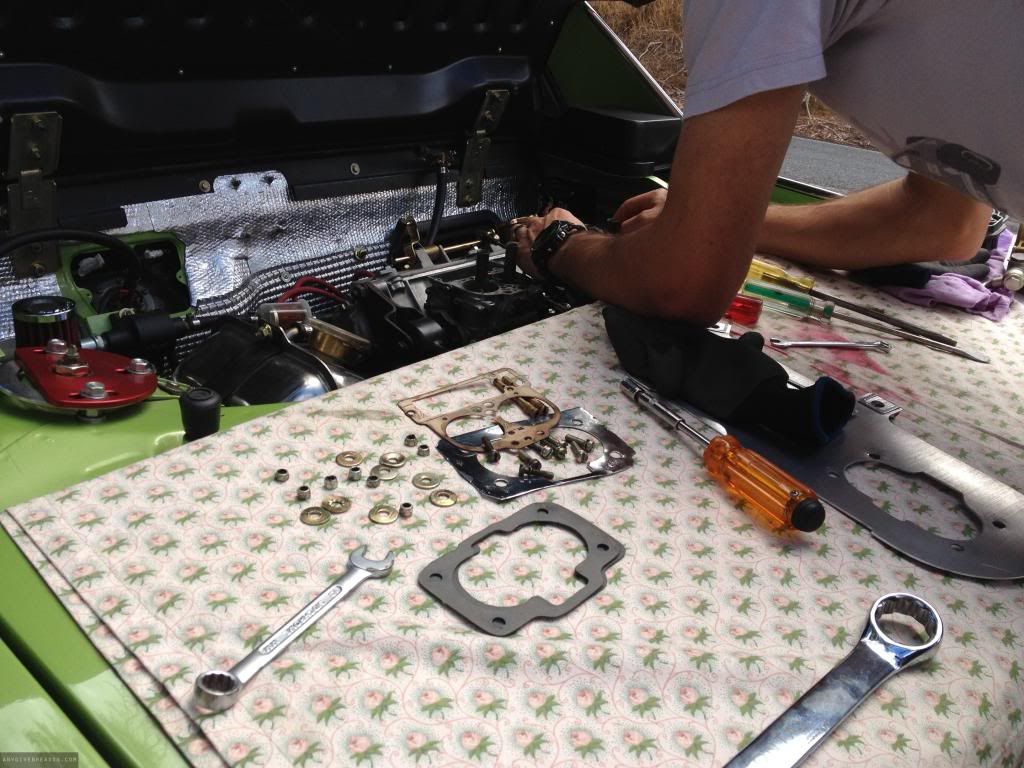
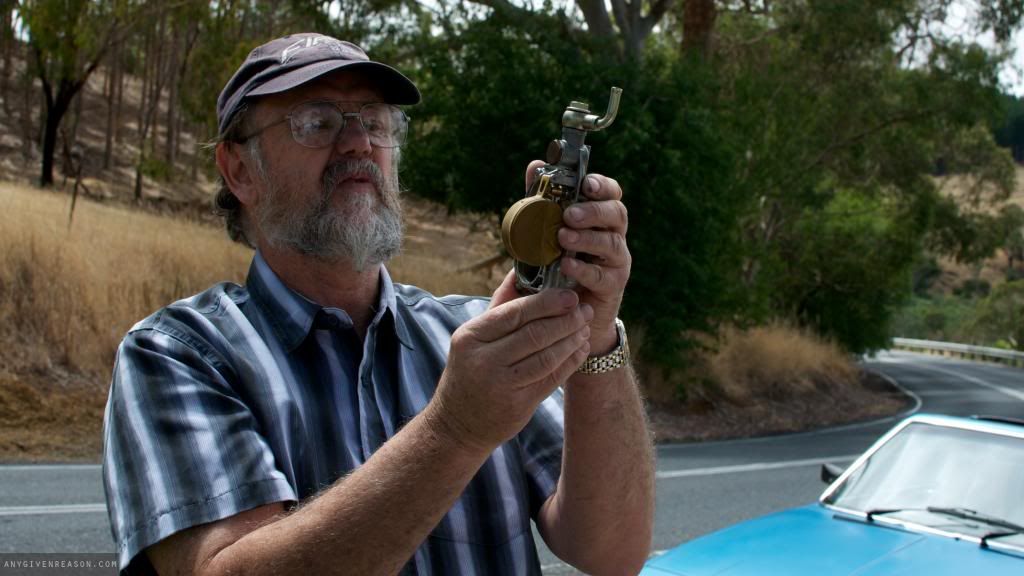
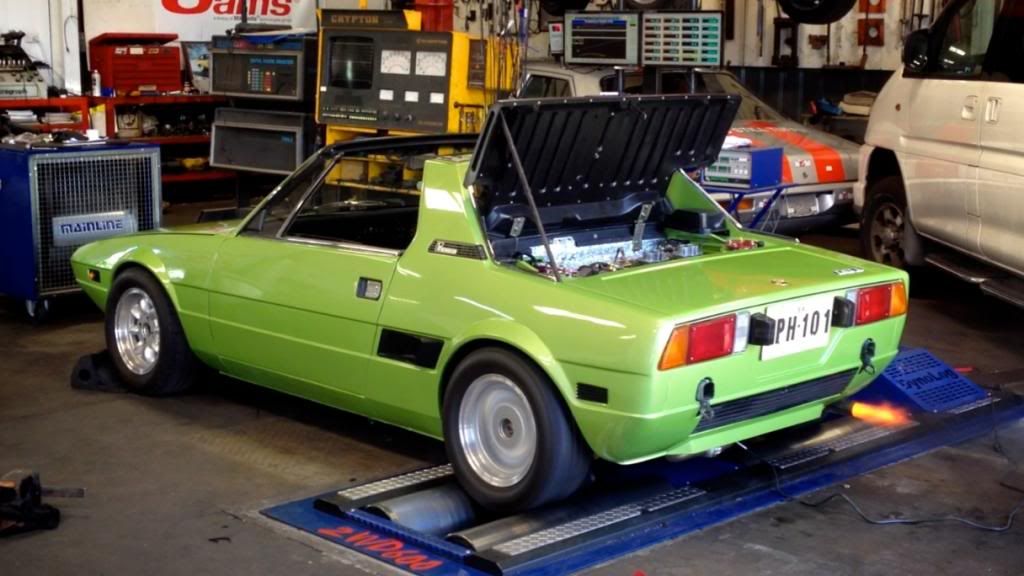
We'd just hit the starter for the first time after stuffing around for a bit with incorrect timing. We've since made it sound a damn lot better than it does in this video - the carbs weren't tuned or synced at all, and we discovered that the shafts on the carbies were slightly bent and were binding on the bodies, causing the revs to stick. That was a bit disappointing, because I had the carbies rebuilt at great expense at a well known shop to make sure we didn't have these types of problems. A mate rebuilt them again on our bench, and now they work perfectly.

IMG_2030_zps0e615eab.jpg

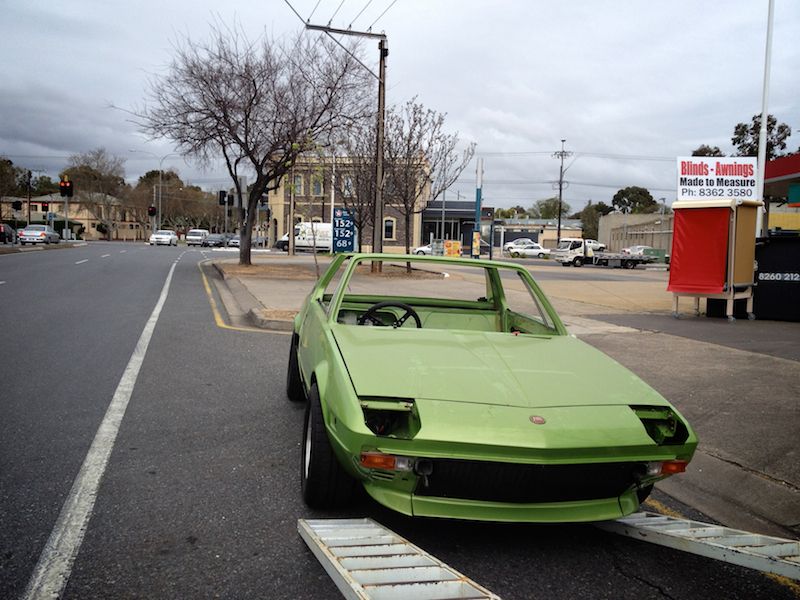
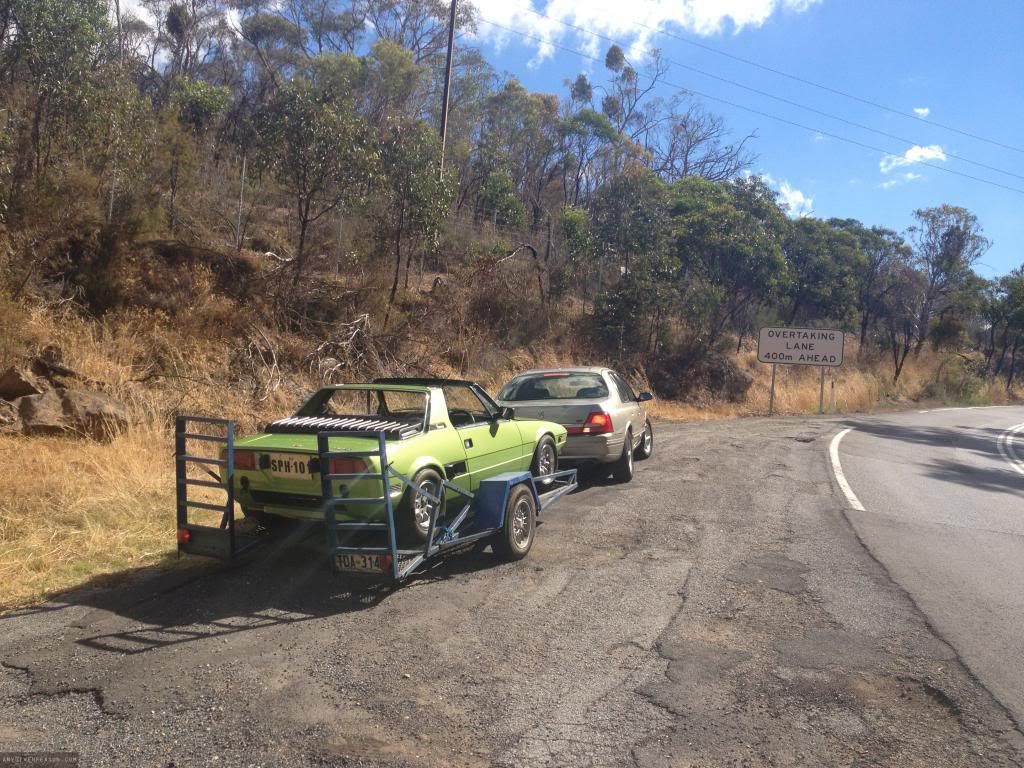
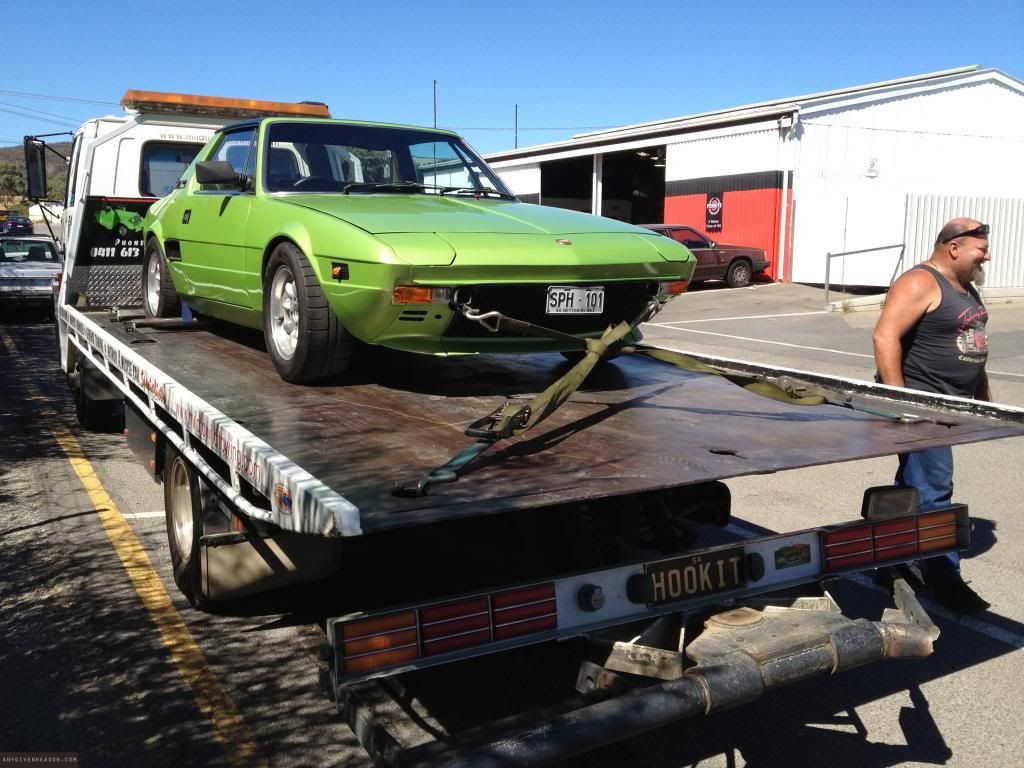
Once it started we only ran it for about 20 seconds then killed it before it got hot. The exhaust guy had made the exhaust system incorrectly so it rubbed against the driveshafts boots, and (stupid me, yet another rookie mistake) I didn't notice it until a month or so later. He had also welded this god awful chrome tip on without consulting me - he thought it was brilliant and he was really proud, but I didn't have the heart to tell him I hated it. When I had a couple of spare days I took the car to a different exhaust place and got it changed and the system fixed. It was the first time the car had been out and about in a while, and it was good to see it on the road, albeit behind a trailer.

I drive an MX5 daily, so it's a real PITA to transport the X1/9 anywhere at the moment. I have to borrow my girlfriends Dad's 4WD and trailer. They live about an hour from my place, so it's a decent two day exercise to take the X1/9 to a workshop to get anything done. Hence why most of it happens at our place!

252214_10151369052340466_116008059_n_zpse108d862.jpg

The next major hurdle was driving it for the first time. However, in order to do that we had to bleed the brakes and clutch. Those little jobs took close to 6 weeks! Between kinked supply hoses, an incorrect flare (another external shop mistake), a couple of leaky flares and an incorrectly assembled return spring (my fault), I had the pedal box in and out no less than 8 times! It also leaked brake fluid all over my hands and face, and my freshly painted floor - which will now need to be painted again.

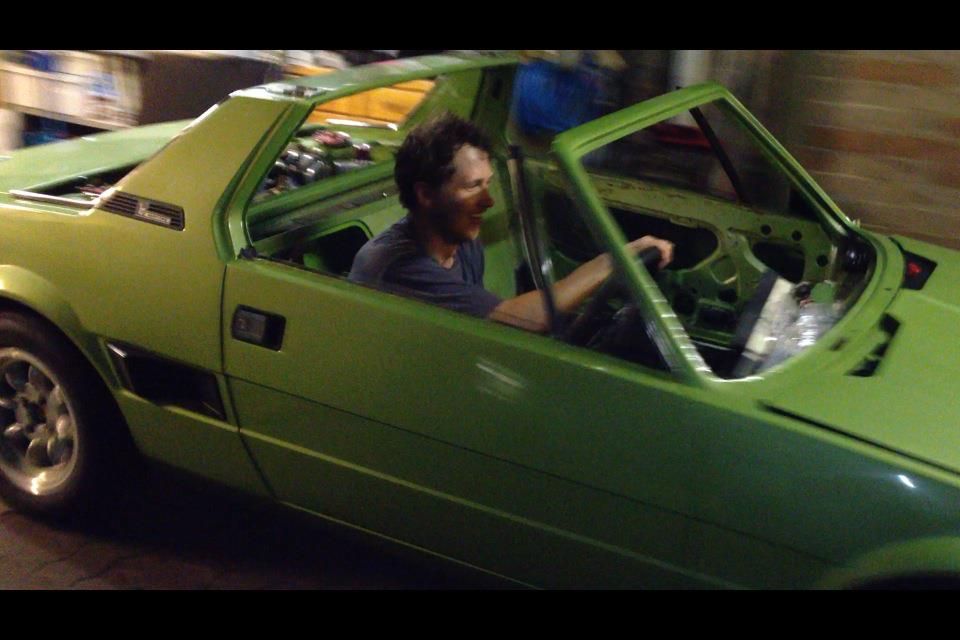
But it did feel good to finally drive it for the first time in over 4 years. Nothing was adjusted, so it was actually pretty awful in all honesty. But it did verify that the car moved under its own power and that the gearbox we built ourselves worked, so it was a success from that point of view.

IMG_2183_zps6814c281.jpg

However shortly after the gearbox starting leaking expensive Redline gearbox oil everywhere. We had to fix it, so out came the gearbox again in just under 2 hours! We found a couple of burs that we'd missed on the casings, and we reassembled it with new gaskets and a much better sealant - so far so good!

It was here that the X19 made it's first serious attempt at killing me. As I was removing the box, it fell off the input shaft onto the ground, landing on top of my arm. Somehow my arm ended up in the valley created between the main casing and diff housing. It got a little bruised, but it very easily could have been broken. Lucky.

IMG_2575_zps5e4b5a26.jpg

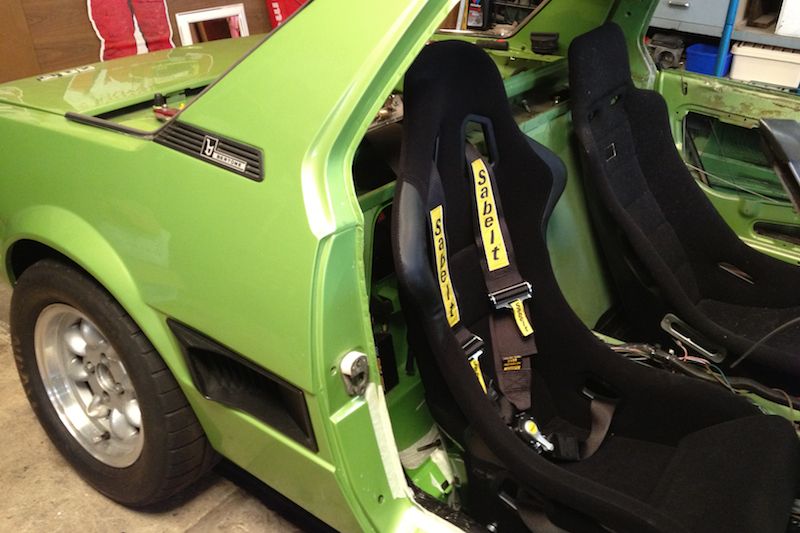
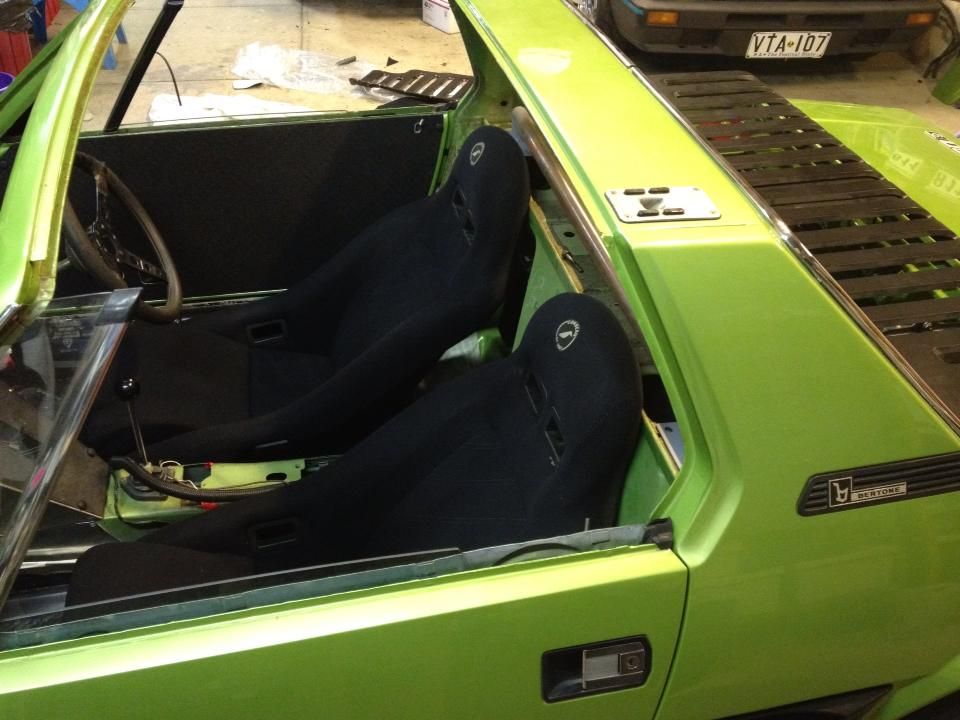
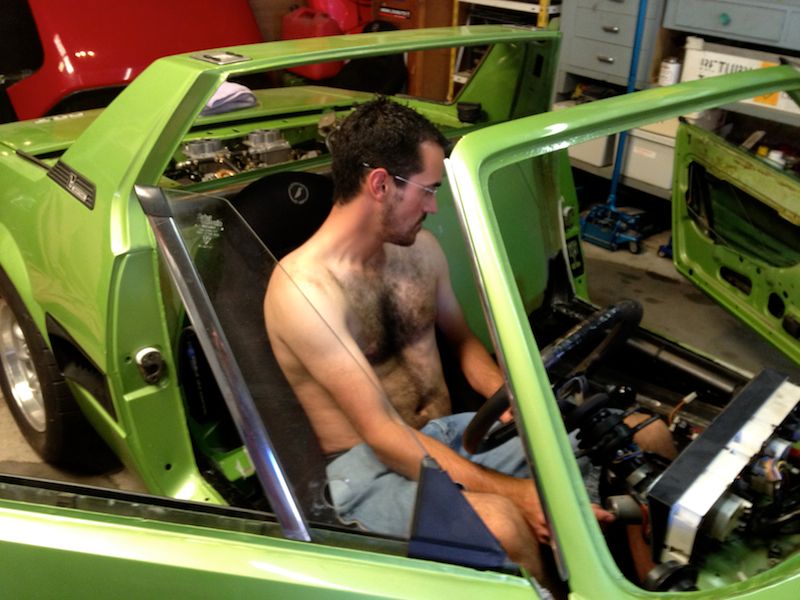
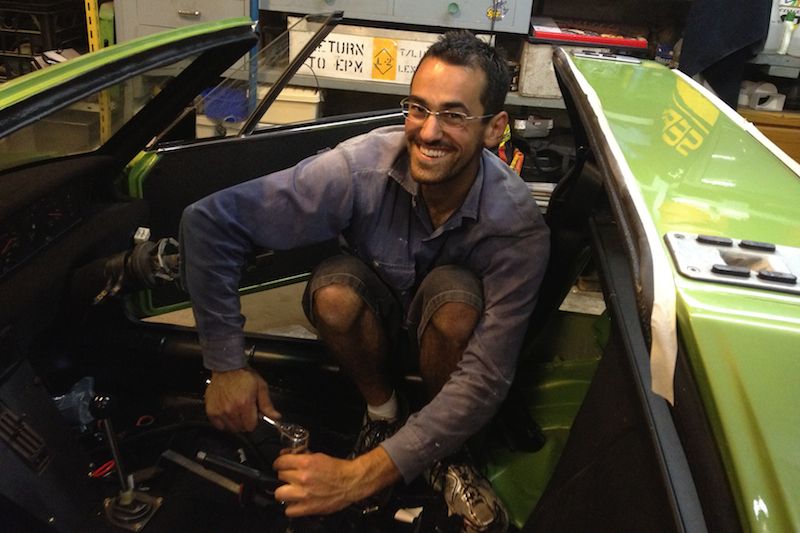
Finding seats to fit my 6.3" frame into the X1/9 has been a huge headache. The back of my head rubs on the targa bar with stock seats (not ideal), and all race seats just exacerbate the problem as they sit you more upright. I tried no less than 8 different seats, and none of them fit. I was about to resort to lowering the floor...

305323_10151406655830466_749269803_n_zps908927eb.jpg

... when a friend called and said he had some old seats he was taking out of his Mini Cooper S rally car. I despondently tried them, and to my great surprise, I actually fit! They are extremely reclined which means my head now sits about 2-3" under the targa bar. It's a seriously cool driving positon - my shoulders are only just above the tops of the doors, and I peer out over the steering wheel which is now perfectly placed, along with the gears, for taller people. It's very difficult to get in and out, so I may need to look into a detachable steering wheel boss somewhere down the line.

IMG_2937_zps5aa605c4.jpg

I drilled the stock seat rails out, and my friend Michael did an awesome job of mounting them as low as we could get them.

IMG_3001_zps2588ce60.jpg

This is how we work through an Australian summer! Sorry ladies, he's taken.

IMG_2999_zps133b6d52.jpg

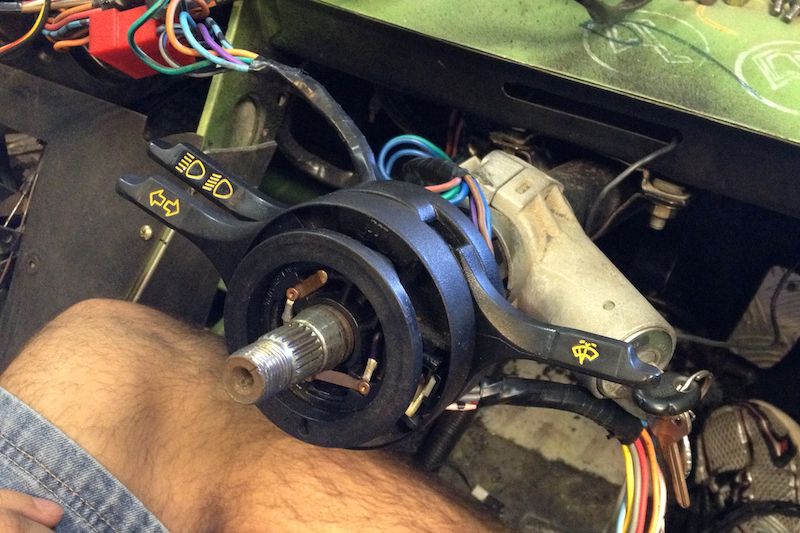
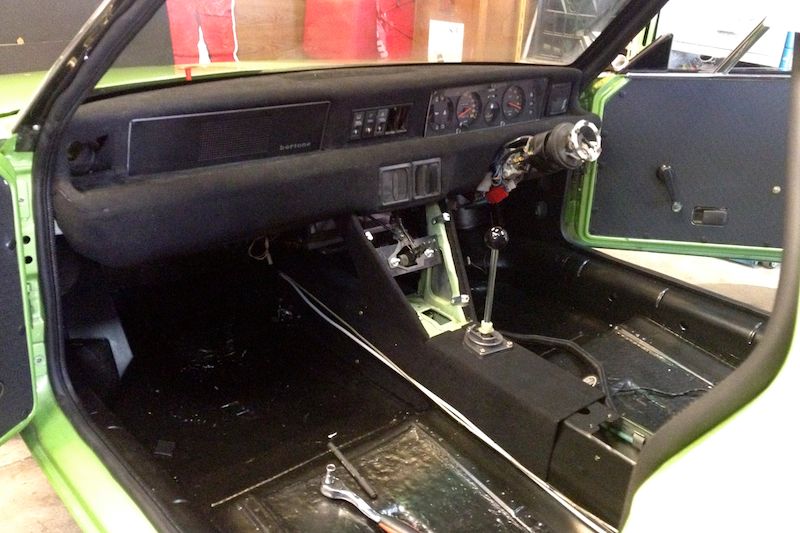
The only problem with the new driving position is that I simply couldn't operate the column stalks - my knees brushed them even when not in use. We looked into relocating the switches, but the solution in the end was devilishly simple, if extremely time consuming. Michael modified the stalks to clear my knees!

1500_10151418354825466_532121643_n_zpsfea812e8.jpg

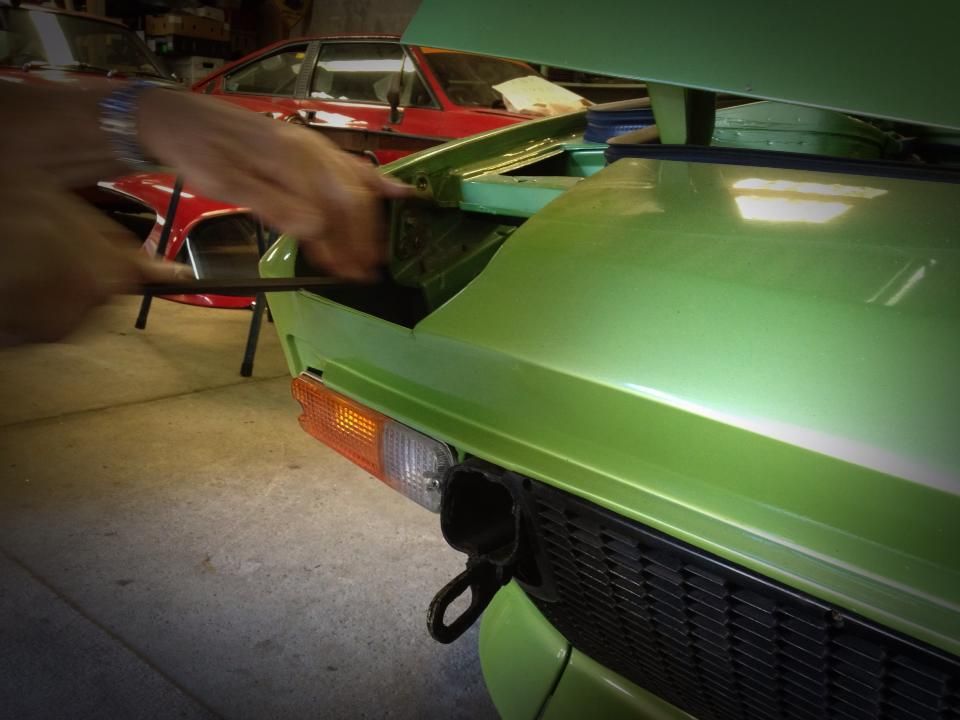
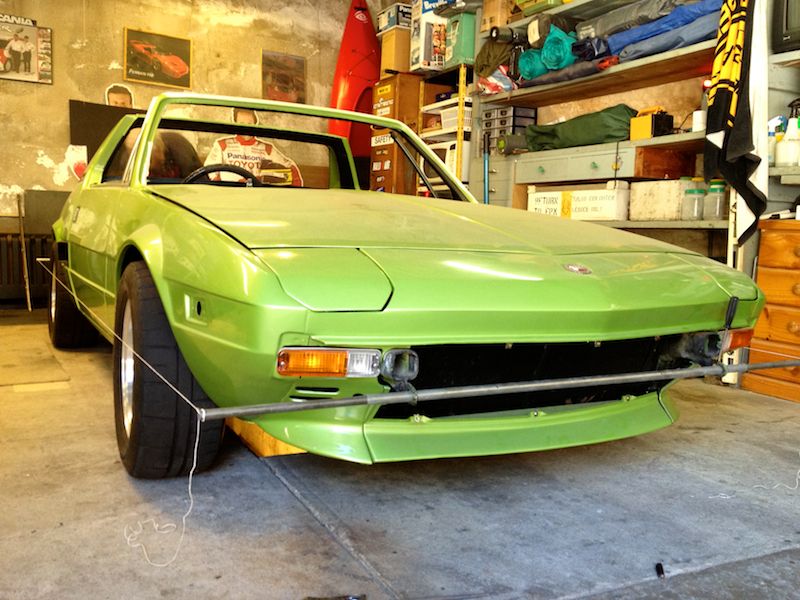
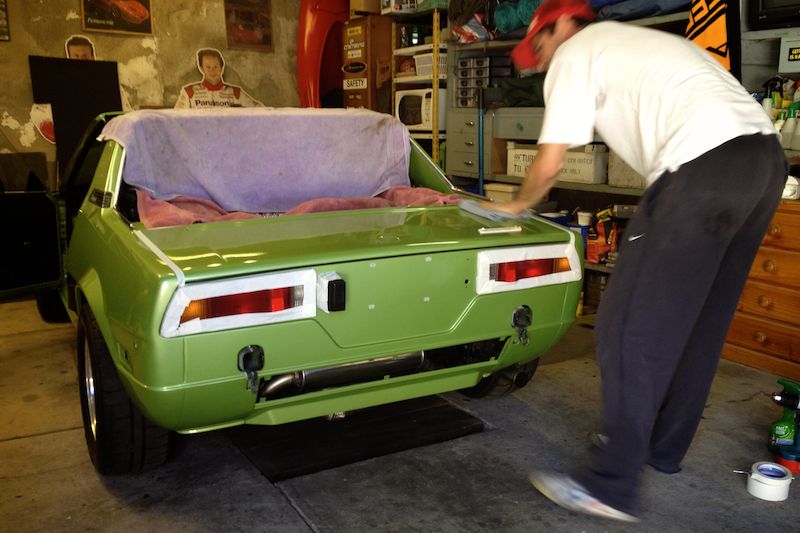
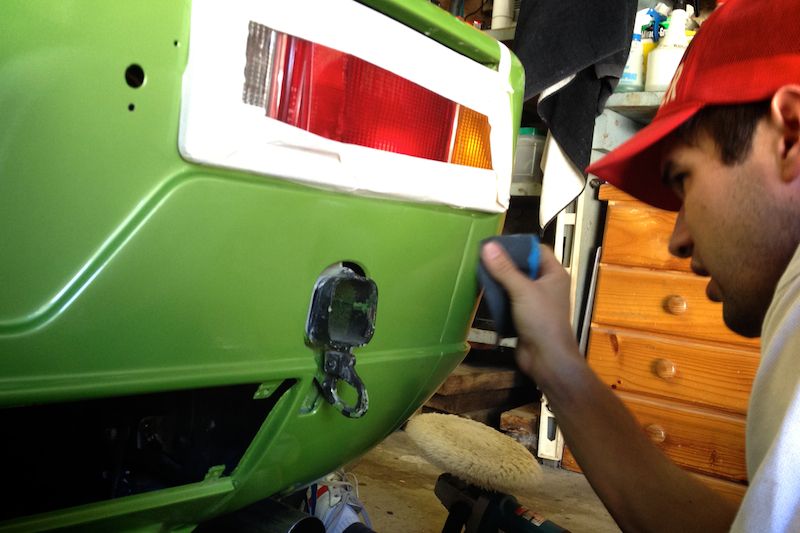
When the guys did the body I got them to weld up the holes under the headlights so I could go bumperless. Unfortunately we later discovered (after paint) that the headlights didn't quite fit anymore as the angles were slightly wrong. With some trepidation we attacked my new paint job with the files to make the headlights fit, which they now do perfectly. And what's more, we touched it up with a spray can of the correct colour and you can hardly tell if you don't know what you're looking for. I'll fix it properly one day, but this will do for now.

IMG_3053_zps1e785ff9.jpg

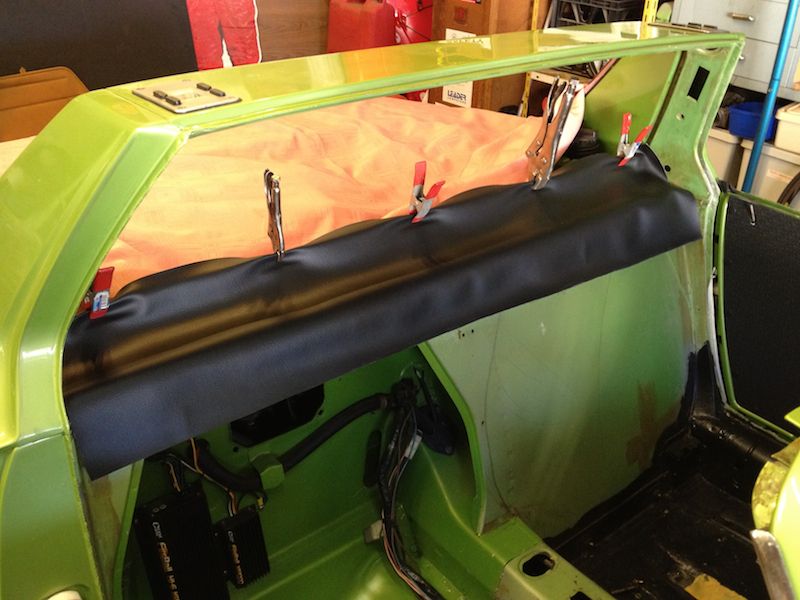
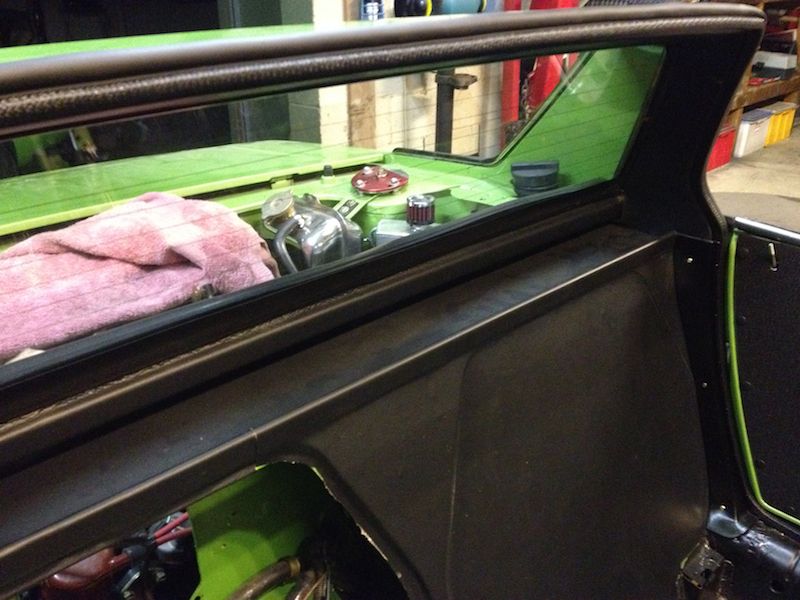
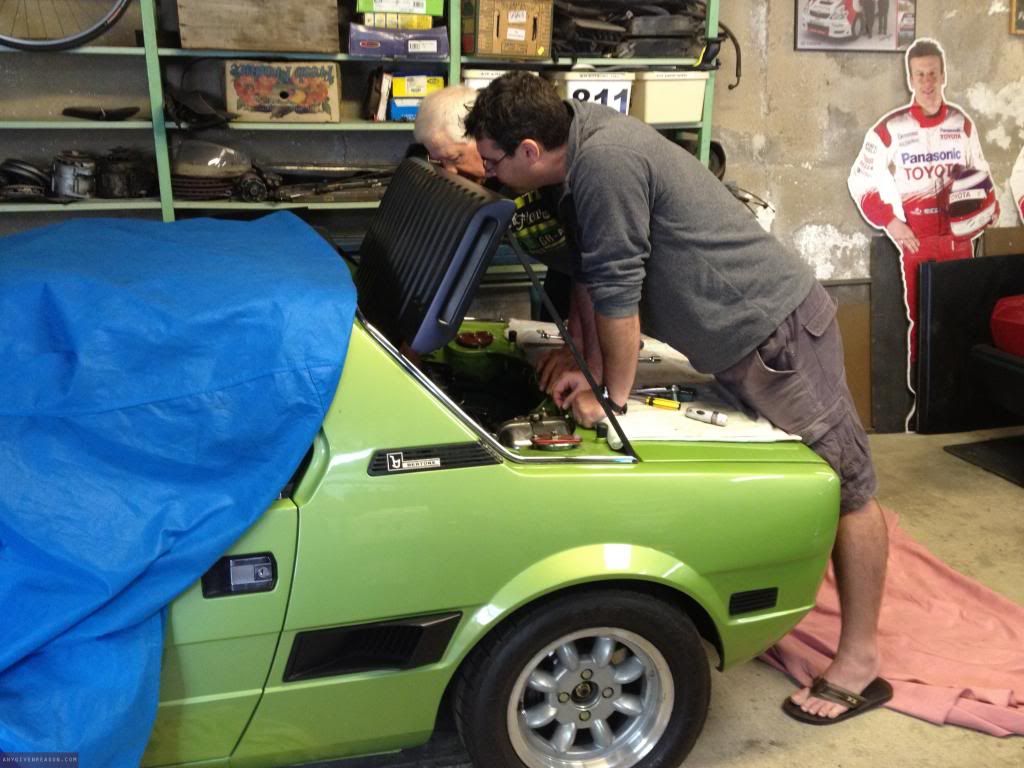
I decided to get busy on the interior, and taught myself how to trim with vinyl and spray glue. Tip for newbies - spray glue goes absolutely everywhere if you're not careful.

IMG_3184_zps6185c265.jpg

In the end I was pretty happy with how it turned out, not bad for a newbie although it did take a serious amount of time to do. The bits at the end were waaaaay better than my first bits and if I did it again it would be a much better job, but I guess that's always the case. I don't know how much a motor trimmer would charge for this, but all it cost me was about $100 in materials and two weekends.

IMG_3185_zpsbf421c44.jpg

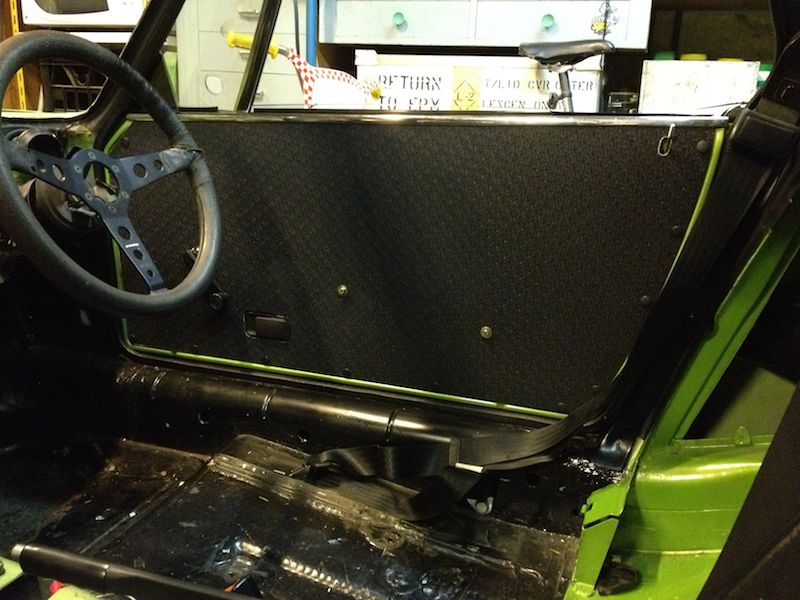
While I was at it I made some door cards. I'm going for a vintage racer look, and I think these fit the bill quite nicely. I'm just waiting on a leathersmith to finish making the pull handles out of old, worn leather - Magnus Walker style.

IMG_3182_zps02015cc8.jpg

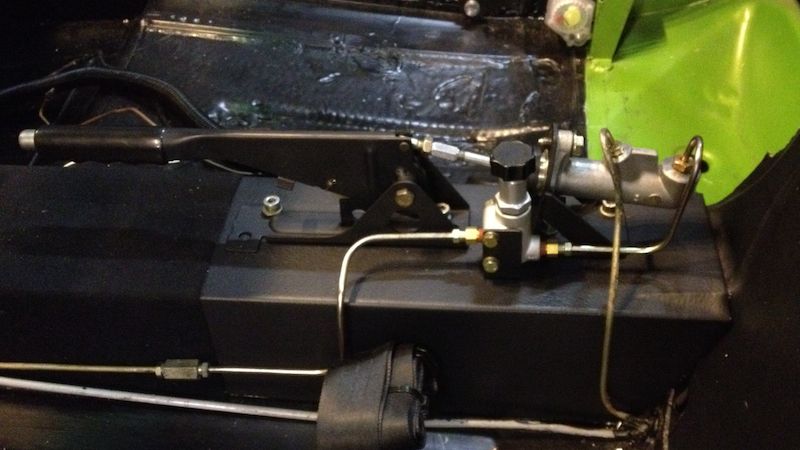
I'm running the Wilwood 4 piston calipers front and rear, which don't have a handbrake mechanism. The only way is to make a hydraulic setup, which will be fantastic for handbrake turns too. We modified an Alfa 33 handbrake cradle to actuate the cylinder, and also mounted the Wilwood bias valve here too. It's not plumbed up in this photo - waiting on some fittings I forgot to get. Once again this setup is more of Michael's handiwork - a full day in this alone. But the ones the race shops sell here are about $500, and this whole setup cost just under $150.

264047_10151455940495466_147197031_n_zps34847ac4.jpg

Last weekend it was time for the final checkover of everything mechanical to make sure it's all tight and that I didn't assemble anything incorrectly, which I did. But all fixed now!

IMG_3165_zps0a2b11b3.jpg

My Dad made up this wheel alignment setup so we could put a baseline setting through everything, until I get it properly checked. One day soon I'll need to learn how to do this properly from home - there's so much adjustment on these cars from the factory plus the G Force suspension I'm running, that it will get too expensive having to pay for an align every time we want to change something. I need to make friends with someone who owns a set of corner weight scales, too.

IMG_3172_zps61090882.jpg

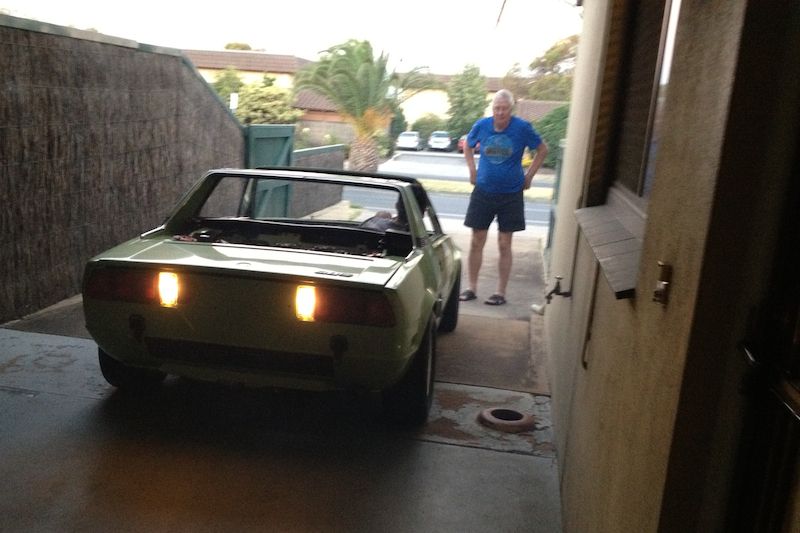
With everything checked and adjusted we did a couple of laps of our (very short) driveway, and it feels worlds different. I wanted to take it around the block but it still doesn't have a windscreen or a dash in it, and Dad convinced me that the cops probably wouldn't see the funny side if I got picked up. It would suck to have the car defected before it's even finished! But I can't wait for the first drive, I think it's going to be really good.

IMG_3164_zps03c5b692.jpg

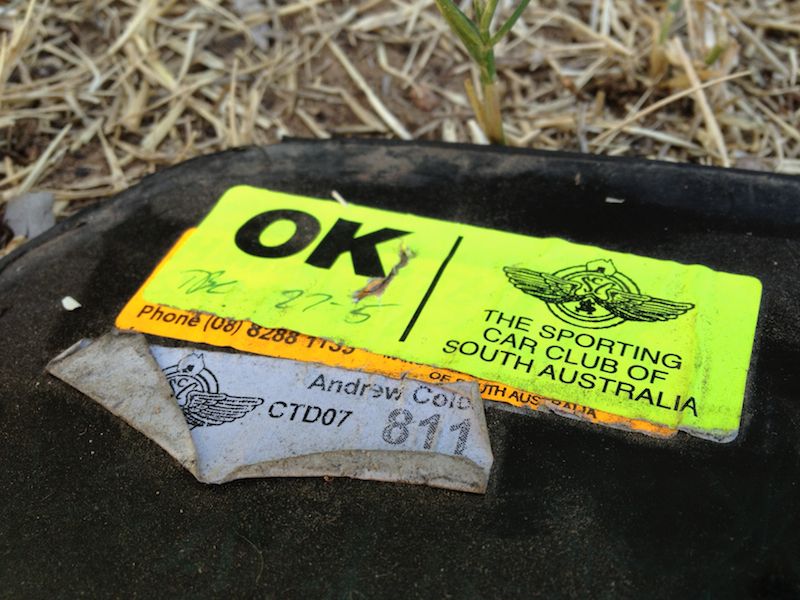
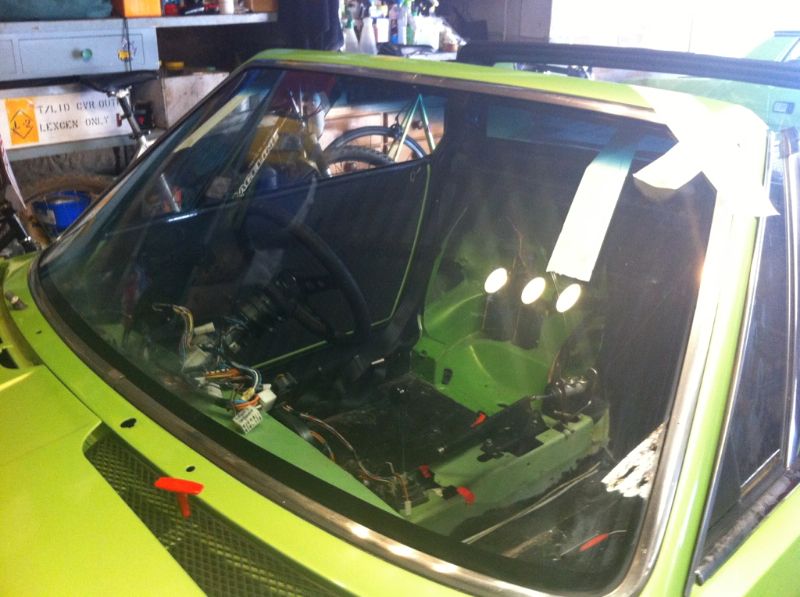
So I set about finding a windscreen, and found my old one with my old scruitineering stickers from about 6 years ago still stuck to it. This car was bog stock back then, and if I remember correctly, overheated on at least one of those track days. I'm getting the same windscreen put back in, so fingers crossed we can fill it with plenty more stickers in the future!

IMG_3187_zps7d638ae1.jpg

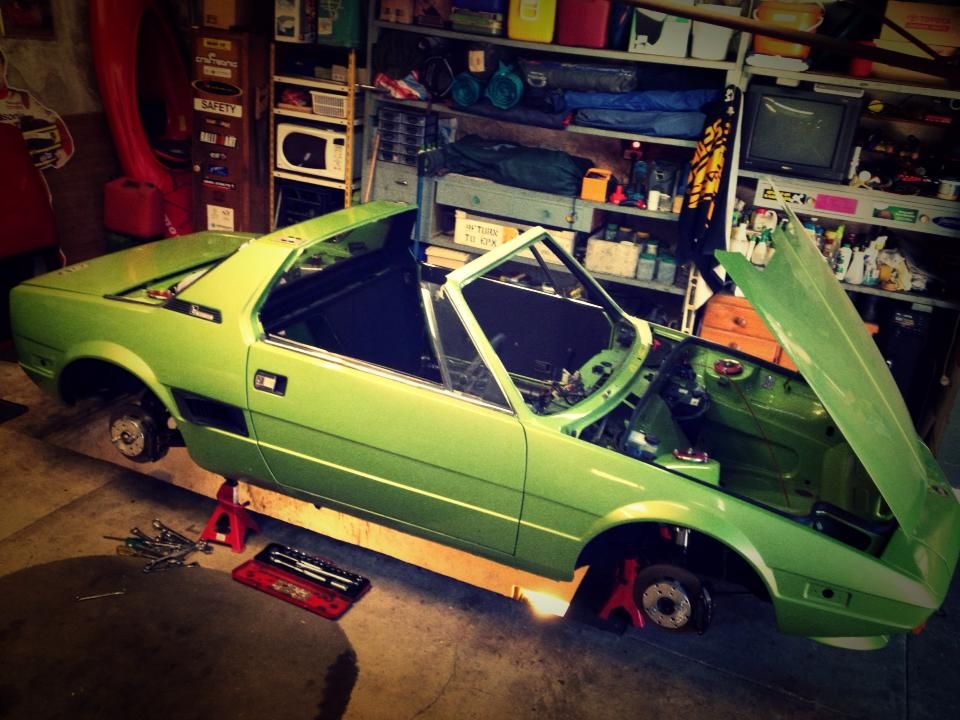
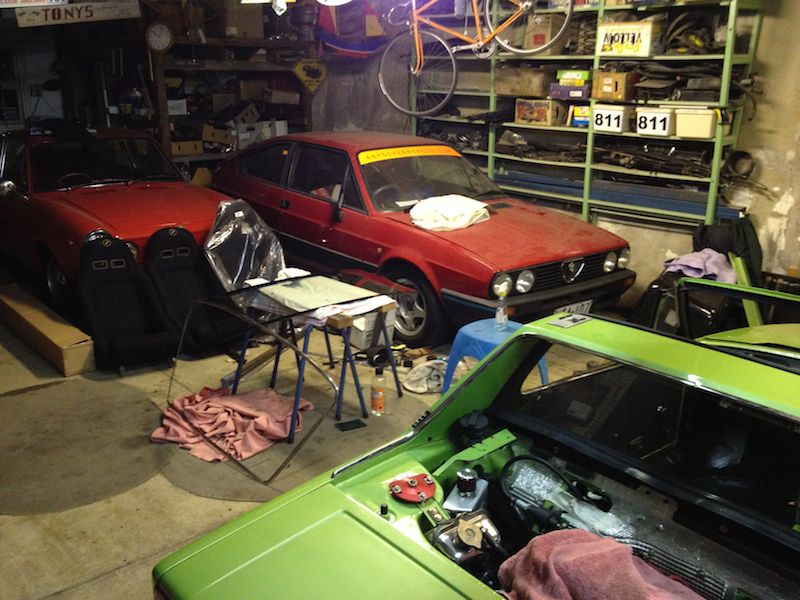
And this is where we sit at the moment - my X1/9 is nearly done, and my parts are slowly overtaking my poor Dad's shed. He's been really great through this, pretty much putting his projects on hold until my car is done.


DSC_0307_zpsa3ecdf1c.jpg

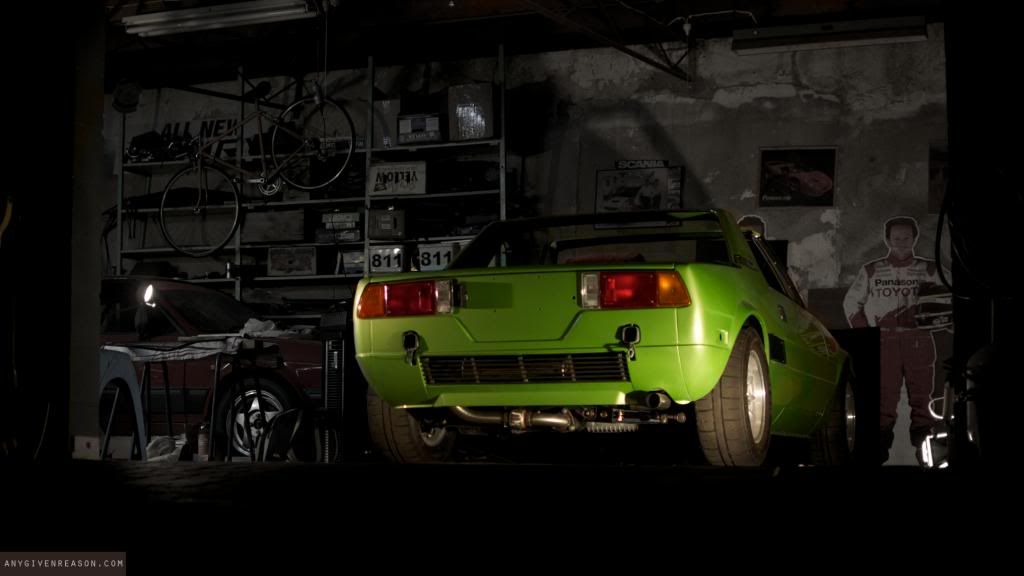
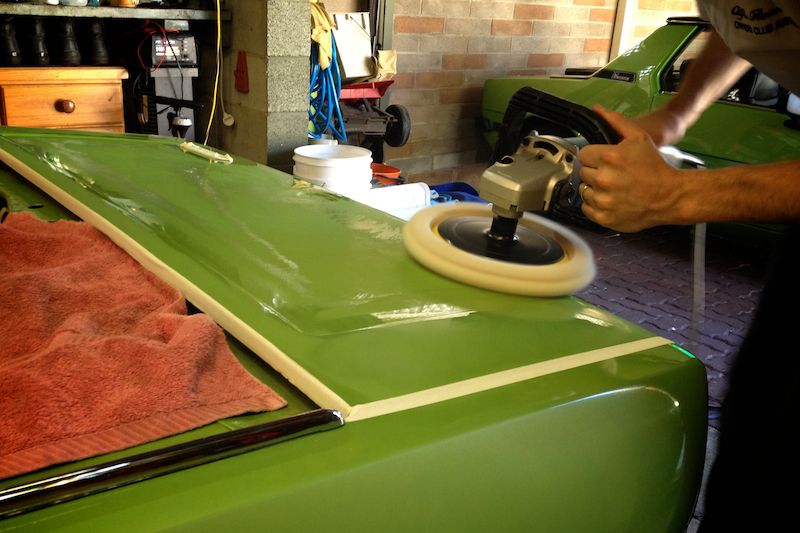
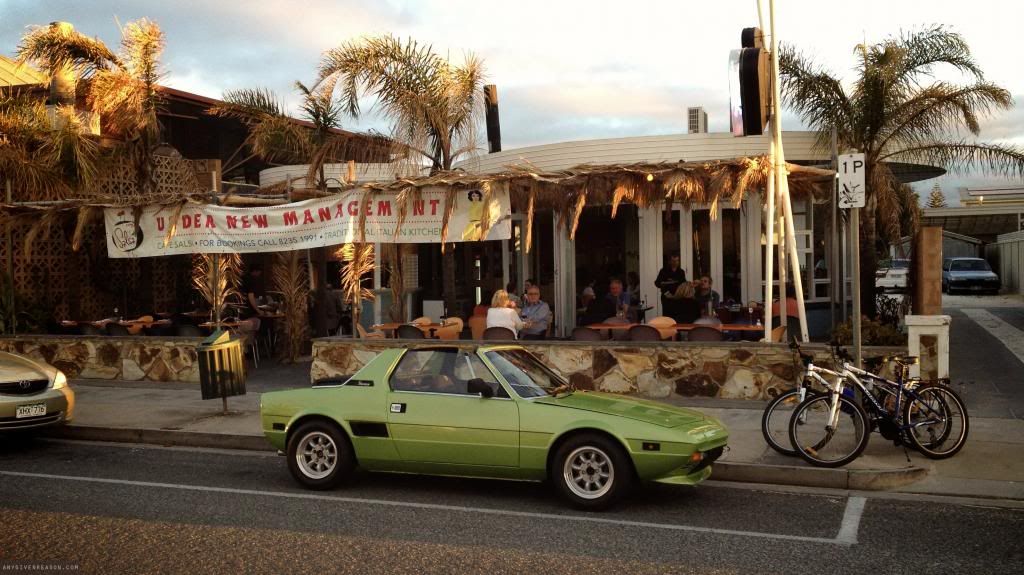
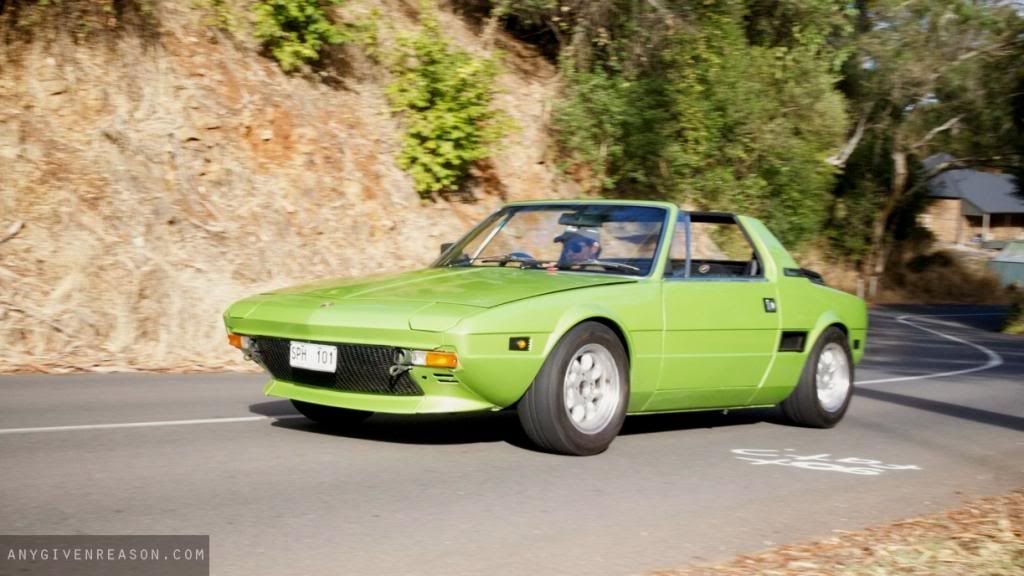
Okay, here's one proper photo to finish off with. Thanks for reading (if you haven't already dozed off!), and I'll make sure to keep this more regularly updated as we get in to actually driving the car and ironing the bugs out.

Cheers, Andrew
 
Brilliant, and inspiring. I was totally buzzing when the car started for the first time in the vimeo clip.

There are so many great things about the car, and for me the most impressive of the new batch of images is the hydraulic handbrake mechanism. Totally genius!

Please keep this updates coming. My exxie is currently under 6 inches of snow, which is not ideal. This spring, the big 1500 bumpers are coming off, some body work is to be done, and a NOS set of 1300 Euro bumpers are going on, if funds allow.

Best wishes,

Mickey
 
As always Andrew... Great work!

And horsepucky with the cops.

Most will understand if ya gotta take it for a spin when ya first get it running. Just don't take it any further than you are willing to walk!

HA!
 
Amazing!

Fantastic job there Andrew! I hope to have my car looking as good as yours soon.

Please keep up us supplied with updates!
 
Well, after spending 27 hours working on the X19 in the last 3 days (yay for Australia day public holiday!) and working from 530pm till midnight for the 4 nights before that, I finally have an oh-so-close to being finished X1/9 that I can just hop in and drive! Here's a quick run-down of the past week...

IMG_3216_zps42deb246.jpg

The first big hurdle was getting a windscreen put in - there would be no driving without it. A mate who's a mechanic at the local Range Rover/ Bentley/ Audi/ Aston Martin dealership put me on to Prestige Windscreens who came and put my old windscreen and chrome trim back on, and they did a brilliant job. I guess if they can work to Bentley standards, they'll be fine on the Fiat! None of the big chain companies I called were very keen at getting involved in what could be a messy job. Not only was the guy from Prestige very keen, but he charged me less than the other companies quoted, too.

IMG_3227_zps4ada2c38.jpg

Next job was to continue the interior trimming. I'm running a Series 1 dash in a series 2 shell, so none of the stock consoles would fit. But no probs - I made my own a few months ago out of sheet aluminium to follow the somewhat attractive lines of the stock chassis.

Note - from here on, all work described and photos taken took place from about 9am on Saturday morning until 7pm Monday night. We did pause to celebrate Australia day though in the only correct manner - drinking beer in a friends pool while listening to the Triple J Hottest 100 countdown took precedence over Fiat work on Saturday afternoon/evening/night/early Sunday morning :)

IMG_3256_zpse9c721e3.jpg

I didn't know what to do about fixing the Series 1 dash I had, and I wasn't terribly keen to pay the $800+ to get it professionally fixed. My friend Michael came to the rescue, and did a bang-up job trimming it in fabric - it looks stunning in real life. I decided to continue the theme, and trimmed the rest of the console in the same fabric for continuity. For a bit of contrast I trimmed the fascia plate in the same vinyl I used for pillars and inside the targa bar. There's a lot more hours invested in that interior than it looks!

IMG_3267_zpsda31e520.jpg

I sourced the last two brake flare screws needed, so Michael finished off his brilliant hydraulic handbrake/ brake bias valve install.

IMG_3280_zpsdee7a2c1.jpg

I modified my console to fit under the assembly, and trimmed it in vinyl in the hope that it may be a little bit tougher if any brake fluid is spilt on it than the fabric would be. I think it looks pretty hot, although I'll make a cover up for it so it is a little more subtle.

IMG_3245_zpsb66b7fe8.jpg

My buddy Luke came around to help me out with the paint work. It's never really been polished or buffed since it was sprayed, and it was covered in about 3 years worth of small scratches from dust and reassembly etc. Luke used to run his own detailing business where he'd mostly detail Ferrari's, BMW's and Lexus' etc, so he is more than qualified for what I need!

We started at about 2pm with a waterless wash to get rid of the layers of dust. Technology is great these days - I would have sworn that the car was dusty enough to need a full wash, but the Sonax waterless system took it all off.

IMG_3246_zps9c33653e.jpg

Luke then hit it with a hard cutting compound polish to really get in and get rid of the scratches.

IMG_3251_zpsec063b0d.jpg

Some areas were pretty bad, and others actually had a bit of overspray on them (it wasn't a huge $$$ concours paint job) so Luke attacked these bits with a very fine 1500grit sand paper.

IMG_3255_zps11f261ca.jpg

After he sanded an area, he went over it again with the polish to remove the sanding scratches.

IMG_3253_zpsc5ab91b4.jpg

Technology is brilliant - all the time we were working, we had the live stream of the Daytona 24 Hours going to keep us motivated!

IMG_3265_zps6ade4bc2.jpg

After this, we polished it again with a very fine polish to remove the swirl marks left by the previous polish. Luke applied it with the machine, and then I buffed it off by hand. The polish he used has no silicone in it so it's really hard to polish off - I know who had the easier job!

IMG_3270_zps8385b96a.jpg

And at about 11pm we were ready for the final step - a coat of Swissvax Mirage Carnauba Wax to seal the paint. This stuff has the most delicious mango scented smell to it - it tastes pretty awful though.

IMG_3286_zpsc778c231.jpg

I didn't get to bed until 230am last night. I slept in this morning and had a slow breakfast, knowing that I just needed to do a few little jobs and then I could take it for a drive!

And then wouldn't you know it - the skies opened up. It's January, it's the middle of summer, in Australia, and it was pissing with rain on the actual day and time I wanted to drive the X19. I was not a happy camper!

But luckily it only lasted an hour or so, and by the afternoon the roads had dried out.

DSC_0330_zps06772555.jpg

The very last part to go on before I drove it was the piece de' resistance, a mint condition, 1985 manufacture Momo Prototipo steering wheel. A friend found this for me on Yahoo Auctions Japan of all places, and it even came with a genuine Ferrari prancing horse horn button from the last car it was fitted to. I thought the Ferrari button would be a little over the top, so I chose a more subdued Momo button I found out the back.

DSC_0363_zpsb1c2bb9d.jpg

Michael came around to hang out for a bit and to come with me for a drive, and for some reason he decided to see if he could fit in the frunk.

DSC_0366_zps9b10051a.jpg

Which, oddly enough, he did quite easily.

But yea, back to the drive. Surprisingly it all went very well. We did a short 1km run up the road and back and then brought it into the workshop to give everything a good checkover. So far so good, so we hit the road again.

It felt absolutely amazing, and a little weird, to be driving this thing down the road. I haven't driven it for over 5 years, and I'd almost forgotten that it was actually a car, that could be driven. It took me a few minutes to settle in, and then after that I couldn't stop laughing.

The video does a better job of explaining:

http://www.youtube.com/watch?v=UkupQIzLE3o&feature=youtu.be
 
http://http://www.youtube.com/watch?v=UkupQIzLE3o&feature=youtu.be

I was worried that I wouldn't actually like it very much, but even now it's just the best thing to drive. The carbies sound just brilliant, and the engine has that free revving, blippy nature about it that I was chasing. I thought it would have zero torque too, but it's actually not that bad. It's reasonably quiet and civilised around town, but it does get very loud when you work it a bit - however my air filters haven't arrived yet, so the open carbies may have something to do with it :)

DSC_0339_zpsb37ab04d.jpg

Stopped at the servo for the first tank of fuel.

The ride is also a lot better than I was expecting. I'm running the G-Force coilover setup, and I was worried that it was going to be unbearably stiff on the road. It's no Camry, that's for sure, but it's not bone jarring either.

There's still a host of teething problems to iron out. The brakes are super super spongy so I'll need to spend a lot more time bleeding them, and the advance mechanism isn't working in the distributor at all, so the timing is probably wrong and it just dies at 5000rpm - probably too retarded.

That, and the list of the other hundred or so things that need doing/putting back on!

DSC_0346_zps8ff4ce48.jpg

The first drive wasn't without its problems, and Dad and I did break down. But what a lovely place to break down at!

Turns out we just forgot to tighten the bolt holding the distributor in place. It stayed put for about 15km, but then it moved and the engine suddenly died. Only problem was we forgot to bring any tools with us - luckily my lovely Mum drove us out the spanners we needed :)

DSC_0347_zps185dabfd.jpg

At least it gave us some time to take photos and look at the car sitting in the natural afternoon sunlight for the first time in several years!

Unfortunately it is far from finished - there's a whole list of things that still need doing. I'm aiming to have the car finished for an event next Sunday, so it's going to be a busy week!
 
Nice Write-up Andrew

One of these days I'd love to meet you and see your project close-up.
All I need is a business trip down-under. :) :headbang:
 
Looking great!

It's nice to read along. I like the dark, soft-looking interior details. They will help with interior noise too.
 
Great report!

Keep going like that!

Can we see a pic of you in the seat?
I always found that a very reclined seat made for too little leg room.
How do you fit in there now? Are your knees on either side of the steering wheel?
 
Thanks for the kind comments and feedback everyone!

bbrown - for sure, send me an email if you're ever in Oz! There's a chance I might be in the States before the end of the year so I'll definetely put the call out if I come, but sadly I won't have my X with me :(

Ulix - will upload a photo soon. It looks all wrong before you get in the car, but in actuality the car now fits me like a glove, it's perfect. I think the Momo boss spaces the wheel back toward the driver which helps, it's also a smaller wheel than standard. The wheel could still be a bit closer to me, so in the future I might investigate machining a spacer - but having it any closer would make ingress/egress a challenge, so maybe I might look into a quick release boss. We had to modify the indicator and light stalk switches as these simply couldn't be used in this seating position. It's tight, but it works for a 6'2" driver which is the main thing :)

Fiatpwr - We've got the Redline sealing just fine now after we fixed the gaskets and mating surfaces. X1/9's require a non EP oil which was extremely challenging to find. The Redline delivers the performance of an EP oil but without the additives, and improves the shift feel beyond belief :)
 
Amen to that Andrew...

Regarding the Redline fluid...

As far as leaking goes... in my old trans it STOPPED leaking after I added Redline! HA!

Great work and journal as well... and do let us know if ya ever hit the LEFT COAST...
 
Sorry for the long time to reply, there's a been a lot going on. I'll take it from where we left off...

28_zps9d6e0faf.jpg

So we'd just spent the following week finishing all the little jobs like installing the ITG air filter and a lot of little interior and trim pieces and catches. My deadline for the car was the Fiat and Alfa club Sunday morning breakfast run, on the first Sunday in February. It was a big ask to go on such a long drive so soon, but I'm a little bit stubborn sometimes, I'd set this event as the deadline and the X1/9 was going to be there come hell or high water!

We had it pretty much ready by 530pm the Saturday night before, so my girlfriend and I took it to dinner at this awesome little Italian restaurant just down the beach from our place. We got a park right out the front, and I couldn't take my eyes off the X1/9!

30_zps585b0ea8.jpg

I had a lucky Budda beer as a good omen to a successful first drive!

32_zps40f92bbe.jpg

That night at dinner I decided that the car really needed to be lower, so I got up at 5am on the Sunday and set about lowering it. I really can't begin to describe the feeling as I drove it into the meeting point. We were running a little bit late, and it actually got a round of applause from the gathered crowd! I don't think any of them thought we'd make the deadline!

34_zps1e47e7b8.jpg

I had mixed emotions about driving it. On the one hand I was incredibly excited to finally be behind the wheel after five long years of work, but on the other hand I was incredibly nervous that something would break or go wrong. It was fun, but it wasn't relaxing.

35_zps41617169.jpg

Although it was a pretty special moment to be following Dad in his green X1/9 up Montacute Road.

37_zps8a791c94.jpg

My awesome mates even drove ahead so they could stop and get some photos for me. We of course weren't even going close to pushing, but initial impressions were good. With the G-Force suspension it cornered dead flat, and I think it's going to be quite the weapon in the tight stuff when it's properly sorted.

39_zps53c1bd19.jpg

It made the breakfast end point, but it was suffering from detonation and getting worse. I thought I could limp it home, but eventually on the way home it got so bad that we had to pull over. Luckily I was rolling with an entourage of experts who know a lot more than I do!

42_zps0565db31.jpg

I thought it was timing related, but the fact that it was progressively getting worse ruled that out. Carbie float levels were out next suspicion, so we pulled the carbies apart and checked them on the side of the road.

41_zps96a76c6a.jpg

They were out, but weren't causing the problem. We limped a little further, when we thought it might be a problem with the distributor (I was running a bodged together stopgap points dizzy). We found the end play in the distributor to be too much and possibly causing trouble, so our good friend Peter Taylor drove back to his house to get a spare dizzy, which sadly did nothing. The plugs were black, so we put a new set of plugs in, but sadly that also did nothing.

44_zps5a41156a.jpg

After spending 5 hours on the side of the road trying to fix the damn thing, we had no idea what the problem was so we gave up. We were still more than 70km from home, so Peter very kindly went and got his trailer and towed it back to our house. What a great mate.

43_zps70fc8b57.jpg

Even though mine is broken down, it still looked good parked next to Dad's!

48_zpsb1df1393.jpg

For 6 weeks in Feb/March I took a second job at the Adelaide Fringe Festival, so while I was busy working 80 hour week's Dad kindly looked into the problem for me. He found a few things wrong:

- The Fel-pro head gasket was very badly blown between two cylinders. Matt at Midwest reckons he's stopped using them because he had a bad batch that kept blowing like ours did. So maybe it was a defective part, or maybe the detonation contributed to it.

- We had mistakenly used the wrong cam wheel for this engine, so whilst it timed up perfectly on the timing light, the timing was probably actually out. A very easy mistake when you have a collection of spare cam wheels!

- Ed in California shipped us a proper Bosch electronic distributor (thanks for the awesome help Ed!), so we rebuilt that and converted the car back to proper electronic ignition.

- On advice received, we reverted back to a good quality stock head gasket.

Dad had the car running again for me perfectly, and it went better than ever! The only issue was that it now sounded a little tappetty, but the valve clearances were all tight. We couldn't figure it out.

I'm heading off overseas for several months soon, so the MSCA Supersprint on March 24 would be my only chance to use the X19 on the track, which was the real purpose for doing all this work anyway. But before we thrashed it on the track, I wanted to get it properly dyno tuned to make sure the timing was spot on and the carbies were tuned correctly. So on the Monday before the event, I booked it in to Mike Dale Automotive for a dyno tune session. Mike has huge experience in building and tuning rally winning Ford Escorts, both of the Pinto and Cosworth variety, so he was more than qualified for my X1/9.

46_zpsf0bf86f3.jpg

It was going really well, right up until the point it stopped going well. We did a couple of pull's with the rev limiter set at 5,000rpm, and then we increased the rev limit to 7,000rpm, and it sounded pretty freakin' wild. At about 6,800rpm the alternator fan blades spun out and made contact with the fan belt pulley, sending a shower of sparks up. We shut the engine down, and as it was stopping we heard a 'pop'. We didn't know what it was, but Mike said that something mechanical inside the head had let go, and sadly our day was over.

47_zps1da4b95c.jpg

So for the second time, the X1/9 came home on the back of a tow truck. I was really disappointed to be honest, after so much work we were so close and it was snatched away at the last moment.

49_zps27a5e505.jpg

We left it for a week or so while I helped Dad install a new diff in his Alfa Sprint. Last weekend (on Good Friday, no less), we started to investigate, and a smashed valve cover was the first thing we found. Hmm...

50_zpsfb2a62a6.jpg

Taking the cover off, there was a loose valve shim floating around, and one of the valves was jammed open. Closer inspection reveled that 2 valves are bent, the camshaft has gouge marks in it, and 2 of the pistons have marks. Luckily not catastrophic, but still not ideal.

51_zps655d8887.jpg

The problem was that the valves and pistons were hitting, as the clearance was not enough. Further investigation revealed that the stock head gasket is 0.3mm thinner than the Fel-pro gasket, so the tappetty noise I heard was most likely the piston and valve just slightly hitting - it's a wonder it lasted the 300km before it let go!

My personal opinion is that the use of the stock head gasket was the cause, however I'm a little annoyed at the engine builder because the clearance between valve and piston must have been stuff all, when he really should have left a greater clearance. I only got an engine builder to build it because the Wiseco pistons actually come up into the head a little bit, and I didn't feel confident measuring it myself, but given this episode I think we'll just do it ourselves from now on.

But the real sad part is that I've missed the boat in terms of driving and enjoying this car after all the work we've done. Before I settle down with a house and family and all that crap, in 7 weeks I'm quitting my job and heading overseas to travel in Europe and the US for probably 8-12 months. At this late stage I can't really justify spending any more money on the X (saving for the trip and finishing the X at the same time was a massive stretch, and I don't want to jeopardize the once in a lifetime travel opportunity by not having enough money), so more than likely it's going to sit under a car cover in the shed for the next year or so until I get back and have the energy to keep going with it. A little disappointing, but it's not going anywhere and it will always be waiting for me when I get back.

But then again, I've told Dad that if he can get it running he's more than welcome to use it while I'm gone, so I'm half expecting that it might see some daylight sometime soon...

Thanks for reading guys, it's been one hell of an adventure! And hopefully it isn't over yet :)
 
Back
Top