Clark
True Classic
She arrived by car dolly yesterday afternoon. We had to go to a wedding in about an hour so she was parked in the garage for our first get together the next day.

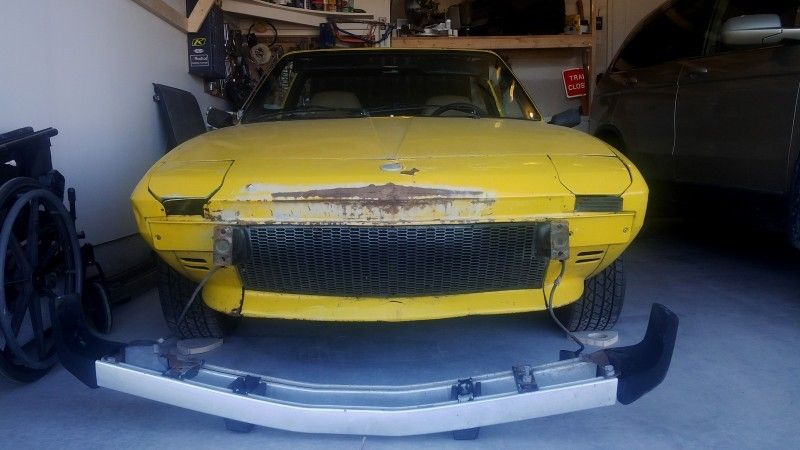
The first thing that I did this morning was remove her braces. She had been wearing them long enough!
A much nicer smile now!
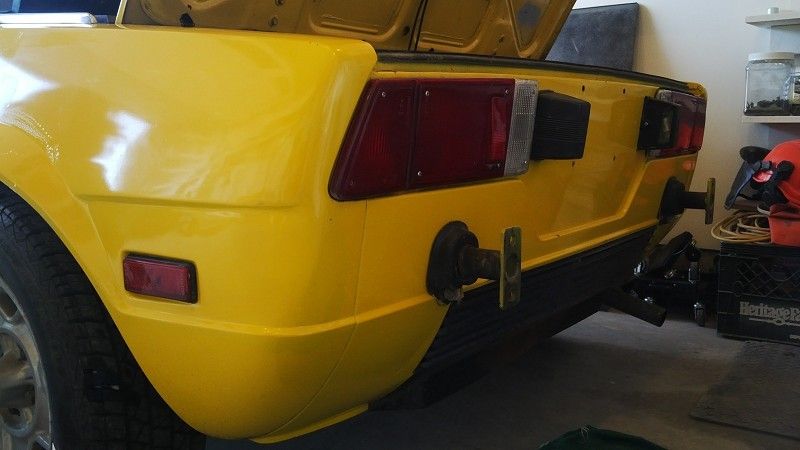
Her back end needed a little help as well.
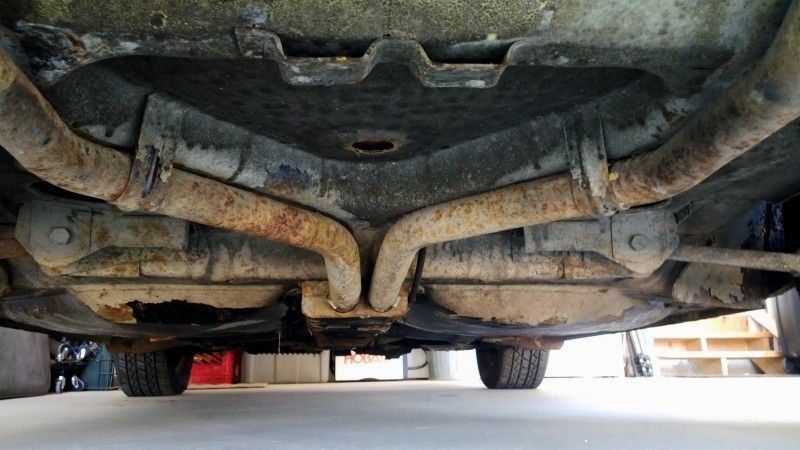
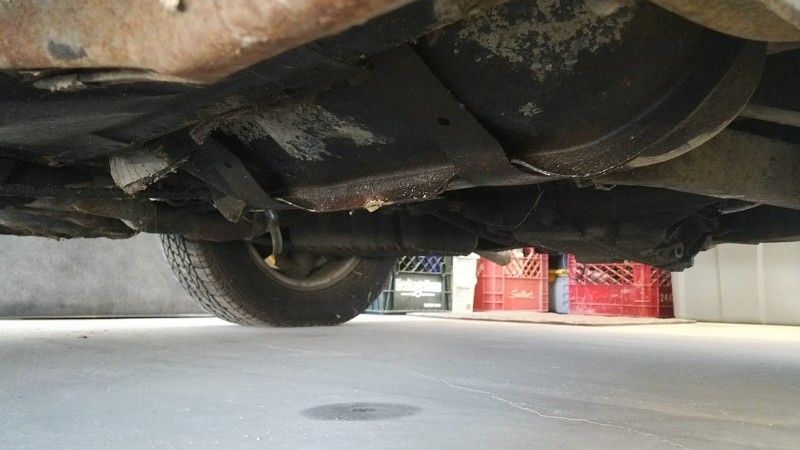
I was surprised at how the years had been so good to her. I was expecting more rust underneath to be honest. There was nothing punky under there at all. Good and strong from what I could tell.
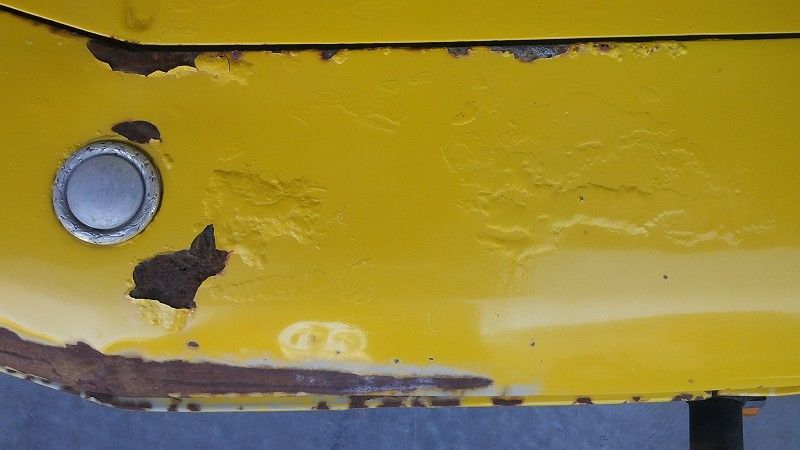
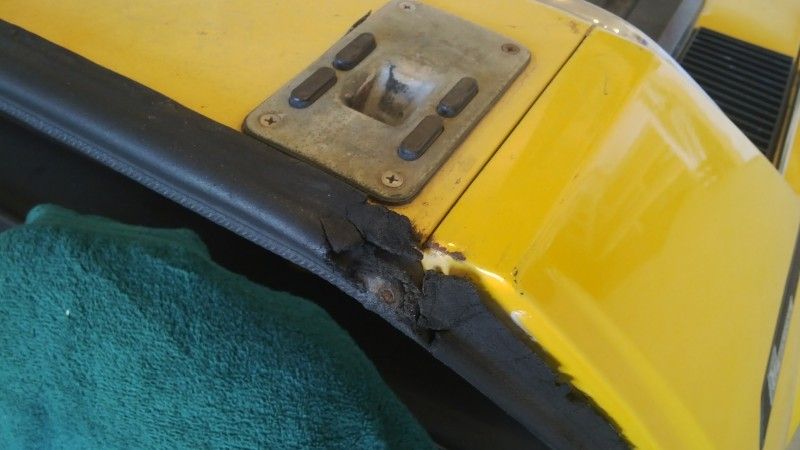
There must have been at least one fender bender in her past and the patching up she received was not the greatest. This is the passenger front. The welding is absolutely hideous. My dog could weld better than that. This will need to be addressed but shouldn't be too difficult.
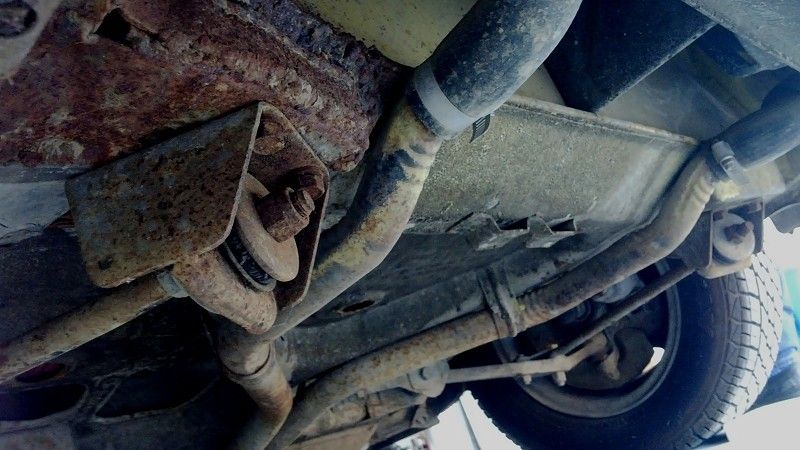
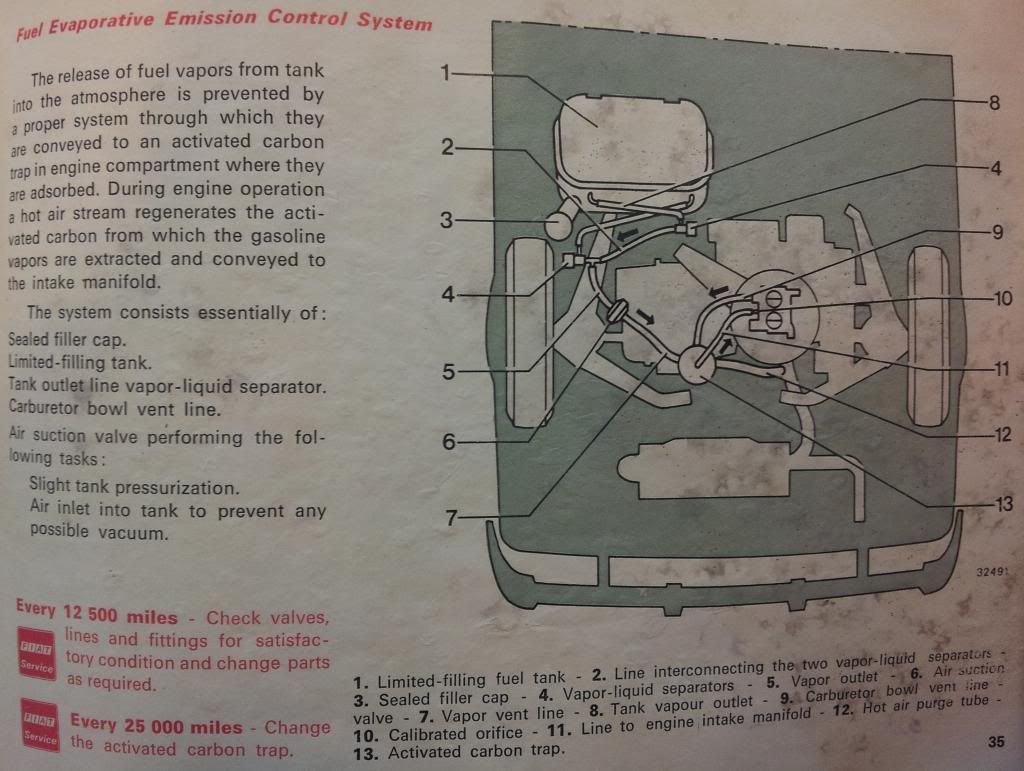
And it looks like maybe the gas tank is leaking a bit. I will check on that in more detail later. It seems to be a very slow drip.
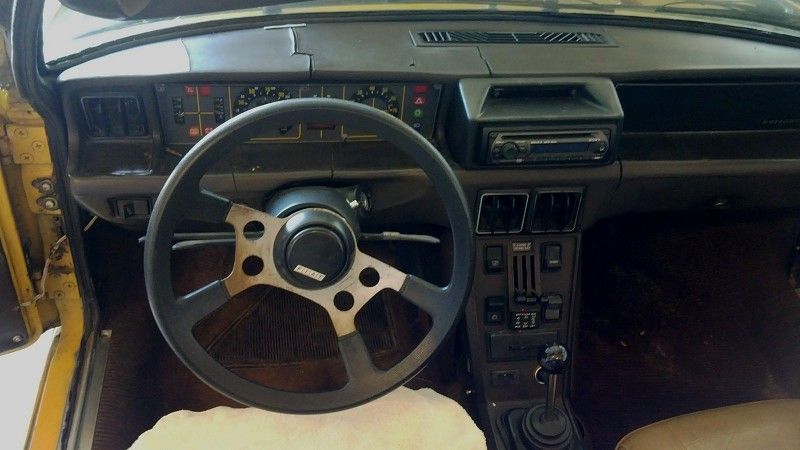
The dash has a few cracks
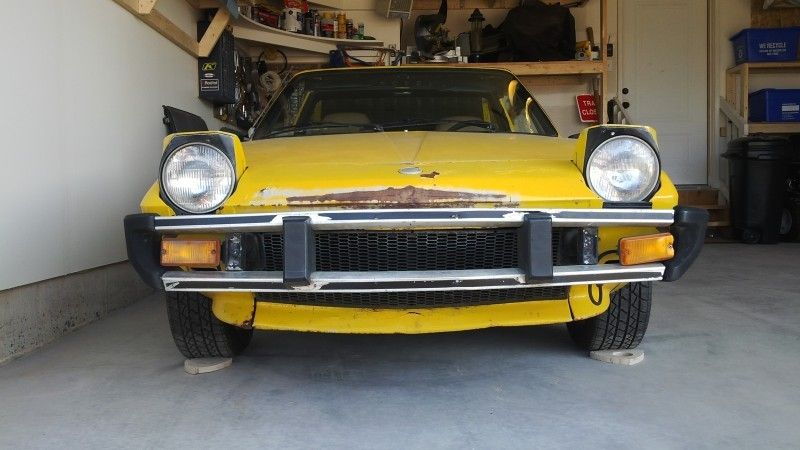
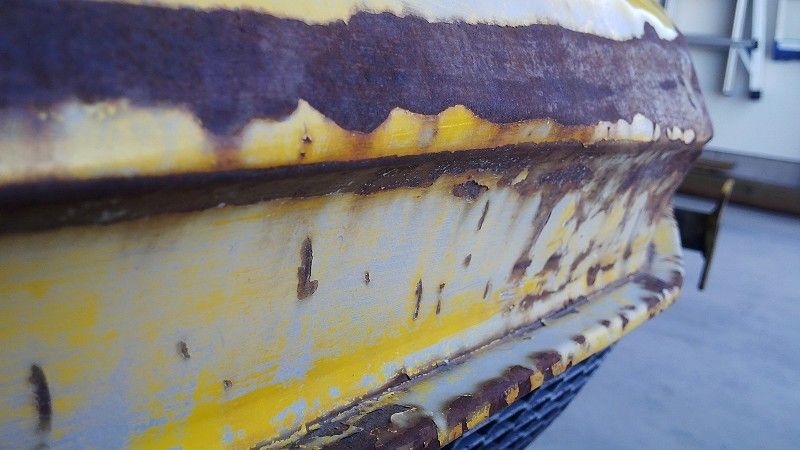
What you notice first and foremost is the state of the nose area... That will require a bit of attention.
Looks like there was a bit of a fender bender there too. The bumper pushed back far enough to dent the front passenger clip.
The latch for the boot has snapped a cable....
The passenger side door handle is broken on the inside...
There is a bit of rubber requires a refresh
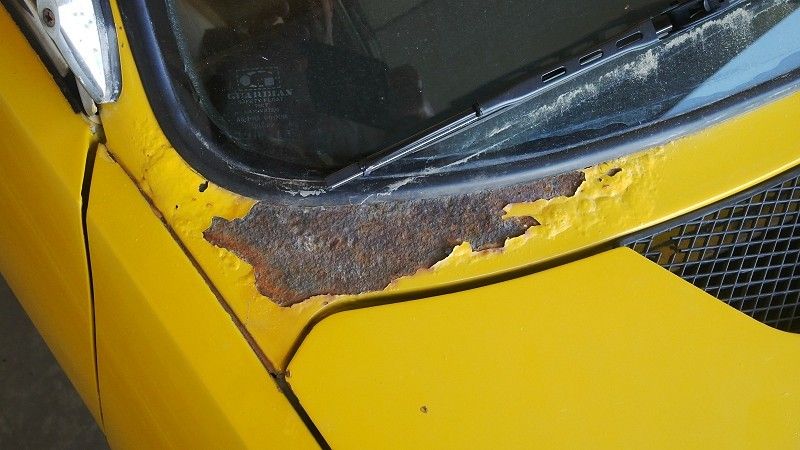
And there's a bit of surface rust around the front window screen.
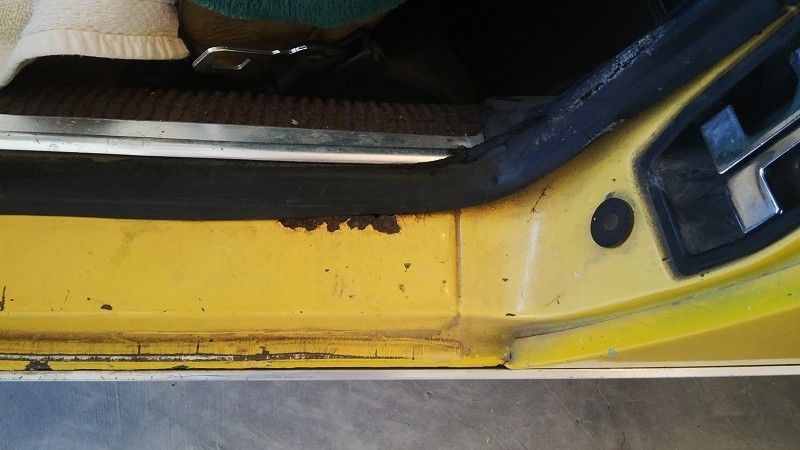
There is a pinhole in the drivers side door entrance...
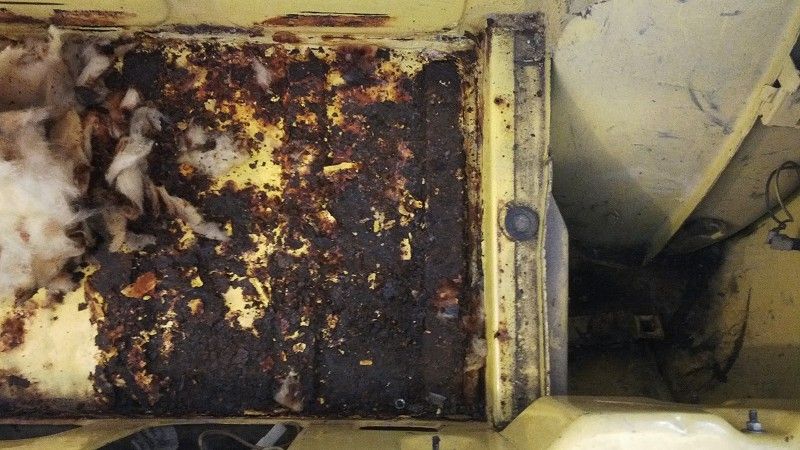
The floor of the boot was very wet and mostly rusted through above the exhaust. That's just about the extent of the rust though. Like I said before I am quite pleased that a 1976 car from Canada that hasn't been treated all that well would remain as good as this. Even the wheel wells look good. It shouldn't be too difficult to fix these up.
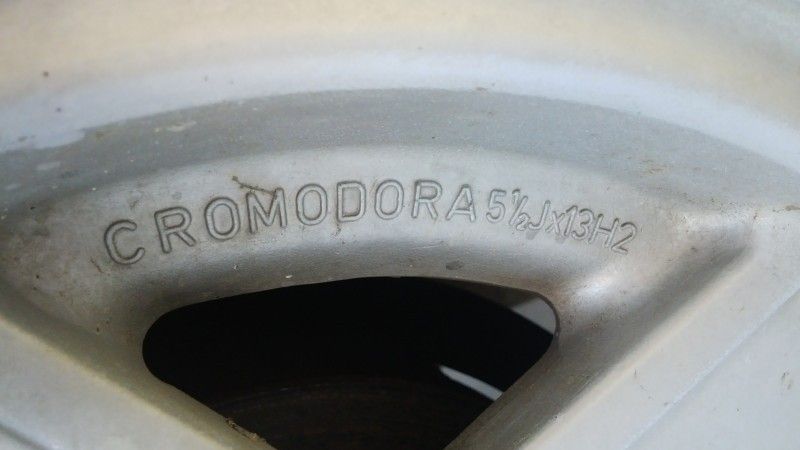
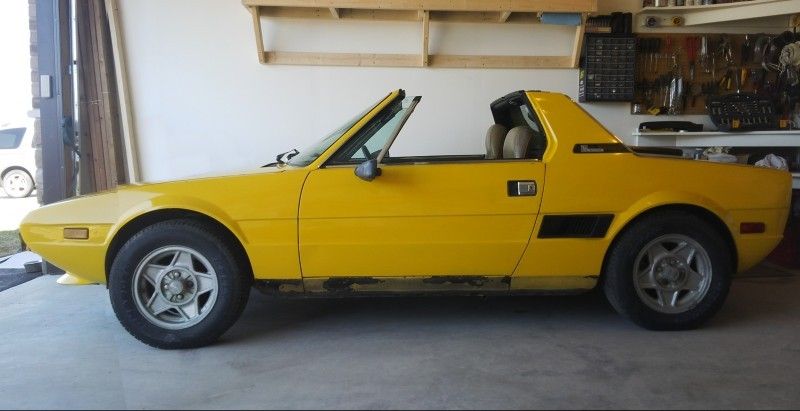
Have I mentioned how much I love the rims? Yeah - they are nice
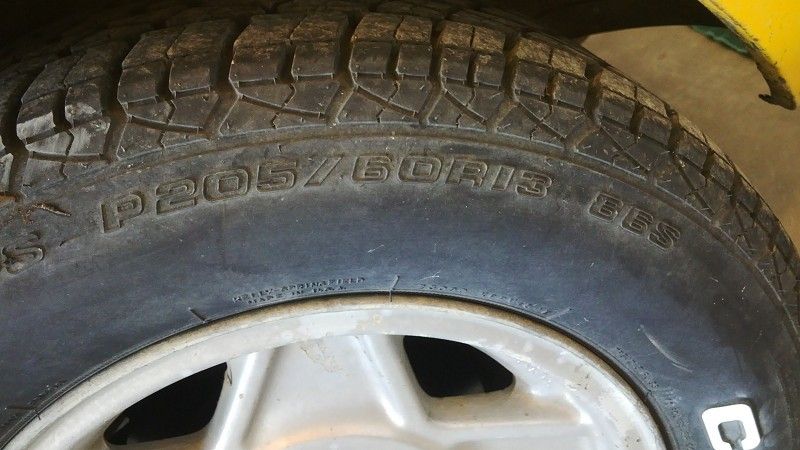
The front and rear tires are the same size at 205 /60 R13. From what I understand this may not be the best for the front. It tends to sit a bit high in the front as it is so I think I may go smaller there in the future.
Now on to a few questions if I may.
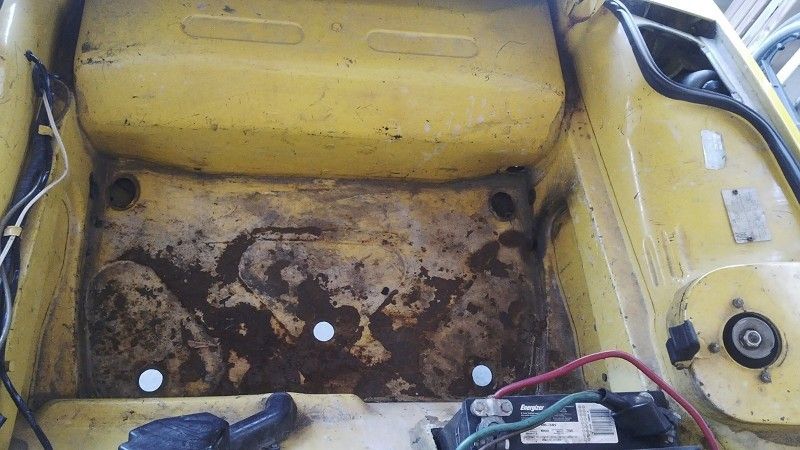
1) I noticed that the front trunk area has a few holes in it. Are there supposed to be plugs in there?
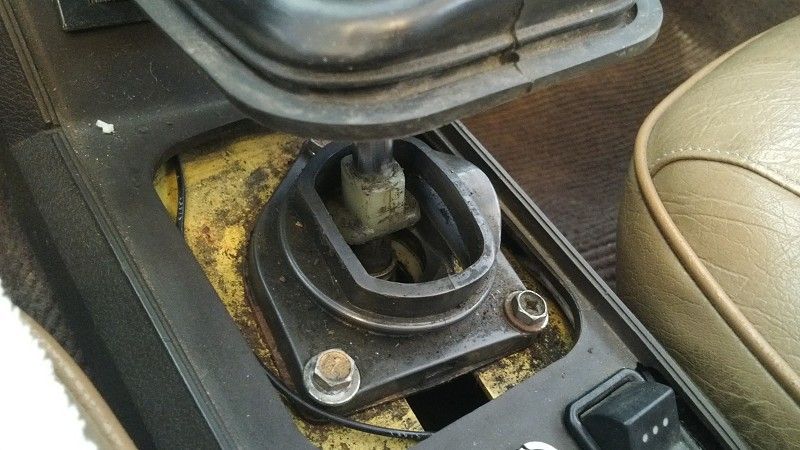
2) Is there supposed to be some mechanism to stop the stick from flopping around? I can pull up on the stick and practically put it in my lap!!!
3) Does anyone have any idea what this power resistor (?) in the front trunk is for? Is this a previous owner disease?

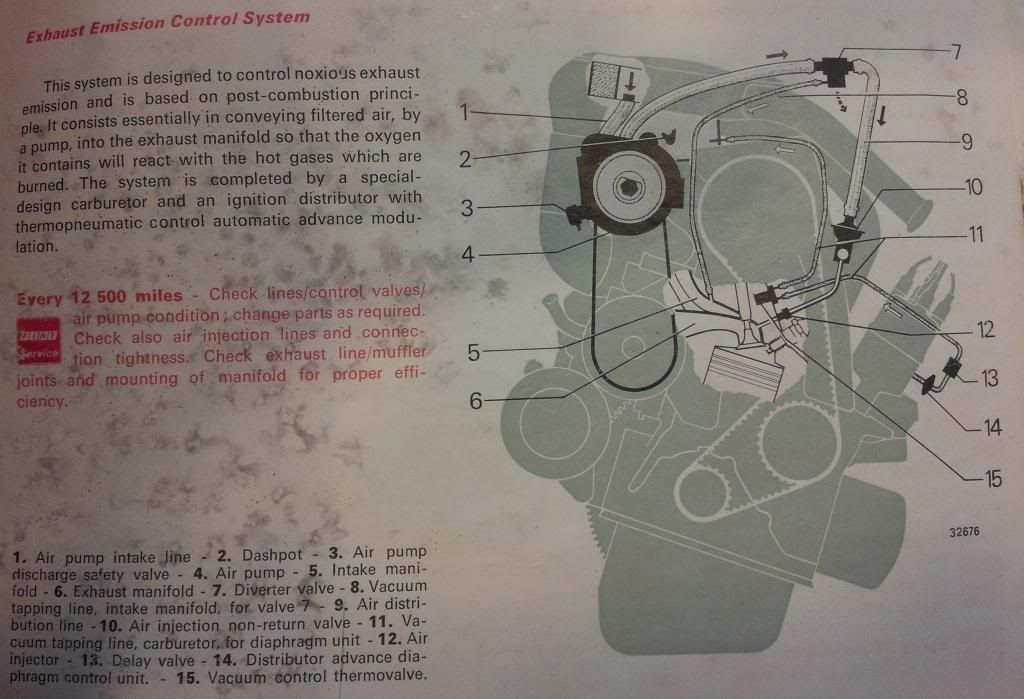
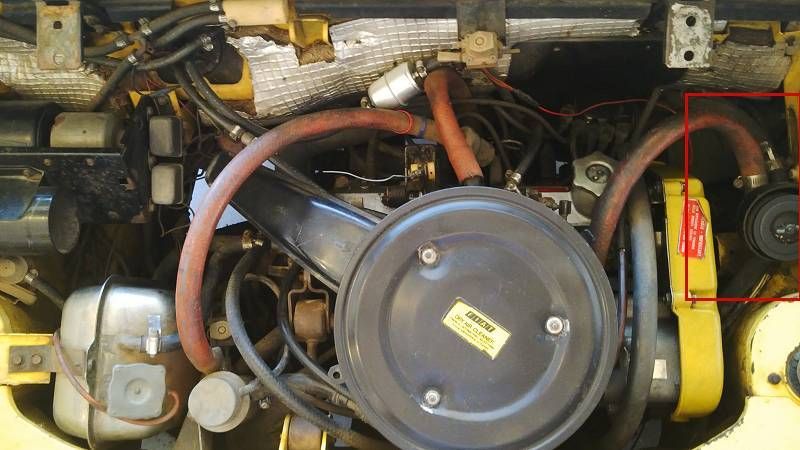
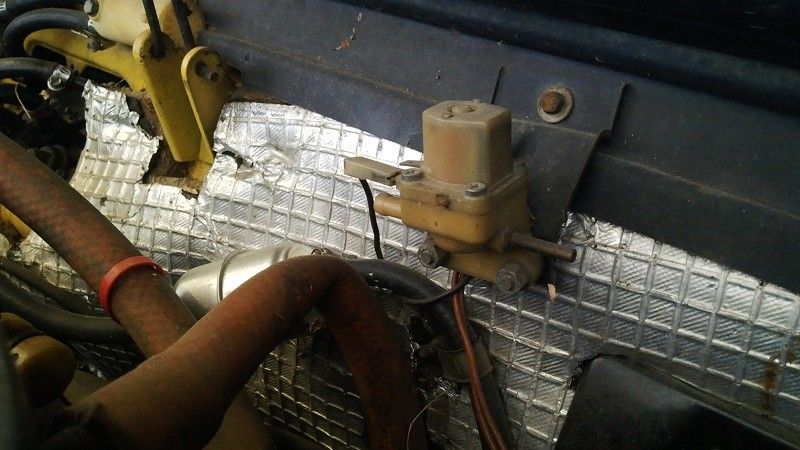
4) How about this little doo-hickey in the engine bay that is attached to nothing at all?
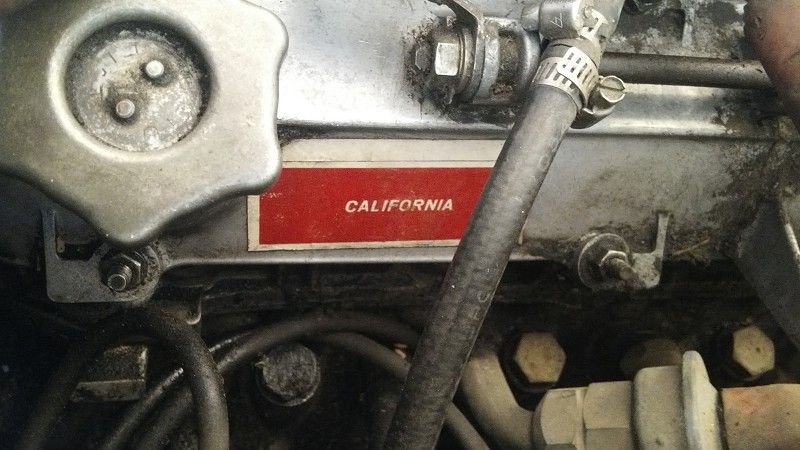
5) I bought this car from Alberta Canada but there is a sticker on the engine that says California? What gives?
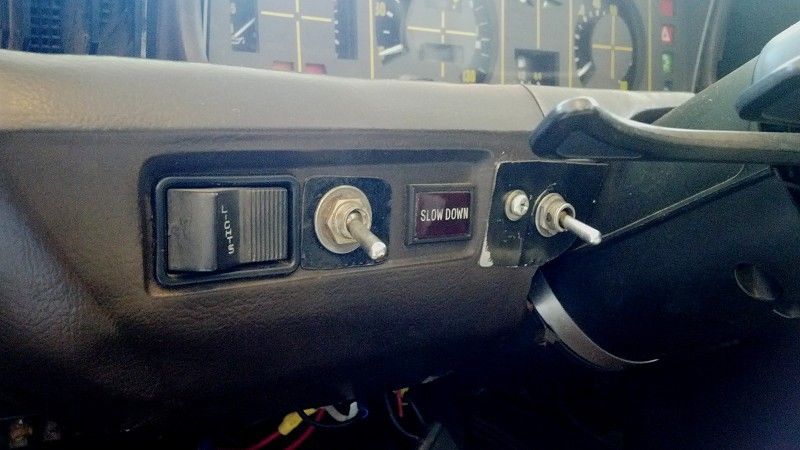
Of course no used car would be complete without a few extra toggle switches added for the users enjoyment.....
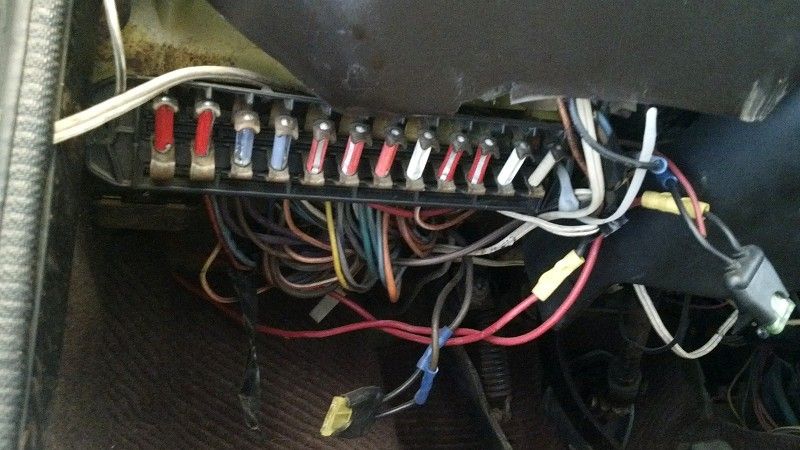
And why just have a fuse block when you can have some spaghetti along with it?
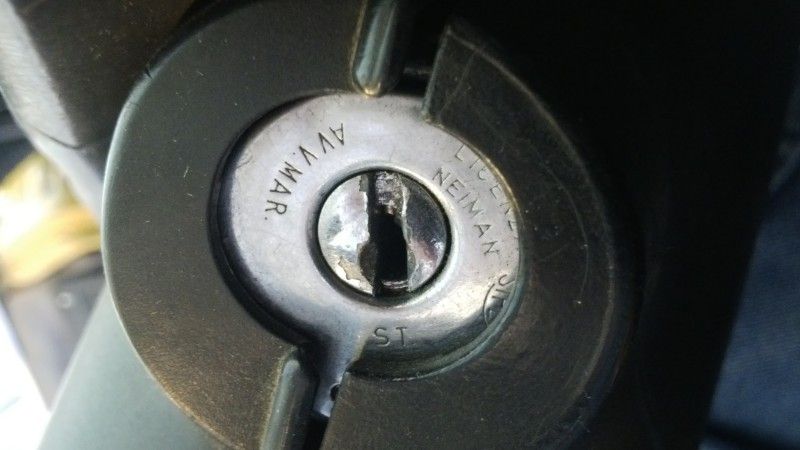
I need to find a new ignition switch and key thanks to the car haulers - now that they have snapped the only known key and threw the remaining bit who knows where!!!!!
All that being said, my new girl cleaned up pretty good by the end of our first date, and hopefully there will be many more to come. We have already been talking about getting together next week to buy her a new belt to keep her running on time. Every relationship needs its perks")
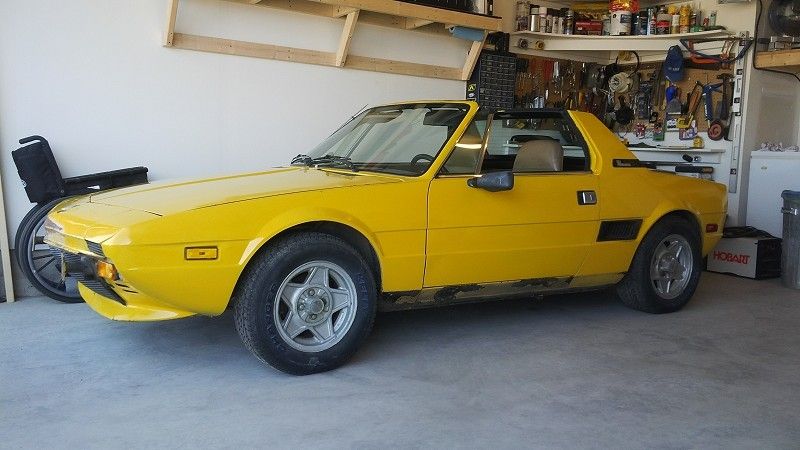
The first thing that I did this morning was remove her braces. She had been wearing them long enough!
A much nicer smile now!
Her back end needed a little help as well.
I was surprised at how the years had been so good to her. I was expecting more rust underneath to be honest. There was nothing punky under there at all. Good and strong from what I could tell.
There must have been at least one fender bender in her past and the patching up she received was not the greatest. This is the passenger front. The welding is absolutely hideous. My dog could weld better than that. This will need to be addressed but shouldn't be too difficult.
And it looks like maybe the gas tank is leaking a bit. I will check on that in more detail later. It seems to be a very slow drip.
The dash has a few cracks
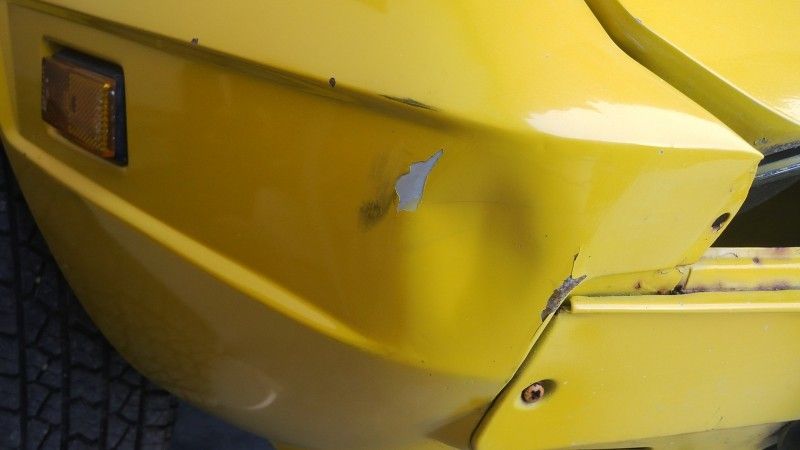
What you notice first and foremost is the state of the nose area... That will require a bit of attention.
Looks like there was a bit of a fender bender there too. The bumper pushed back far enough to dent the front passenger clip.
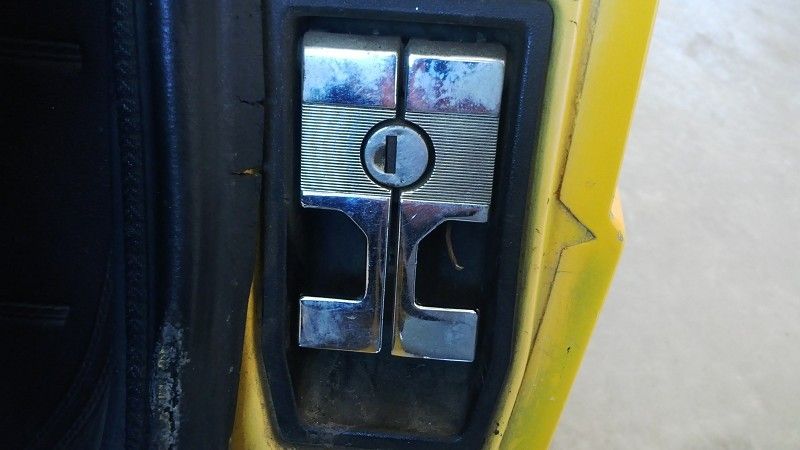
The latch for the boot has snapped a cable....
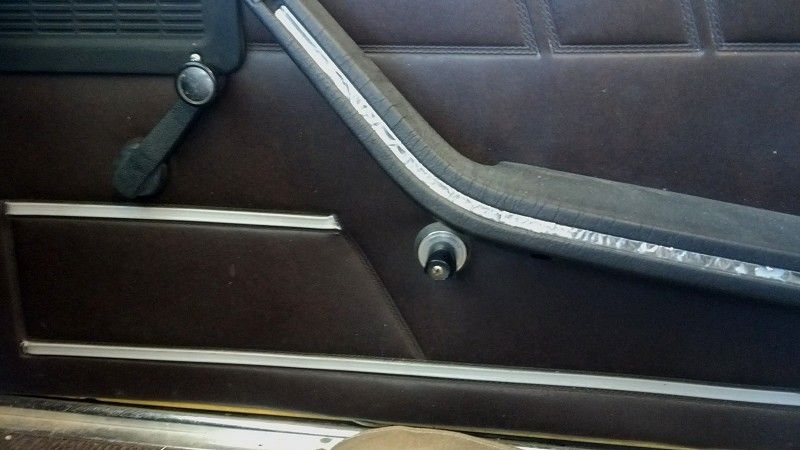
The passenger side door handle is broken on the inside...
There is a bit of rubber requires a refresh
And there's a bit of surface rust around the front window screen.
There is a pinhole in the drivers side door entrance...
The floor of the boot was very wet and mostly rusted through above the exhaust. That's just about the extent of the rust though. Like I said before I am quite pleased that a 1976 car from Canada that hasn't been treated all that well would remain as good as this. Even the wheel wells look good. It shouldn't be too difficult to fix these up.
Have I mentioned how much I love the rims? Yeah - they are nice
The front and rear tires are the same size at 205 /60 R13. From what I understand this may not be the best for the front. It tends to sit a bit high in the front as it is so I think I may go smaller there in the future.
Now on to a few questions if I may.
1) I noticed that the front trunk area has a few holes in it. Are there supposed to be plugs in there?
2) Is there supposed to be some mechanism to stop the stick from flopping around? I can pull up on the stick and practically put it in my lap!!!
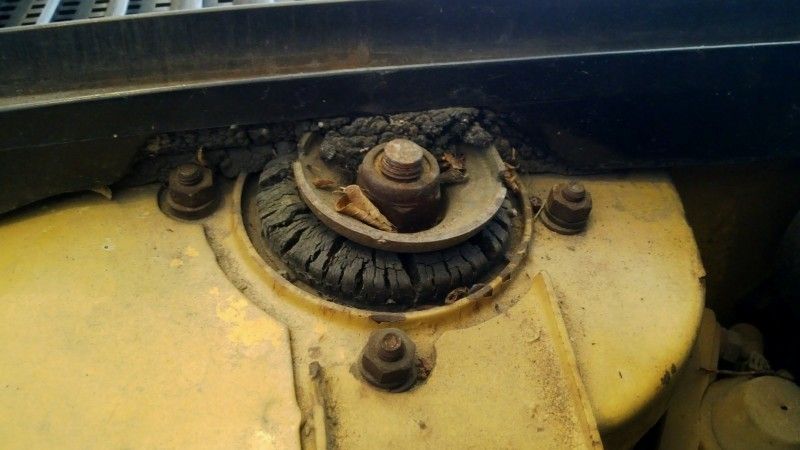
3) Does anyone have any idea what this power resistor (?) in the front trunk is for? Is this a previous owner disease?
4) How about this little doo-hickey in the engine bay that is attached to nothing at all?
5) I bought this car from Alberta Canada but there is a sticker on the engine that says California? What gives?
Of course no used car would be complete without a few extra toggle switches added for the users enjoyment.....
And why just have a fuse block when you can have some spaghetti along with it?
I need to find a new ignition switch and key thanks to the car haulers - now that they have snapped the only known key and threw the remaining bit who knows where!!!!!
All that being said, my new girl cleaned up pretty good by the end of our first date, and hopefully there will be many more to come. We have already been talking about getting together next week to buy her a new belt to keep her running on time. Every relationship needs its perks