What did you do to your X1/9 today ?

Sam,

Can you steer me in the direction of the auto shop you use for this kind of stuff? I'm handy enough to do basic maintenance and some mechanical repairs, but I don't have the knowledge or skill to replace masters and slaves. Thanks!

-Bill
Bill:
It's a hole in the wall grungy place, but they have great prices and seem able to fix anything,
Port Euro Cars
Address: 27 Haven Ave, Port Washington, NY 11050


Phone 516 767-6768
 
Today the rain finally stopped here in eastern PA so I was able to let the car warm up and take it around the block to try and find a coolant leak I'm hunting. The steering boss I ordered arrived Thursday so I was able to install that with my old Dino steering wheel, as well.
 
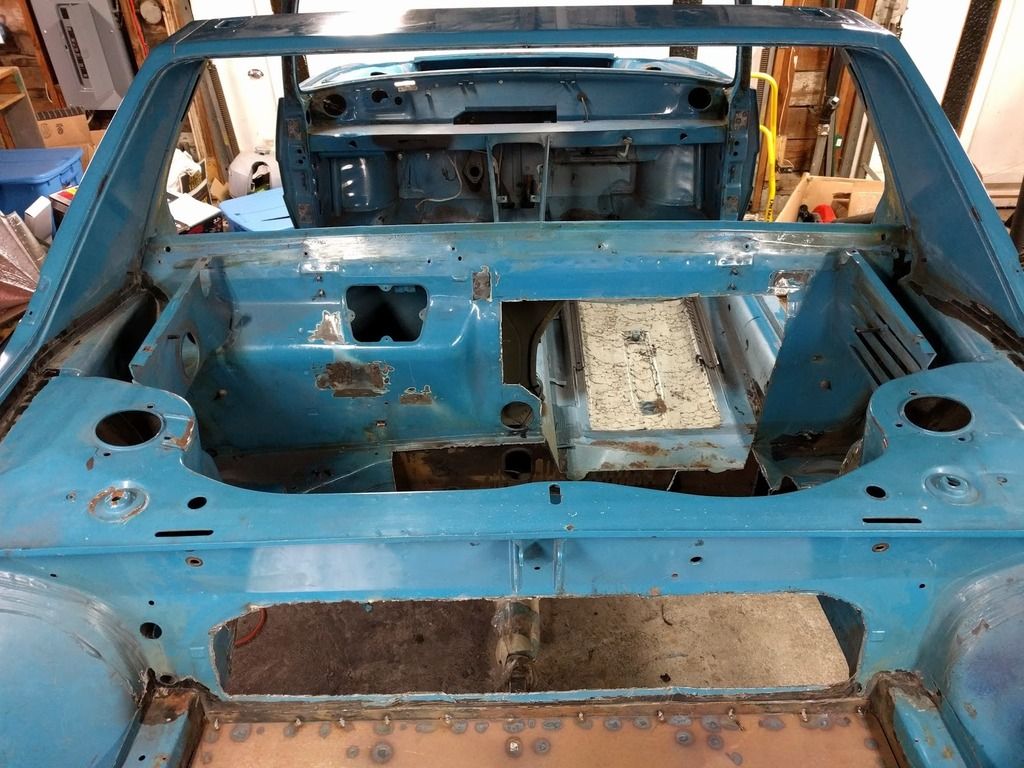
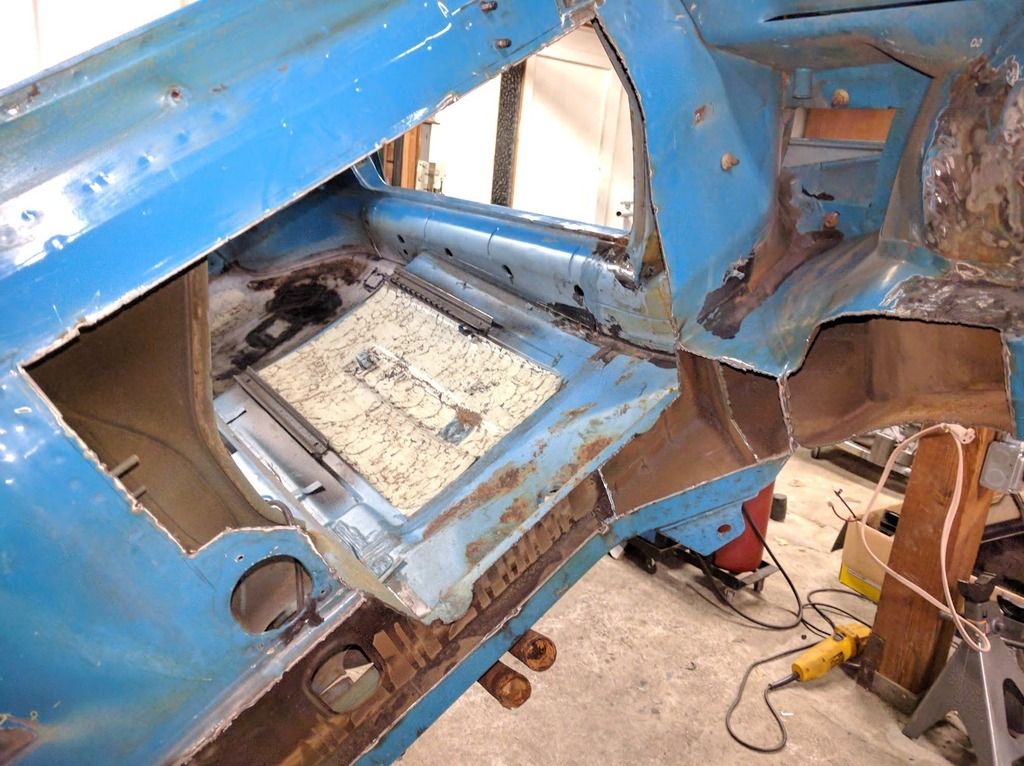
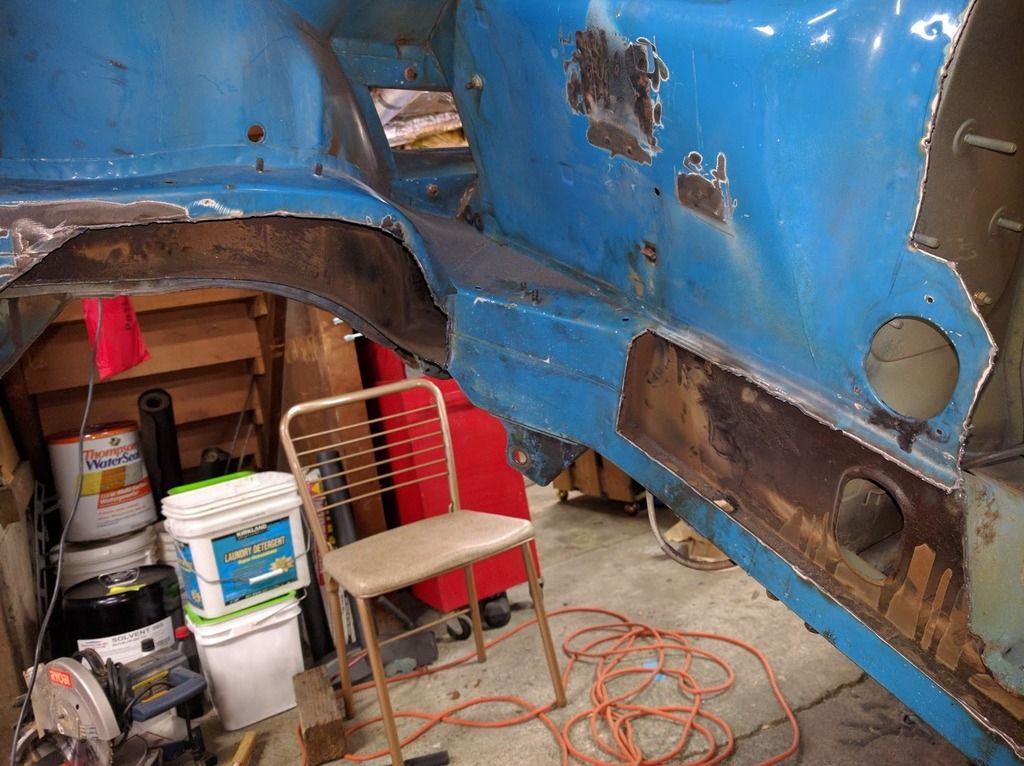
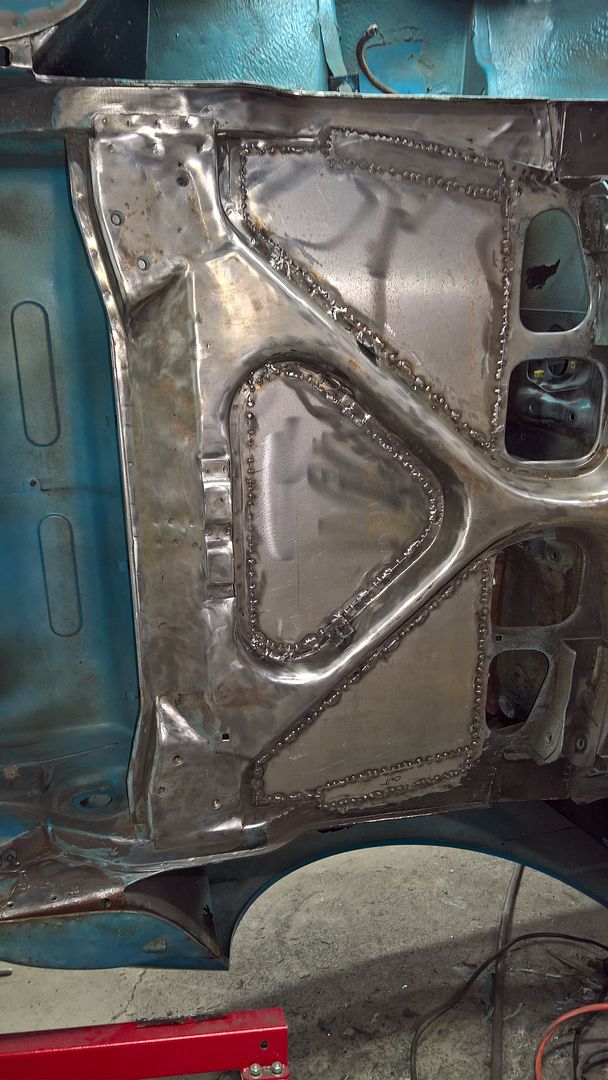
Finally did my K20A engine bay cuts...

Finally decided it was time to do the big cuts to the engine bay.
IMG_20160507_223744_zps6lr09iy6.jpg

IMG_20160507_223806_zpsueasxtvo.jpg

IMG_20160507_223833_zps4z3drpq3.jpg


I'm working on a (long overdue) blog on the project. Basically it's a full resto-mod: car is stripped, on a rotisserie and will get the full body, suspension, engine etc work. That is a lot of work tho, time better spent in the garage :)

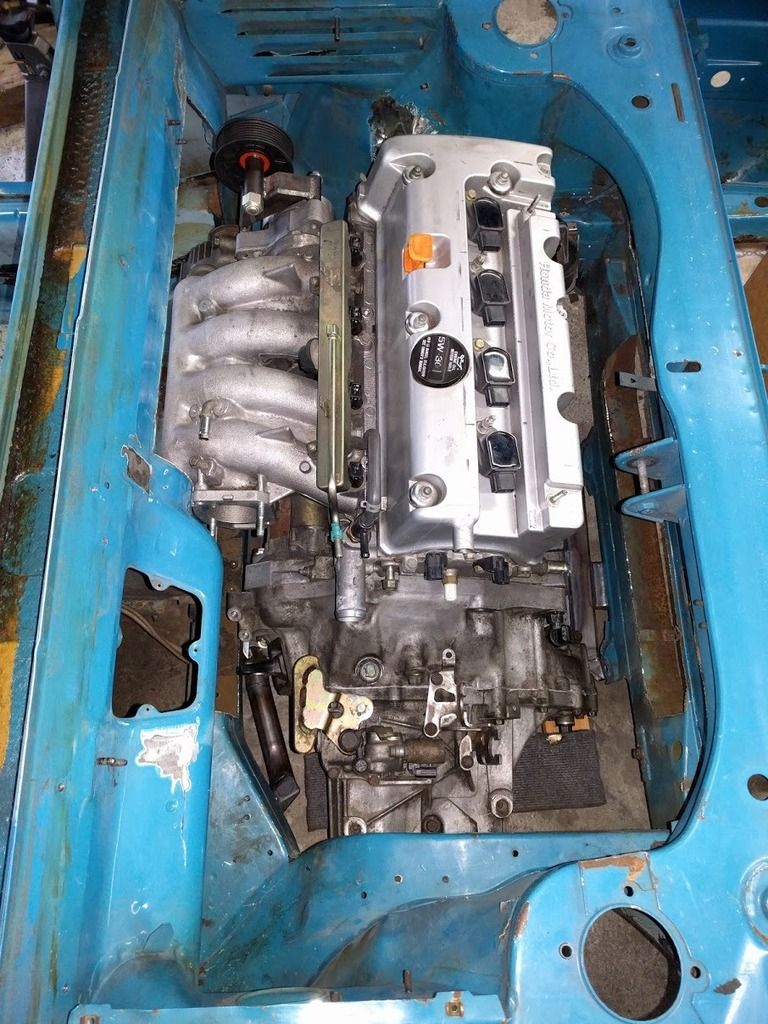
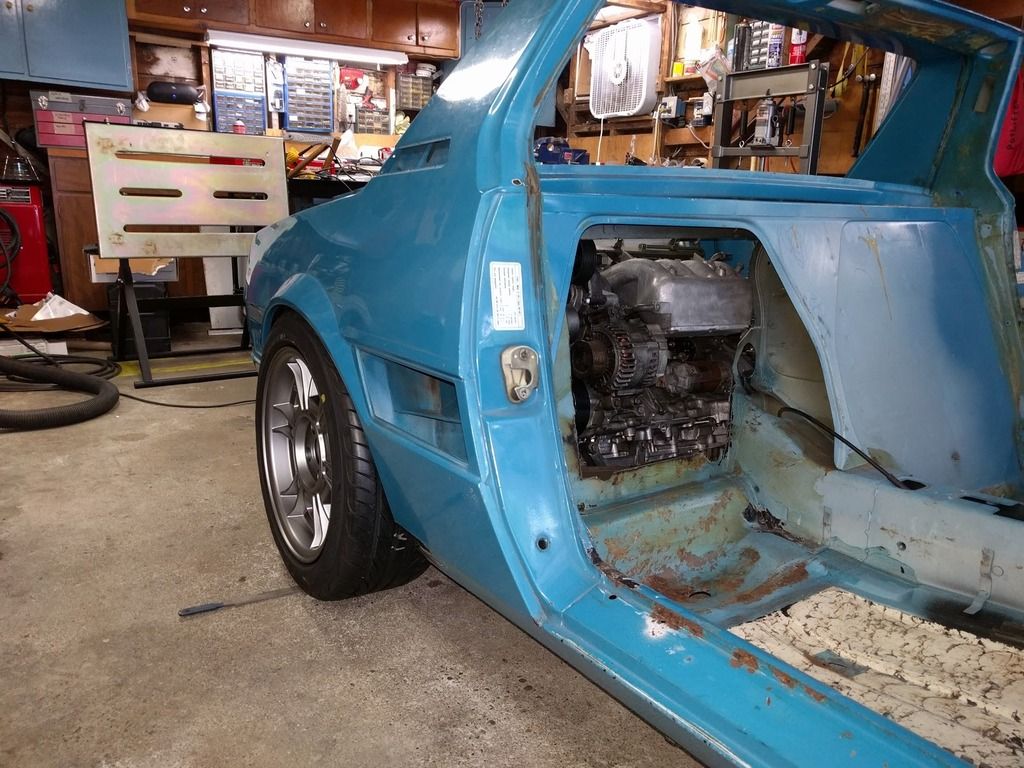
I also did the engine/drivetrain fit this weekend too:
IMG_20160508_152735_zpsnaein5ld.jpg


... I definitely needed to make more room on the driver's side for the transmission. My first cuts were made based on the photos from Matt (MWB), Rodger and Tim - and while very useful, I think that having some measurements might help then next crazy K20A swapper's work a bit easier.

It sure is fun tho - looking forward to welding up the replacement supports and box sections.

Just for fun, I put the Allison's reproduction CD-66 rear tire in too...
IMG_20160508_161425_zpslzfwzash.jpg


-Darin
 
Tons of work there. Congrats on the successful fit up of the new engine. I never cease to be amazed by the amount of cutting... :shock:

Love the new wheels, any other shots of those per chance? Any details on the fit up of the wheels (spacers, tire size, etc?) I have never seen them fitted to an X.
 
Looks familiar! You have definitely jumped all in. Looking good so far. Keep us posted on your progress. We'll see who gets to give who a ride first :). I feel like my progress has slowed to a crawl.:sigh: Life seems to get in the way of fun....
 
Dropped pedal box for 4th time

Chasing after fluid leaks before I put in a new carpet. I think I've finally got it all sealed so stamping on either pedal for a long time and then letting the car sit for a day, I see no drips on my blue paper towel indicator :eyepop:
Changed the top and driver side weatherstrip. Wish the top was just 3 inches longer so it goes over the entire top instead of having to extend the sides up to overlap (and then I'll put some sealant in the top so water doesn't enter the O hole that's now facing up at the top).
 
finished the frunk repair...

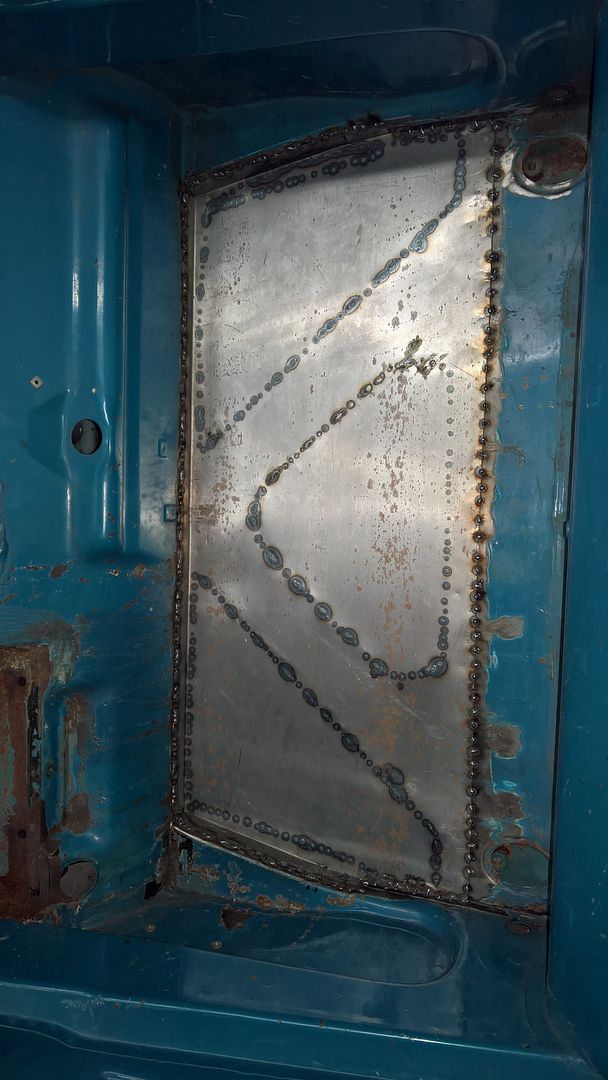
I cut the front replacement for the floor in the frunk with my fancy plasma cutter, measured the new piece, drew some lines then brought it to a metal shop to bend it up (I'm NOT NOT NOT buying a huge metal brake!) then I welded it in.

When I bought the car, someone must've had a crap battery that overflowed and drained sulfuric acid into the frunk cuz it was all rusty. That was the first cuts I made to the car, and boy - did I make a mess of those cuts! Much smarter about cutting now, but in those initial cuts I didn't have the car on the rotisserie (silly me). No worries - a bit of extra welding and I have it all nice now.

Here's some finish photos (everyone here likes pix).

Top (from the side - thanks rotisserie!)
WP_20160515_22_37_37_Rich_zpskz71zjnp.jpg


Bottom
WP_20160515_22_38_09_Rich_zpswyvjwyj9.jpg


Not sure if it's all that noticable, but... if you take a careful look at the top suspension "thrust mount" area (I think that's what it's called) it was bent up. I'll post a later question regarding any type of fixes for this in the Workshop Forum. (UPDATE: the post is here for the curious)

Anyways, it was a fun working in the garage weekend for sure!
 
Last edited:
Finished off my euro bumper conversion brackets for my '76 US 1300. Results are good, even fabbed the bracket for a Carello spotlight as per the originals. These are also original steel euro bumpers.


Brackets slide into the big bumper shock holes and so nothing is modded on the car.

 
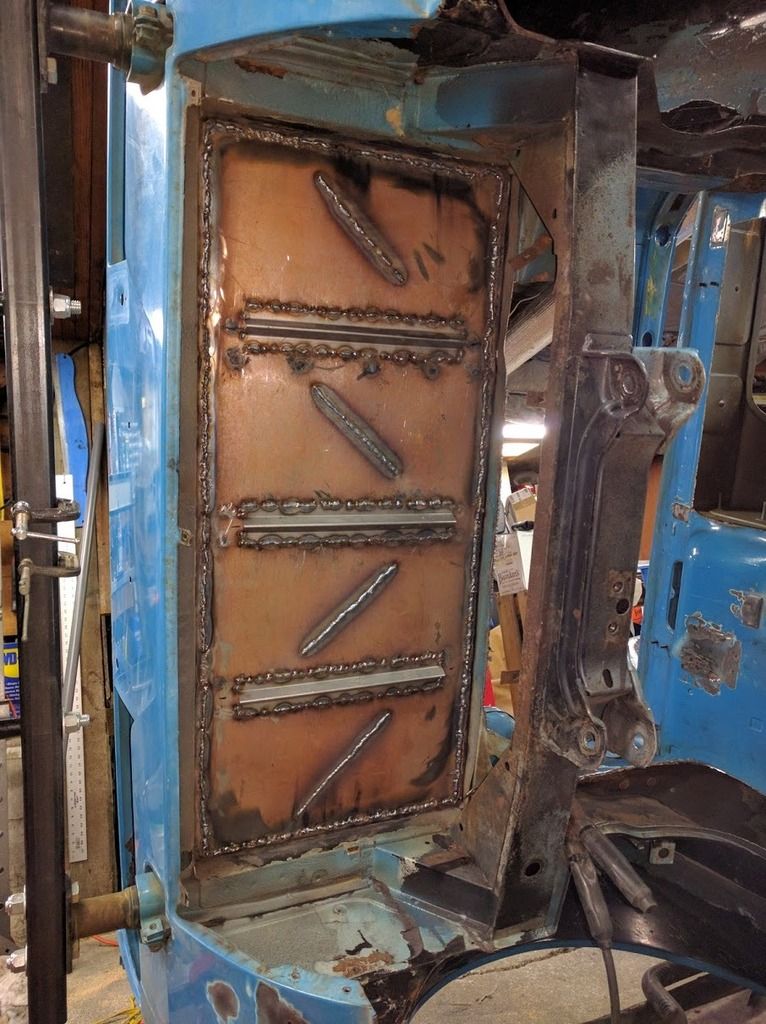
Frunk done, now the trunk too.

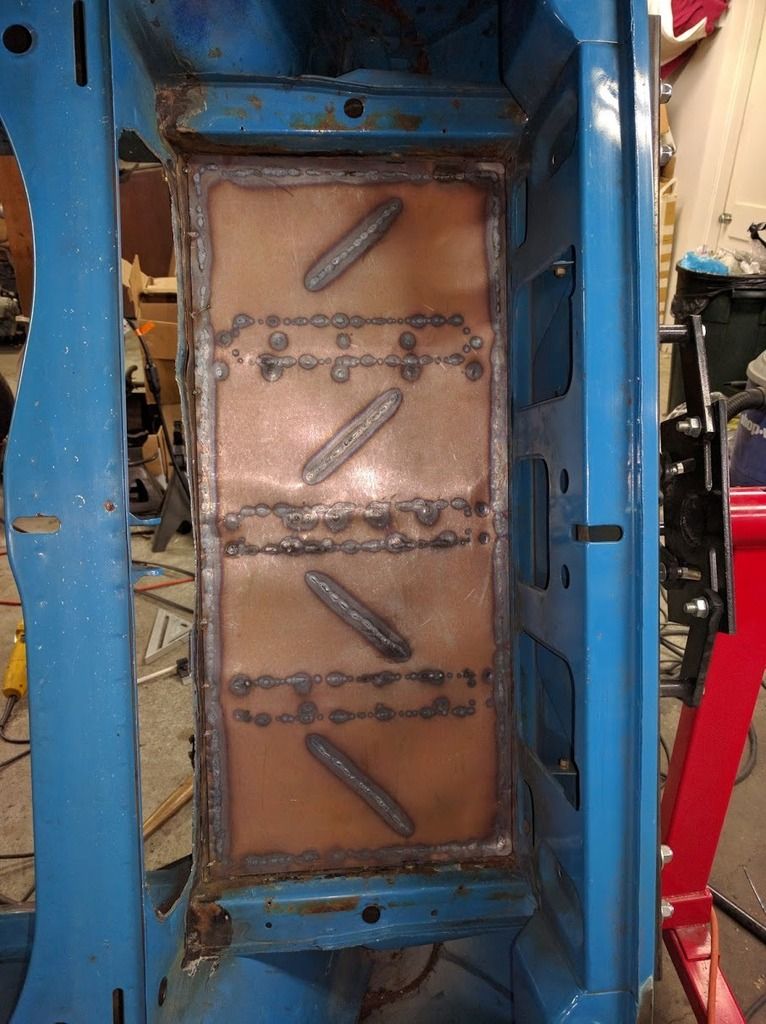
Trunk had what is apparently typical rot where the top layer of fiberglass insulation goes, so out with the rusty-holy piece and in with a new one. I cut it out as a flat piece myself - in retrospect, I should've measured and had the metal shop cut it after adding in some support depressions as the stock unit was, but instead had some 'v's fabricated and welded them in (and added in some beads hoping that would dampen any residual vibrations).

Should be good!

Top:
IMG_20160516_212406_zps1e0mhaby.jpg


Bottom:
IMG_20160516_212430_zps8ibvw6df.jpg
 
I pulled the metal trunk layer and the floor was damp under the fiberglass insulation - clearly not a great idea and this was a super dry California car. Fortunately it hadn't caused any damage, but my frunk floor has suffered a little from trapped damp under the rubber mat.
 
Started getting seats ready for new skins.

Got the old skins off the seats from my 86 that is at paint shop. They are in pretty good shape.

Will start with some new over padding and then install the new Red Leather Covers I got from Henk.

PW
 
Finally working on my carpet replacement on my 82. Got out the seats and all the screws and other things holding it down, and out it came.

Nice solid no rust floors! :grin:

Now I have to clean everything up, then install the new carpet. Gotta take a break for now, it's 90 degrees! :mad4:


Oh, and if this is of help to anyone, a couple of things I learned. There is a tool that looks like a corkscrew that is a spring puller. That gets that spring under the seat off nice and easy. Also, spray silicon on the tracks makes getting the seats out possible if they are stuck at all.
 
Be careful on carpet install--lining up the seam in the center of the console made it shift slightly to the right--mine needed to be a little on the left side of the console. Maybe 3/4" shifted left.
 
Back
Top