LED conversion of instrument cluster and fiber-optics

engelme

True Classic
Hey guys. I just got my hands on a 140 mph instrument cluster from an 81 X1/9 which I'd like to convert to LED illumination to install in my 83X. At the same time I'd like to convert the light source for the fiber optics that serves some of the console lighting and the light source for the cigarette lighter to LEDs. I'm hoping that someone [Bob ;)] could provide a list of the right LED lights to order for each. Which supplier? Purchase in bulk so replacements are available?

Also, quick question...my power window switches don't illuminate at all. The switches have a port that I've heard is where a fiber optic source connects. But when I had the switches out, there's nothing connected there and I don't see a loose fiber optic in the console. Can someone educate me about how the fiber optic provides light to these and other console switches? Pictures?

Thanks.
Me
 
Hi Yves.

Your cluster looks terrific! Did you replace the individual incandescent bulbs with LEDs or just rely on the LED strip for illumination? Where did you grab power for the strip?
 
Thanks for the link Jeff

It may be that it's old enough that its embedded pictures are no longer available. Looks like several of the eBay stores have closed their doors too. I'll try to find the items by searching other sources. Any you would recommend? How many watts are the wedge LED replacements for the instrument cluster? Seems there are two sizes of bulbs (10 that are the smallest incandescent bulbs I've ever seen an 4 that are somewhat larger). Only the larger ones have what I'm assuming are the diffusers that people refer to.
 
all you really need are the old Fiat (and other) bulb numbers, go to ebay search that and LED, buy a bunch as sometimes they arrive DOA
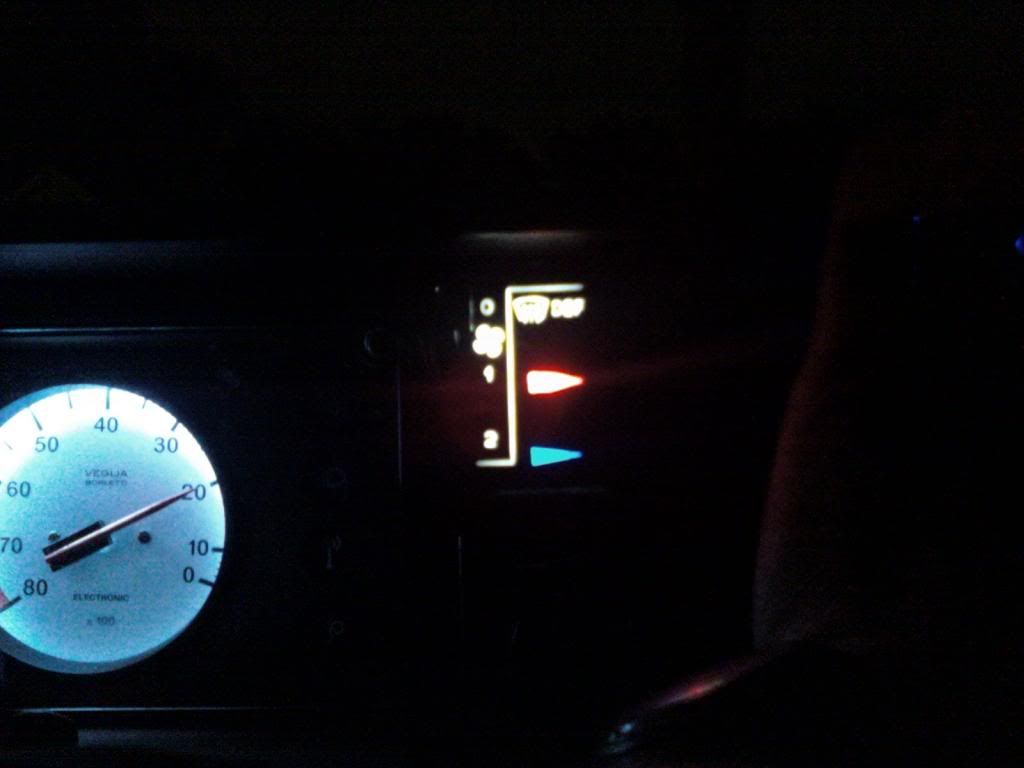
these are the 4 big ones to light up the speedo and tach, similar to what I put in a few years ago, diffusers have to go but man they are nice
http://www.ebay.com/itm/4X-T10-Whit...785476?pt=US_Car_Lighting&hash=item3a8ecb3604
I wouldn't bother with the little warning light bulbs (74), not on enough to bother with, IMHO.
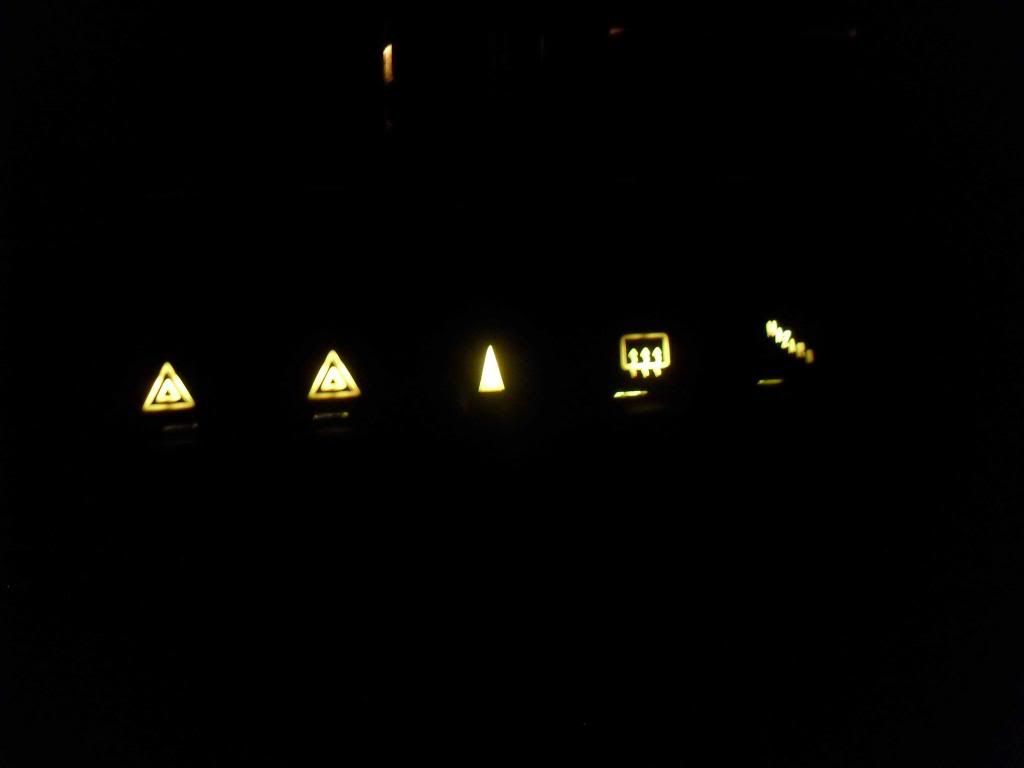
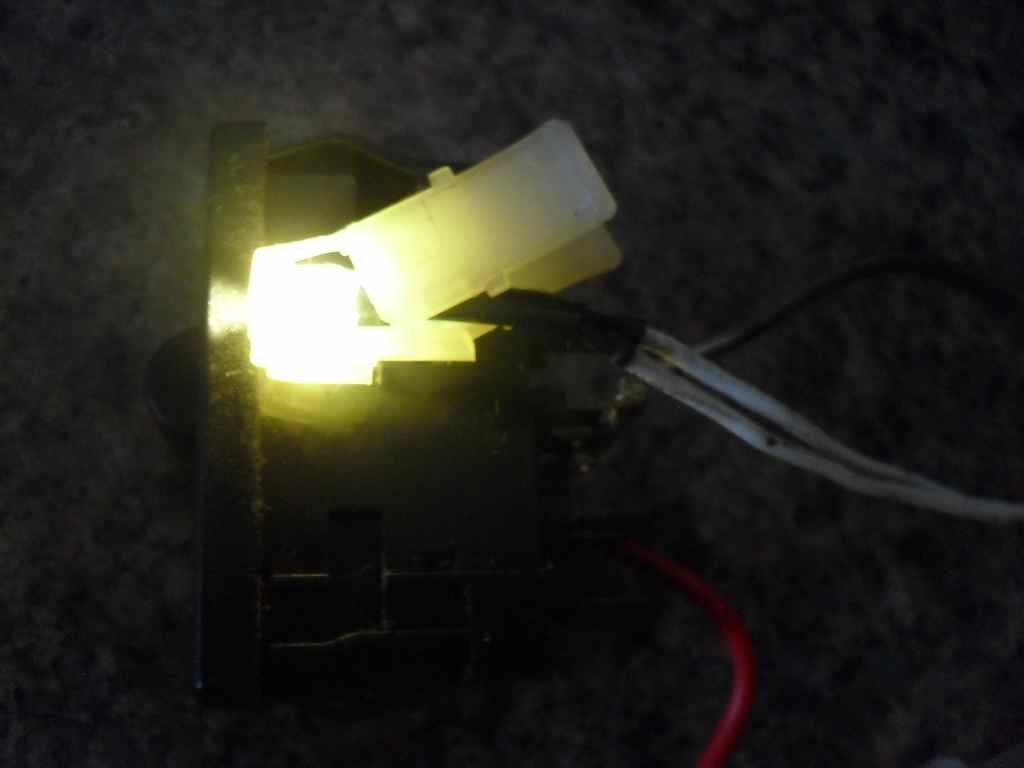
I would encourage you to make a LED harness to replace those fiber optic switch lights, you can easily run them to your power window switches too, get these, you'll want 8 but I'd do 10 and point two into the footwell, maybe even 11 and snake one into the cubby hole behind the shifter, I have the footwell and cubby lights as well as all switches, looks great, put an LED were the fan speed switch is too, that'll light that puppy up
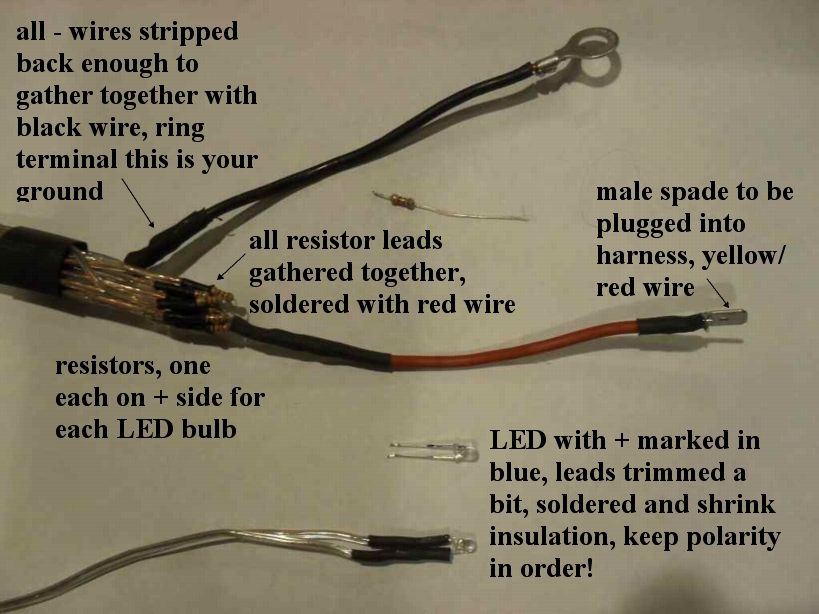
first few I made I soldered 'em all myself, resistor, wires, LEDs now you can get these, way way easier
http://www.ebay.com/itm/Here-20pc-L...H_DefaultDomain_0&hash=item1e8fbbbf6e&vxp=mtr, just add the bits to connect were old optic bulb was and you're golden

http://xwebforums.com/forum/index.php?threads/15889/
 
Last edited by a moderator:
Thanks Jeff

Now I just need to get the pictures to show up in these old postings. I'm a visual learner. I think I get it fron the text in these posts, but it would be great to confirm my mental images and to know precisely what to buy. I may bug you some more. Hope you don't mind. Cheers.
 
Bug away, happy to help if I can, i have lots of pictures of those harnesses.
I didn't go LED anywhere except the 4 main gauge lights, one behind the heater fan switch and fiber optic replacement. Some have done every light in the car!
BTW, my son leaves Sunday for a short internship in Salt Lake City
fanlights_zps7c155812.jpg

lit1_zps9e412c71.jpg


old harness, I wouldn't do my own LED leads anymore, not with pre wired with proper resistor for 12v so cheap, just combine the negatives and positives and hook up (you'd have to extend the length on at least 3 of them though; headlight and two power window ones
harnesslabled_zpsd1b4d56f.jpg

litswitchbackopen_zpsa51c85c1.jpg

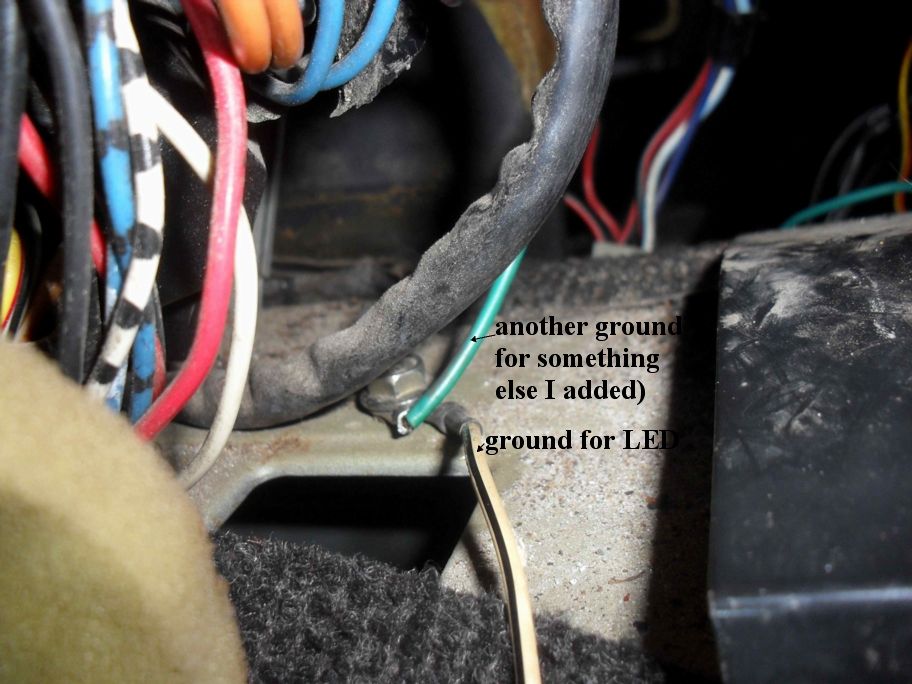
ground_zpsfba8f7d4.jpg
 
Last edited:
Jeff nailed it. There are hundreds/thousands of vendors on eBay who offer these LEDs and they're cheap. When I did my cluster, the most difficult lights to replace were the cluster back-lites and that's because you need to remove the plastic diffusers (which requires separating the PCB from the enclosure by grinding/drilling the small plastic rivets which hold it in place.

After that, the old bulbs are socketed and easily replaced with LED replacements. Just have to ensure you insert the LEDs properly since they have a specific polarity: They work one way and don't work the other way (rotated 180 degrees).

I replaced all the gauge illumination/backlites and the idiot lights. As jeff mentions, to replace the dim fiber optics I also purchased some prewired 3mm white LEDs with resistors attached and then extended the length of the wires for my application and heat-shrink wrapped them for extra protection.

If you want thing REALLY bright, you can add more LED's inside the cluster to illuminate the gauges (Bob Brown did this), make your gauges white, etc.

I did not increase the quantity of LEDs in my cluster, but removed the diffusers to allow for larger LEDs. With Jeff's help, I also printed white gauge faces in vinyl and attached them to my gauges. I drive at night with my dimmer at 1/2 to 3/4 and that's plenty. I sometimes turn them on full just for fun :)
 
It is possible to "force" the diffusers out. I set the board on the bench with something under the diffuser (tiny screw driver handle) pushing it out from behind, grab it from the front with a pliers while pushing down and pulling/twising with the pliers. They come out with maybe a tiny sliver of plastic breaking off. Separating all those plastic "rivets" (snapping off with an exacto blade)taking the diffusers out, then 're-riveting" with a solder iron or crazy glue is a lot of work. Or just crush them and pull out the bits. You don't need to save them. I have at least 3 full sets if you need them again for some reason (you won't want them back!)
 
Thanks guys.

For some reason I can now see the pics you posted Jeff. Makes things much clearer for sure. I'm going to try to tackle this after I get my daughter back to college next week. I learned from Matt B. that my speedo needs a different cable than the one found on my 1983 X because of a change in connectors. Live and learn.

Do the diffusers really block that much light that they need to be removed? And if size is the issue, can't one just use a smaller lamp? For example, 20 LEDs vs 28? Would there be enough room?

Also, if I want to bench test my cluster and my fiber optic replacement harness before installing, how would I do that? Just hook up directly to a 12V source? Where would I make those connections on the cluster?

I'm also interested in white faces for the gauges. Guidance on how to do this? I have access to a color laser printer at work. Where do I get the right kind of paper? Is it self adhesive? Reversible without damaging the original gauge faces?

Jeff, what brings your son to SLC? Anything I can do to help him?

Cheers.
Mike
 
Diffusers are in the way, I tried some smaller cluster LEDs but they were much less bright and still didn't fit!
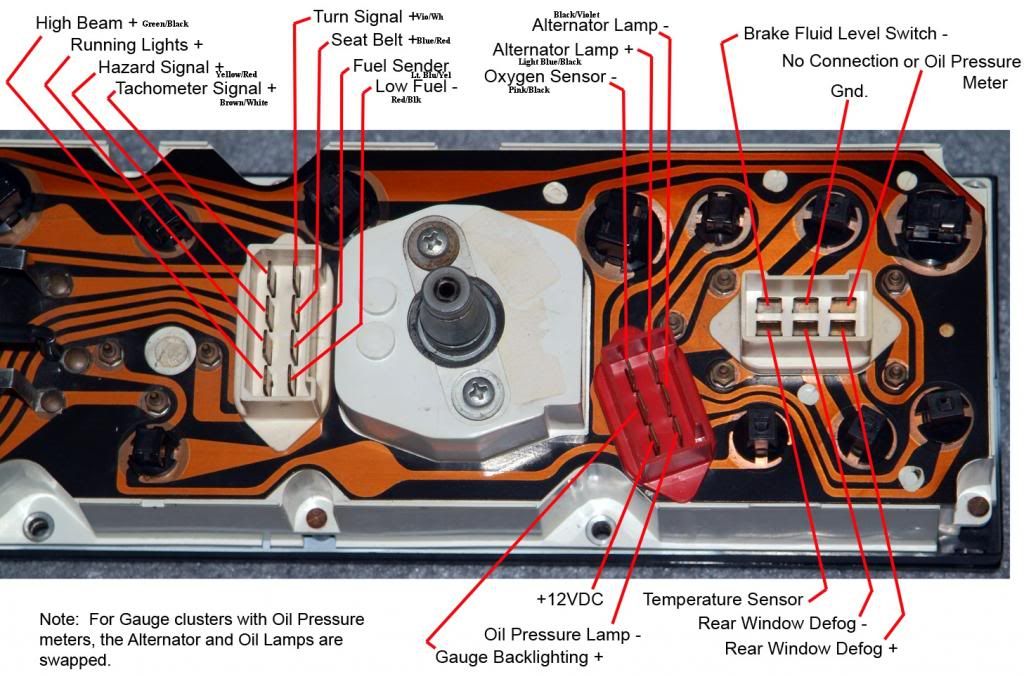
Here's the dash cluster pinout from Bob Brown
gaugeclusterpinout_zps03da47d4.jpg

You can put 12v and ground on this and check the lights on the bench.
White face gauges: I've made many versions of these and can send you pdf file if you want and you can print, can easily customize it too if you want.
here's a bunch of samples:
http://s1148.photobucket.com/user/javandyke1/library/Fiat/gauges?sort=3&page=1
The last few I've done have been on "sticker" photo paper but that might not go through a laser printer very nicely (too much heat) They turn out the best on a laser printer though, just use the right paper. If you can't get laser sticker photo paper, use regular laser photo paper and glue it down.
My son is shadowing a doctor for a week. I don't think he really needs anything. He'd like to go the salt flats (although i hear it's flooded at the moment).
Let me know if I can help. If you don't want to do it yourself let me know. I've done a few for others.
 
I had success using inkjet printable vinyl that I purchased from these guys: http://www.expressionsvinyl.com/catalog/printable.html

It worked perfectly for me. I printed and then use a matte clearcoat acrylic finish over it. The white vinyl is not 100% opaque and I had to "double it up" over the black and white original gauge faces so that you could not see the old gauge graphics behind them. SO... Jeff provided the pdf files (thanks again Jeff), I disassembled the gauges and removed the faces. I put one layer of white vinyl sticker material over the gauge face. I put the new gauge face (printed on the inkjet) over that and then trimmed the edges and openings.

More info here: http://xwebforums.com/forum/index.php?threads/17924/
 
Last edited by a moderator:
ink jet for my last set was pretty good too, I did sticker photo paper and used a paper preservative spray since these were for a motorcycle and see a lot of sun, good thing is you can try a hundred times for cheap :excited:
 
Back
Top